MANUAL 101
Aperture
|
|
|
|

|
|
|
Goals for Photowalk:
Carry: camera, water, phone, and a prop
Camera settings:
ISO- set to auto
Aperture Priority Mode: (A)
-low depth of field (blurred areas)
-high depth of field (everything in focus)
Use a classmate as a model! Or photograph nature and more abstract compositions.
Camera settings:
ISO- set to auto
Aperture Priority Mode: (A)
-low depth of field (blurred areas)
-high depth of field (everything in focus)
Use a classmate as a model! Or photograph nature and more abstract compositions.
Aperture 101-resource link
Aperture is the hole through which light enters the camera. The size of the hole can be changed to control how much light is let into the camera.
Smaller aperture= less light
Larger aperture= more light
Think of it like your pupil. When its dark out, your pupils open very wide to let more light in to help you see better. When you are outside in the bright sun, your pupils shrink to block some of that light out!
Smaller aperture= less light
Larger aperture= more light
Think of it like your pupil. When its dark out, your pupils open very wide to let more light in to help you see better. When you are outside in the bright sun, your pupils shrink to block some of that light out!
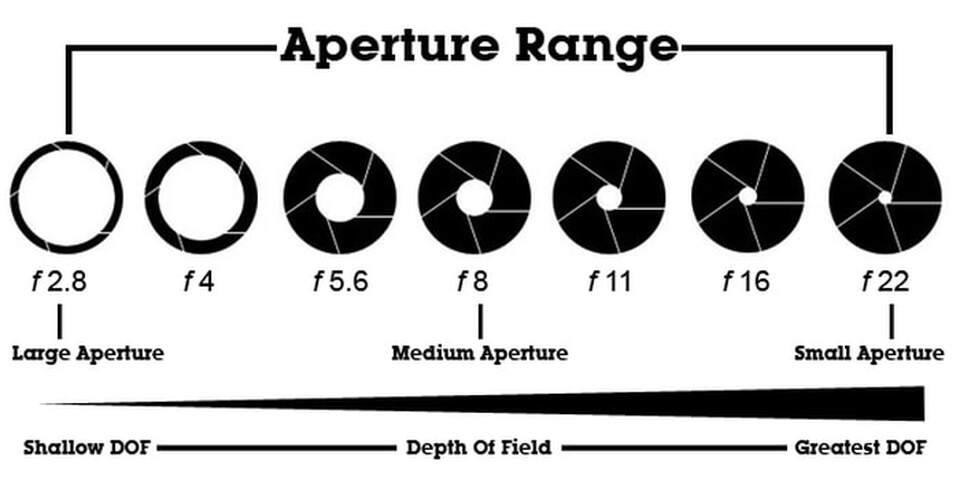
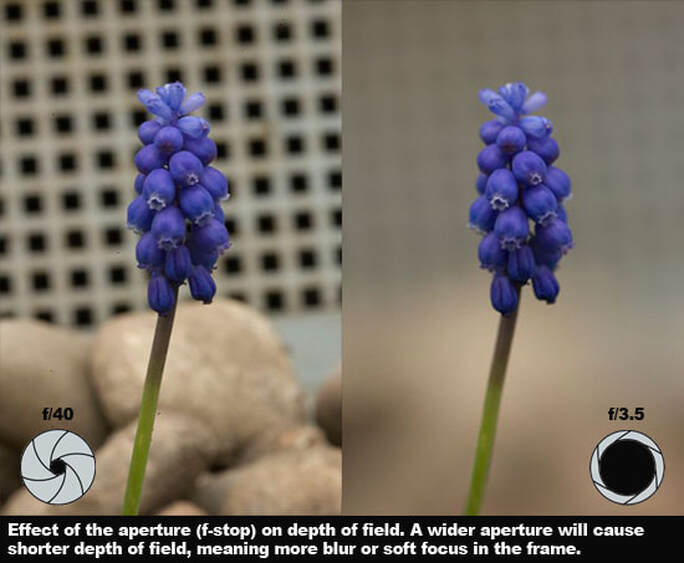
The size of the aperture is referred to as an "f-stop."
Larger f-stop numbers (like f/22) designate a smaller aperture.
Smaller f-stop numbers (like f/2.8) designate a wider aperture (Confusing, I know!)
Your f-stop controls:
- Exposure (how much light is let in to your camera)
- Depth of Field (the area of your photo that is in focus)
Larger f-stop numbers (like f/22) designate a smaller aperture.
Smaller f-stop numbers (like f/2.8) designate a wider aperture (Confusing, I know!)
Your f-stop controls:
- Exposure (how much light is let in to your camera)
- Depth of Field (the area of your photo that is in focus)
Aperture Photo Assignments:
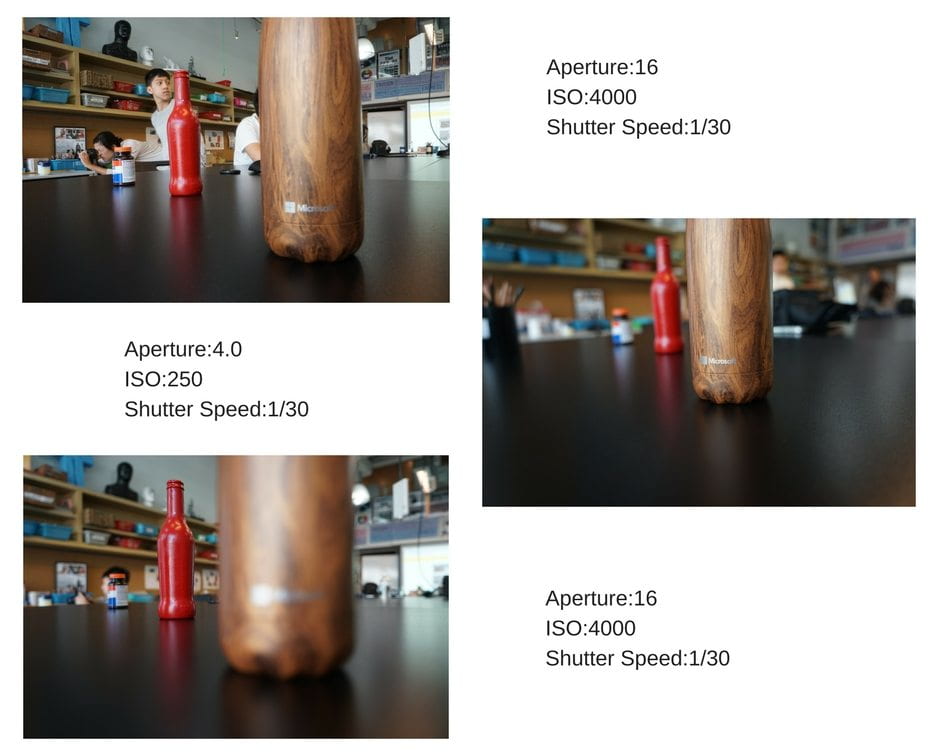
1. SKILL PRACTICE: APERTURE COLLAGE
Set up a shot so that you have a subject in the foreground (close to you) and in the background (farther back). It can be two objects, two people or even one object or person that has a part of them/it closer to the camera and part farther back in space (for example, a person holding their hands out towards the camera to frame their face). Just make sure that you can see both the foreground and background subjects at the same time.
-You will take 3 photographs of your 2 subjects.
-Use a tripod OR make sure you do not move your camera in between shots.
-Use MANUAL FOCUS for these shots.
-Switch your shooting mode to Aperture Priority or do this in Manual mode to make all adjustments yourself.
-Use a tripod to set up your composition and get your manual focus perfectly sharp where you want it to be.
When you are finished, turn your 3 photos into a COLLAGE (use a slide on a google presentation, similar to what we did for our ISO collages) and label them with your SS/Aperture/ISO info.
Add your completed Aperture collage into our shared MANUAL 101 presentation.
Scroll down for examples.
-You will take 3 photographs of your 2 subjects.
-Use a tripod OR make sure you do not move your camera in between shots.
-Use MANUAL FOCUS for these shots.
-Switch your shooting mode to Aperture Priority or do this in Manual mode to make all adjustments yourself.
-Use a tripod to set up your composition and get your manual focus perfectly sharp where you want it to be.
- SHOT 1: Use a small aperture (large f-stop #) to create a large depth of field. BOTH of your subjects should be in focus.
- SHOT 2: Use a large aperture (small f-stop #) to create a shallow depth of field. Use manual focus so that ONLY the subject in the FOREGROUND is in focus. The background subject should be blurry.
- SHOT 3: Use a large aperture (small f-stop #) to create a shallow depth of field. Use manual focus so that ONLY the subject in the BACKGROUND is in focus. The foreground subject should be blurry.
When you are finished, turn your 3 photos into a COLLAGE (use a slide on a google presentation, similar to what we did for our ISO collages) and label them with your SS/Aperture/ISO info.
Add your completed Aperture collage into our shared MANUAL 101 presentation.
Scroll down for examples.
2. Spring Break CREATIVE Photo Assignment:
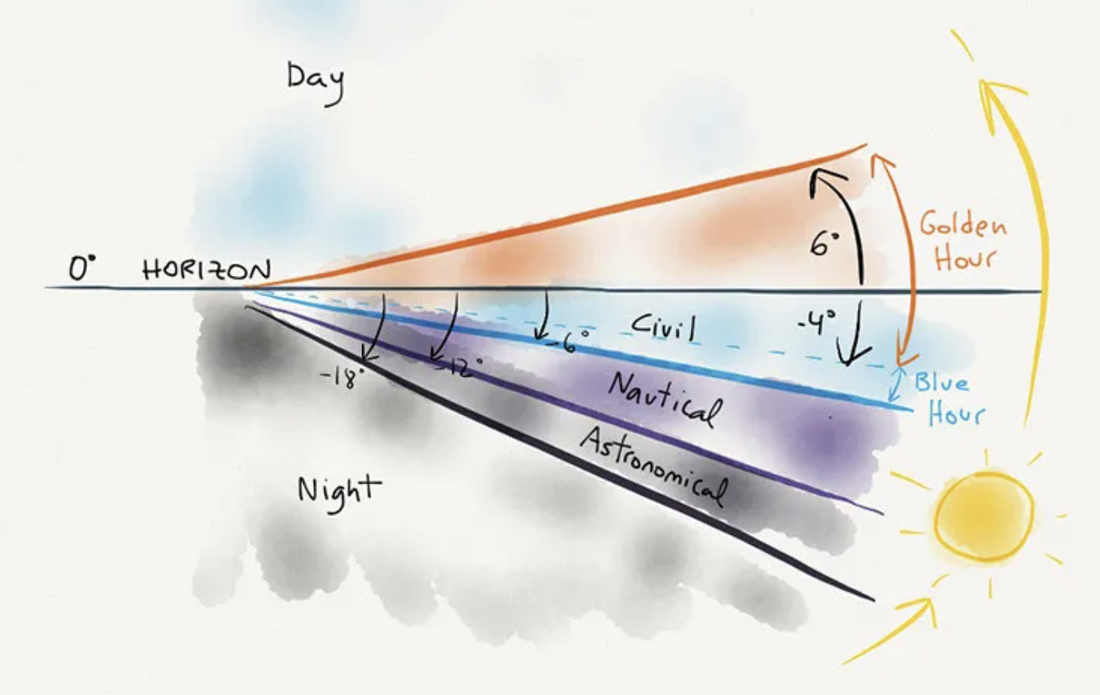
golden hour, APERTURE and shadows/reflections/silhouettes
Unedited minimum 50 photos / Edited 20 photos
UNEDITED Album- 50 PHOTOS
Take 1 Golden Hour photowalk.
Schedule it during the early morning OR late afternoon as the light is softer and warmer.
See this Pinterest Board for ideas/inspiration.
For your walk, try to go somewhere with a view of some sort, if possible. LA, Pasadena and Altadena have incredible mountain views and so many hilly areas where you can get to some sort of vista point.
Your photowalks should fall within 5:30 pm -7 pm, aka GOLDEN HOUR.
Experiment with BOTH HIGH and LOW APERTURE settings. Try putting your camera on Aperture Priority (A mode) to only control the aperture. If your image is overexposed or underexposed, you may need to put it on Manual (M mode) and play around with all your settings.
- Landscape photography -Aperture of at least F8 and up-WIDE DEPTH OF FIELD
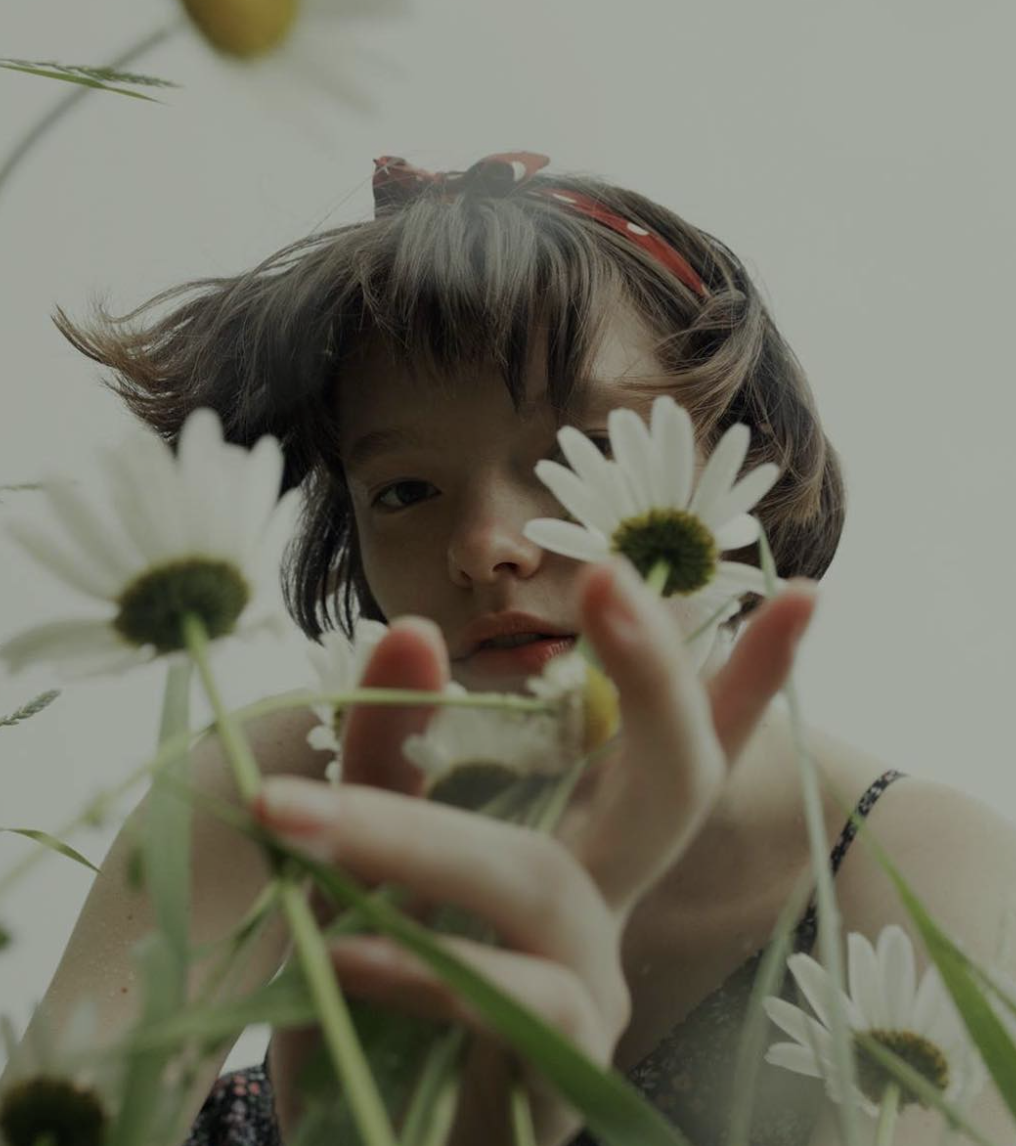
- Portrait and close up nature photos-Lowest Aperture Setting possible F4 or below - SHALLOW DEPTH OF FIELD
- Silhouettes/Shadows- Position your subject with the sun behind them to capture silhouettes. As you'll be taking photos with the sun lower on the horizon you should capture longer shadows
Example Photos:
|
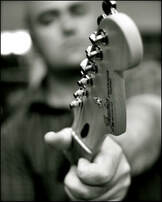
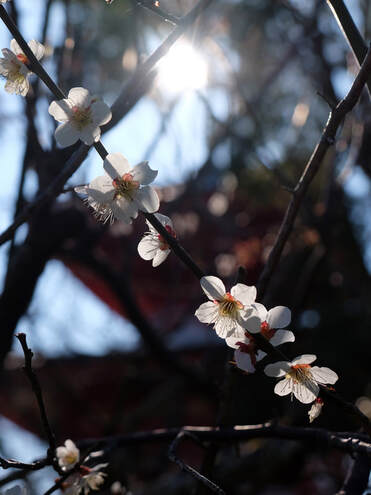
SHALLOW DEPTH OF FIELD-APERTURE
|
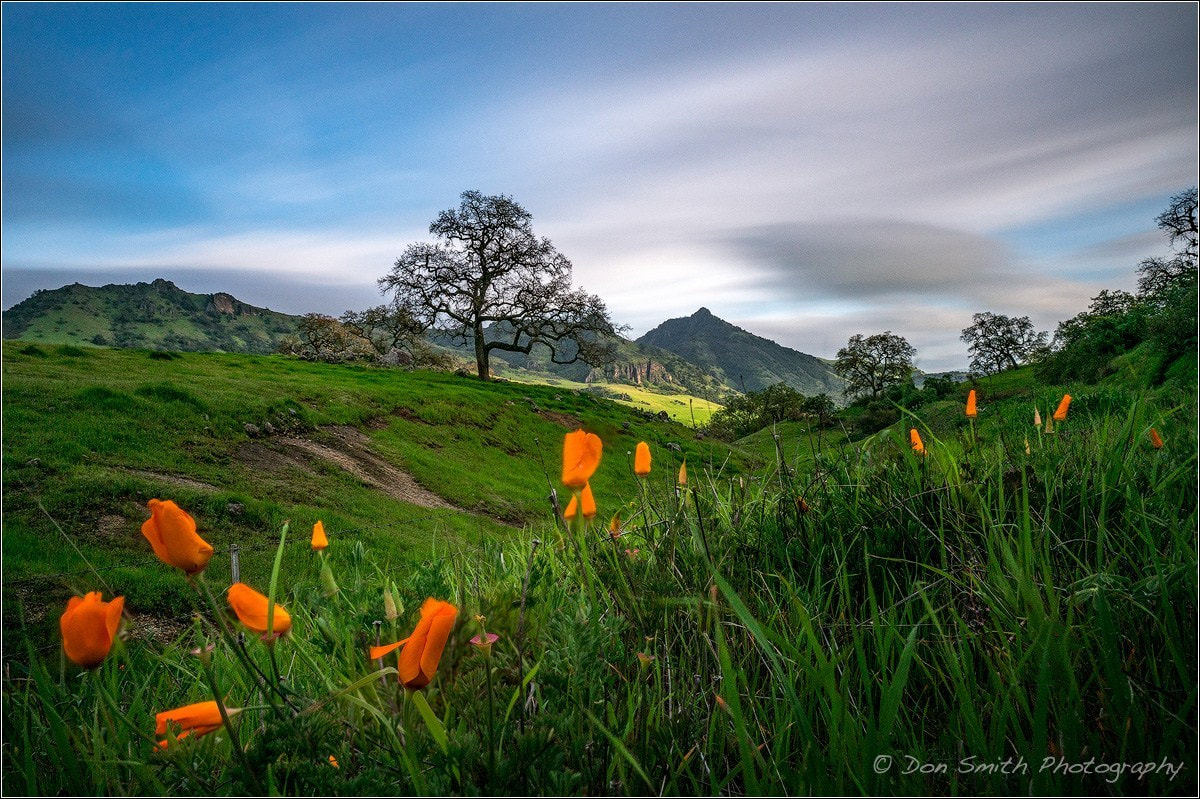
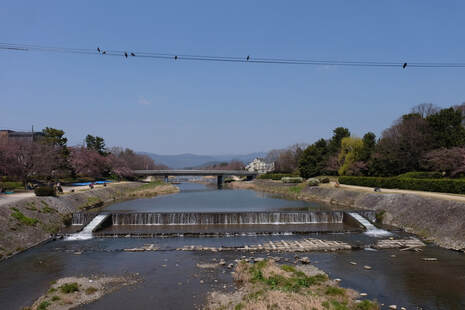
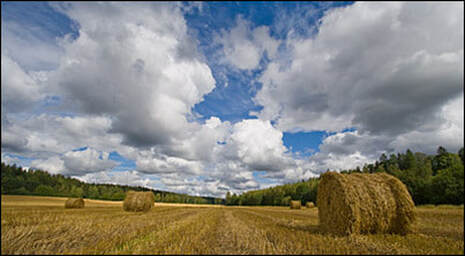
WIDE DEPTH OF FIELD-APERTURE
|
|
SS: 1/1900 . Aperture: F4.3 . ISO 200
|
SS: 1/180 . Aperture: F22 . ISO 500
|
Aperture Collage Examples
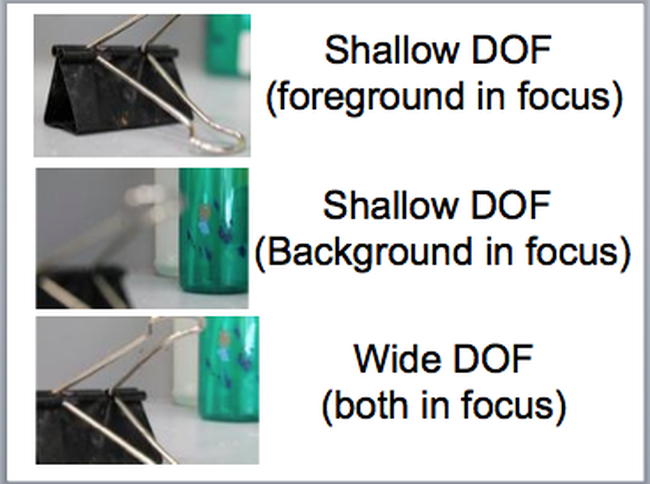
WHAT IS 'DEPTH OF FIELD'?
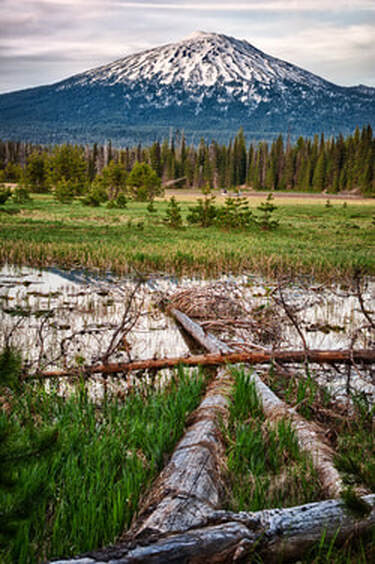
Depth of field refers to the range or distance in a photo that appears sharp and in focus.
WIDE (LARGE) DEPTH OF FIELDUseful when you want everything (near and far) to be in sharp focus, such as with a landscape.
|
SHALLOW(SMALL) DEPTH OF FIELDUseful when you only want a certain part of the image in focus, and the rest blurred out.
Extremely useful in portrait photography. By blurring out the background, you simplify the image and keep the focus on your subject. 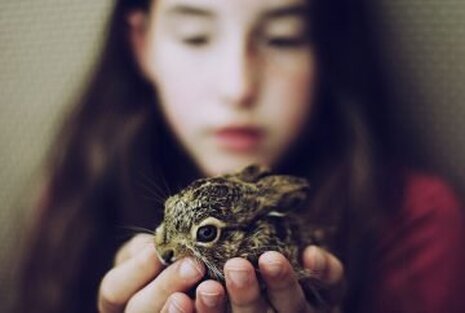
|

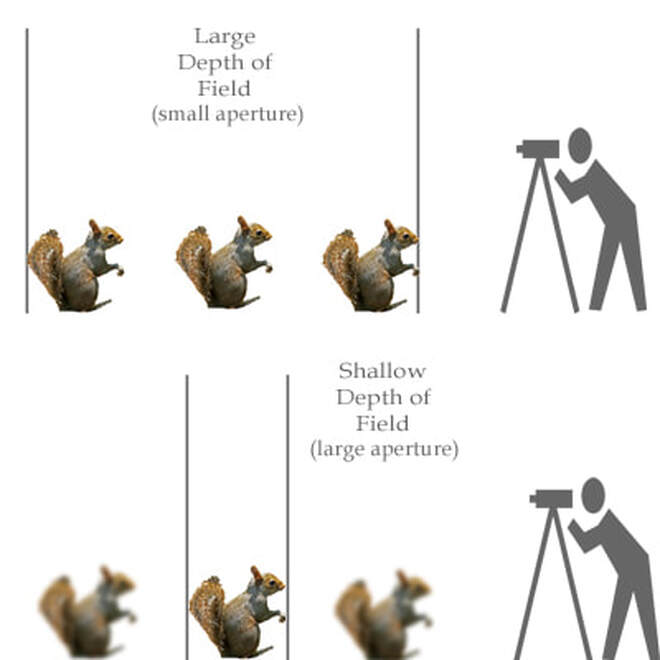
2 WAYS TO AFFECT DEPTH OF FIELD:
SHALLOW DEPTH
|
|
Wide Depth
|
|
