Online Portfolio Update
|
Make sure to update your online portfolio with images/GIFS of your recent work. Make sure to include descriptive captions under each of your images.
If you have images demonstrating PROCESS, add those in as well.
|
|
Ball bounce animation exercises
Exercise 1: Perpetual (Vertical) Ball Bounce
Exercise 2: Horizontal Ball Bounce (we will turn this into a joint animation!)
Exercise 1: Perpetual (Vertical) Ball Bounce
Exercise 2: Horizontal Ball Bounce (we will turn this into a joint animation!)
This exercises will teach you the most important principles of animation, namely:
- Arcs
- Timing/Spacing
- Squash and Stretch
- Volume
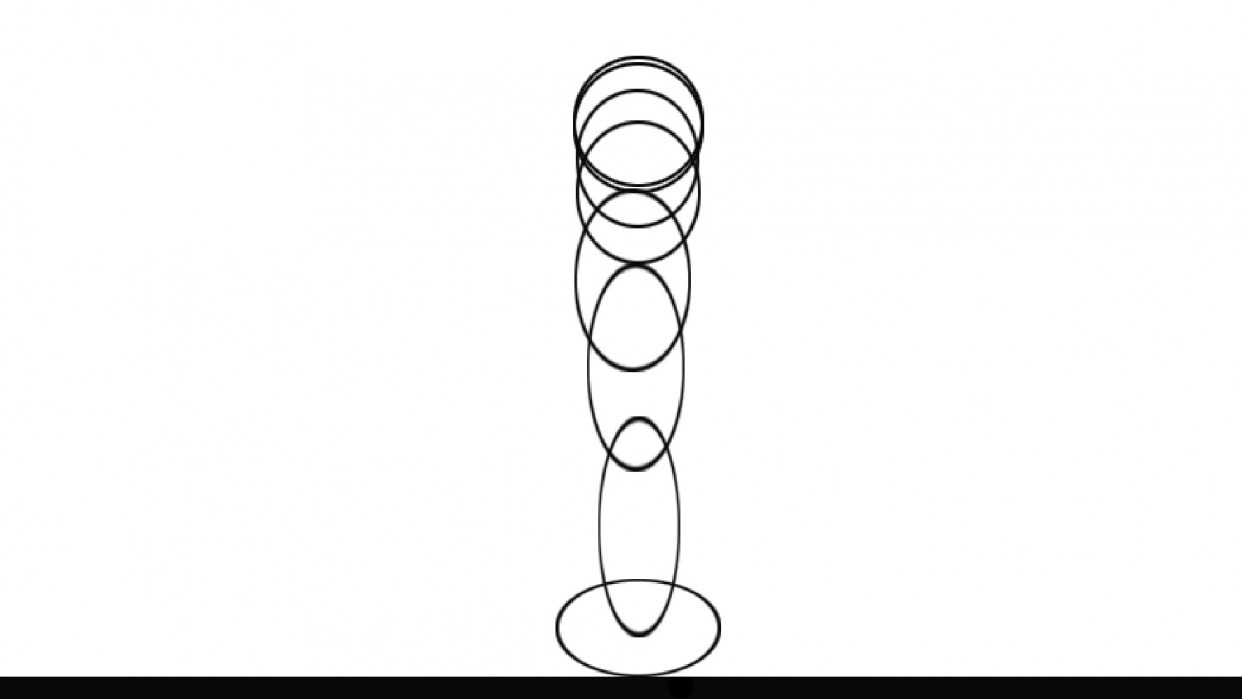
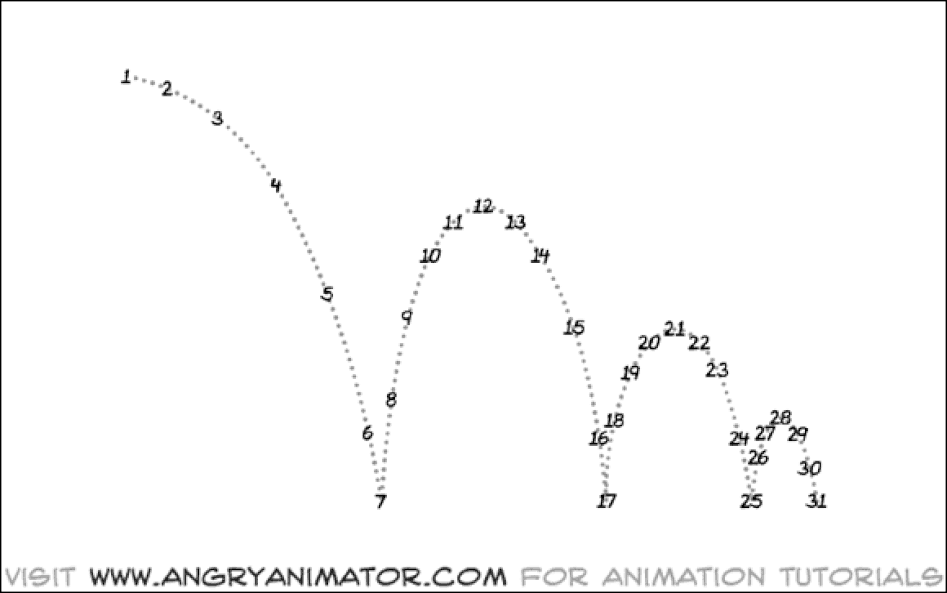
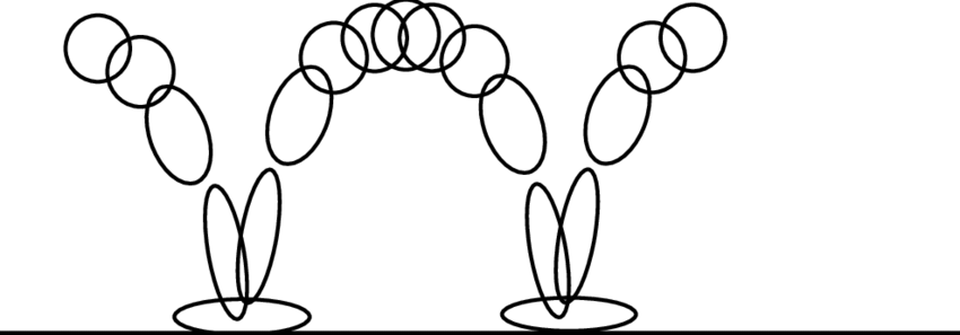
This is the first lesson taught to any animation student. It may seem boring, but by following it you will grasp most of the principles used in animation. Study the bouncing ball scene below with all the frames superimposed.
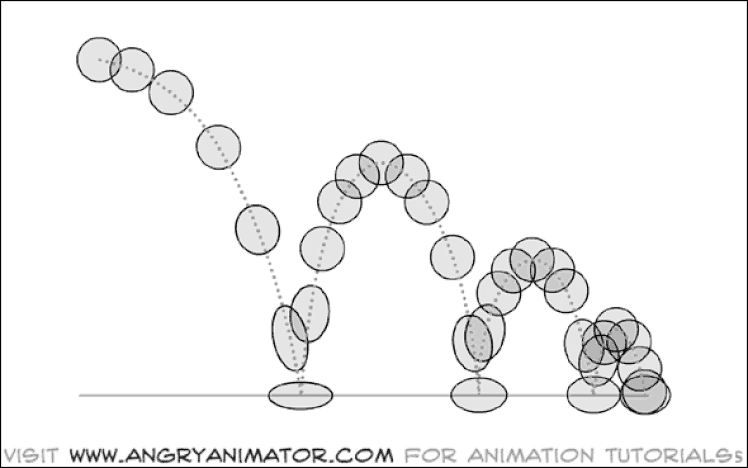
1. Arcs. The ball falls in an elliptical arc through space. Most things move in an arc of some kind. If the ball were to move in a straight line between the high and low points of the bounce, then the action would look very unnatural.
2. Timing. (or Spacing). As the ball falls it is accelerated by gravity, the gap between each frame growing all the time until the ball contacts the ground. As the ball bounces from the ground the opposite happens: as the ball hops up it moves very fast at first, then slows down by gravity into the high point of its bounce. Note that at the high point of the bounce the ball is weightless…perfectly balanced between the force of gravity pulling it down, and its own momentum moving it forward.
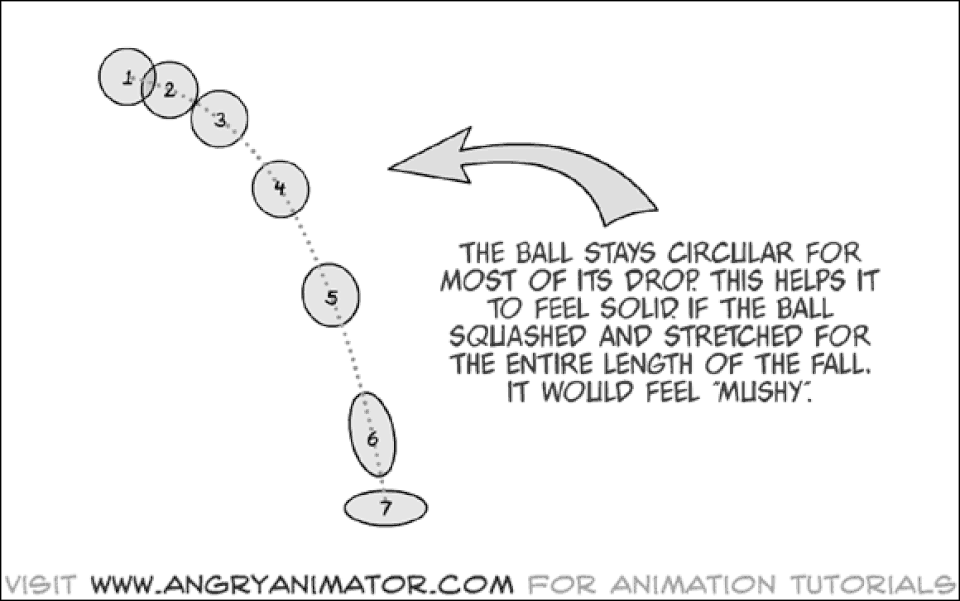
3. Squash and Stretch. As the ball falls it stretches. When it impacts the ground it squashes. When it bounces off the ground it stretches again. Note how quickly the ball regains its circular shape. Too much squash and stretch can make an object look “mushy”.
4. Volume. The ball should remain the same mass as it squashes and stretches. If the ball were to squash too much it would seem to be growing physically bigger. This is very eye catching, and looks weird.
Exercise 1: Perpetual Ball bounce
What you need:
-small paper (index card size)-20 pieces (with extras to spare)
-pencil, black pen, eraser, ruler and colored markers
-light source
-binder clip
-small paper (index card size)-20 pieces (with extras to spare)
-pencil, black pen, eraser, ruler and colored markers
-light source
-binder clip
DIRECTIONS:
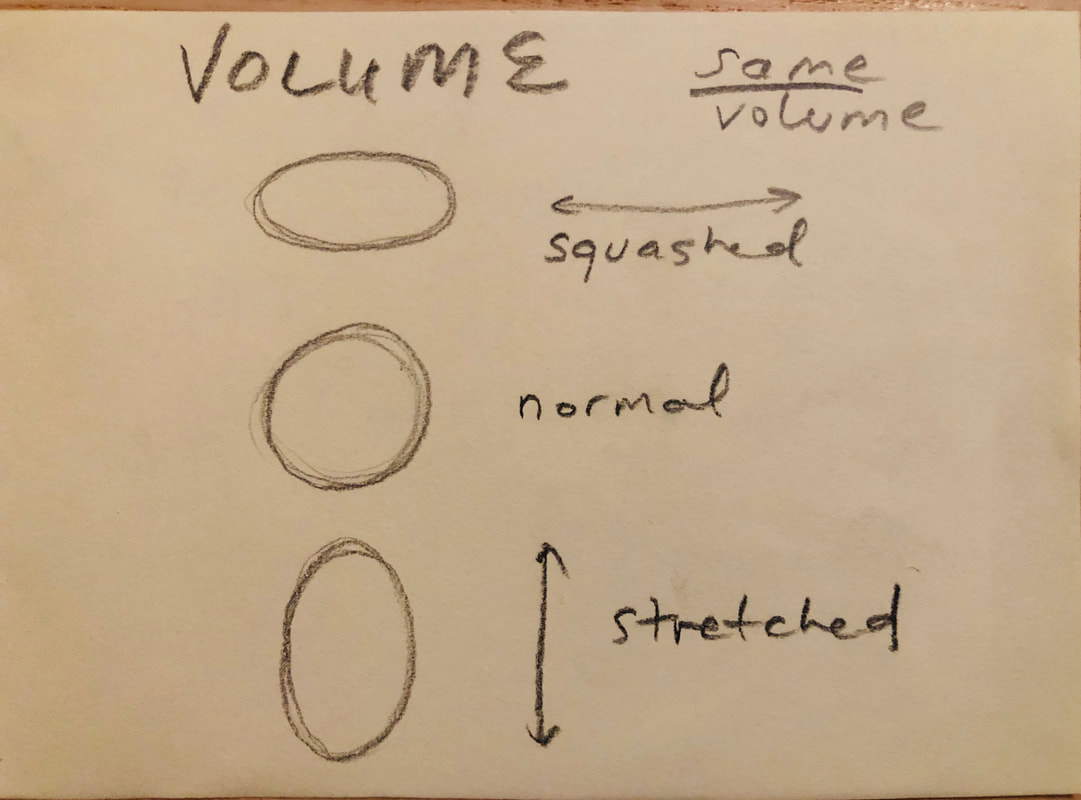
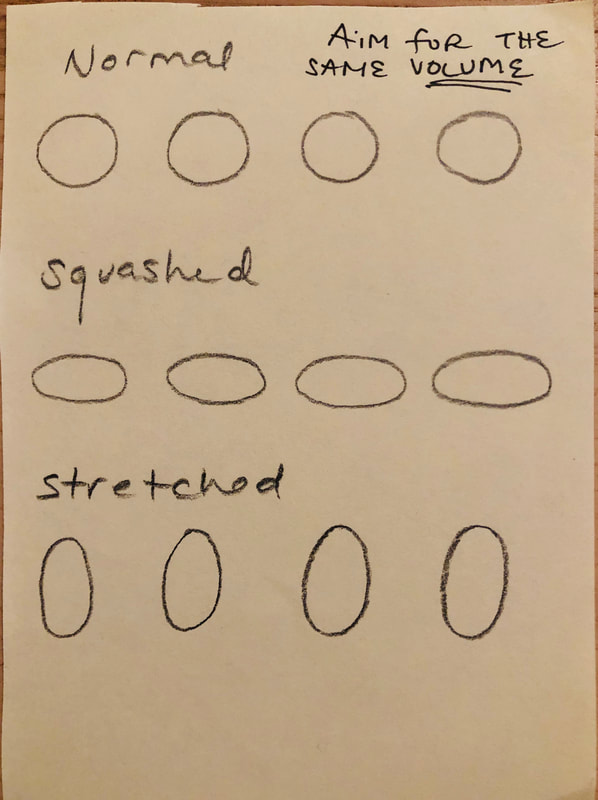
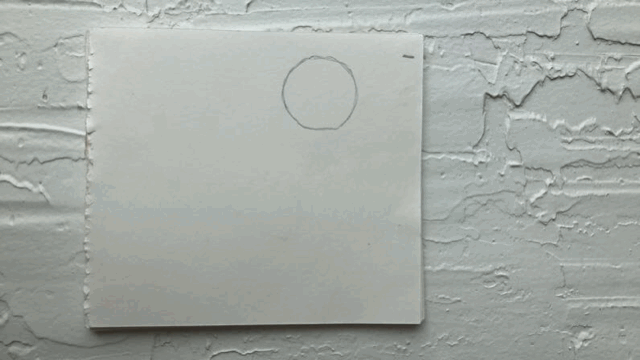
1. First, spend some time practicing drawing squashed, normal and stretched balls. You are drawing freehand so it takes some time getting them to look correct. Think about how each ball has the same VOLUME, but the shape may change depending on the movement of the speed of the ball.
|
|
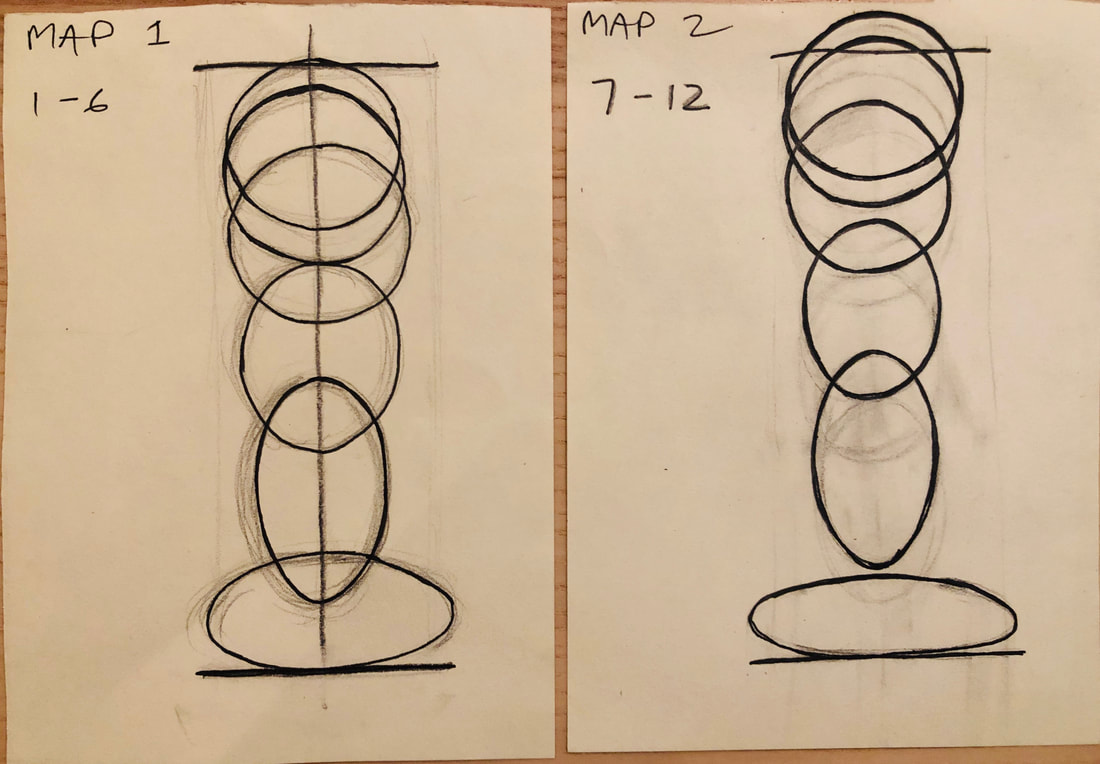
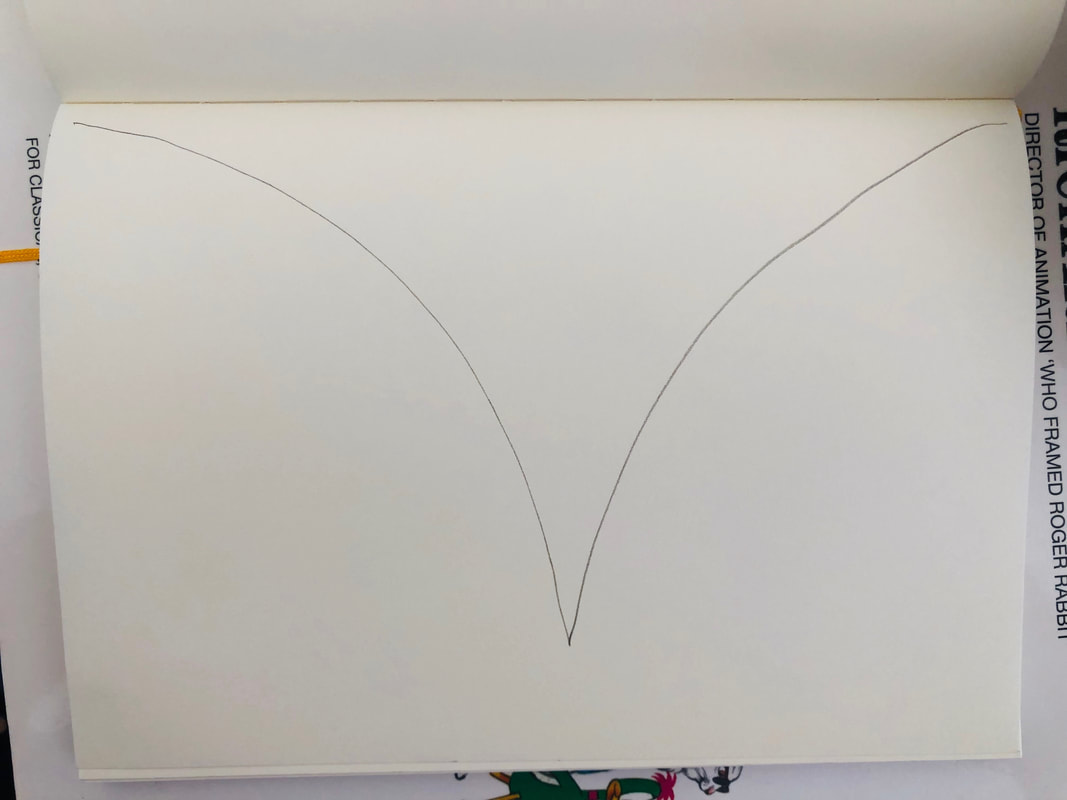
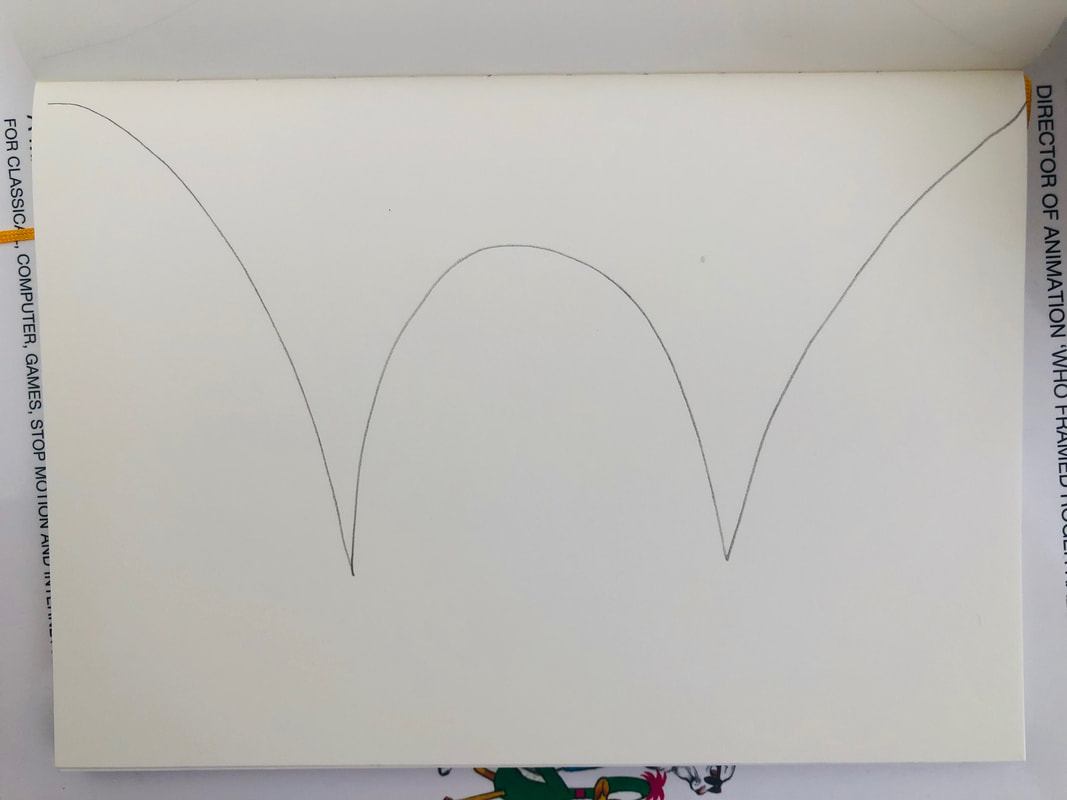
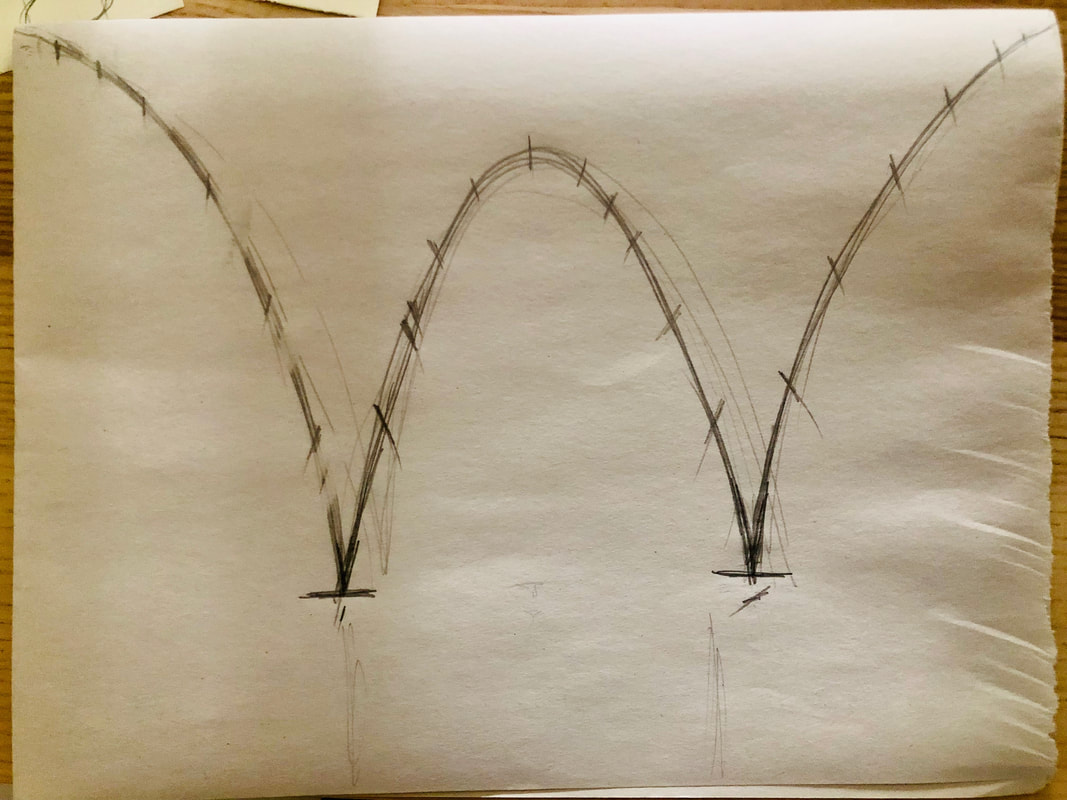
2. You will create 2 maps. Each map will show the course of the ball in multiple frames. You will eventually use these to trace each individual ball on an individual sheet of paper.
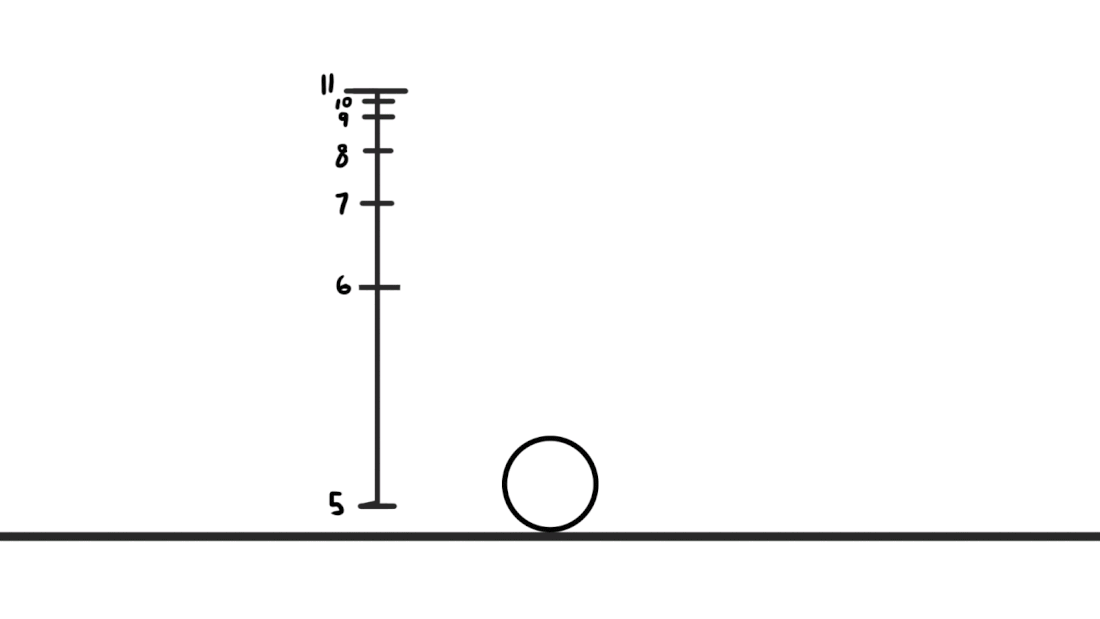
You need to create a border to fit all your drawings in, and it may help to draw a line in the center for each of your ball drawings are as symmetrical as possible.
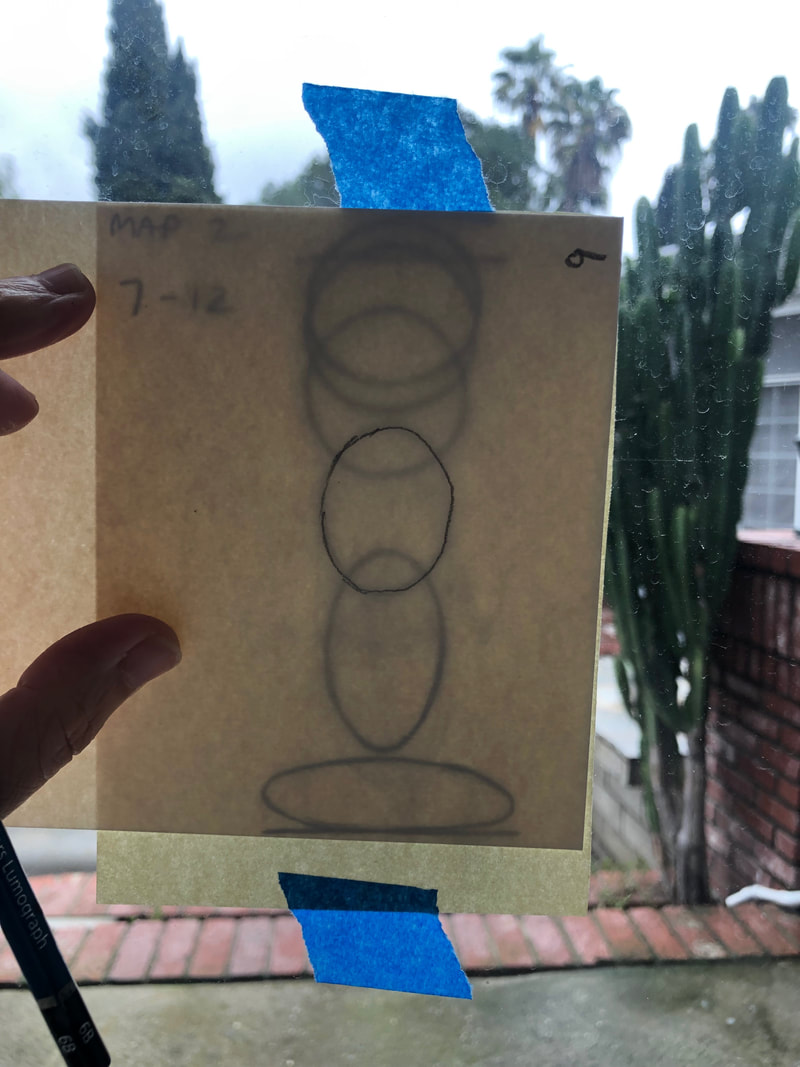
Frames 1-6 on 1 paper
Frames 7-12 on a second paper
You need to create a border to fit all your drawings in, and it may help to draw a line in the center for each of your ball drawings are as symmetrical as possible.
Frames 1-6 on 1 paper
Frames 7-12 on a second paper

|
|
|
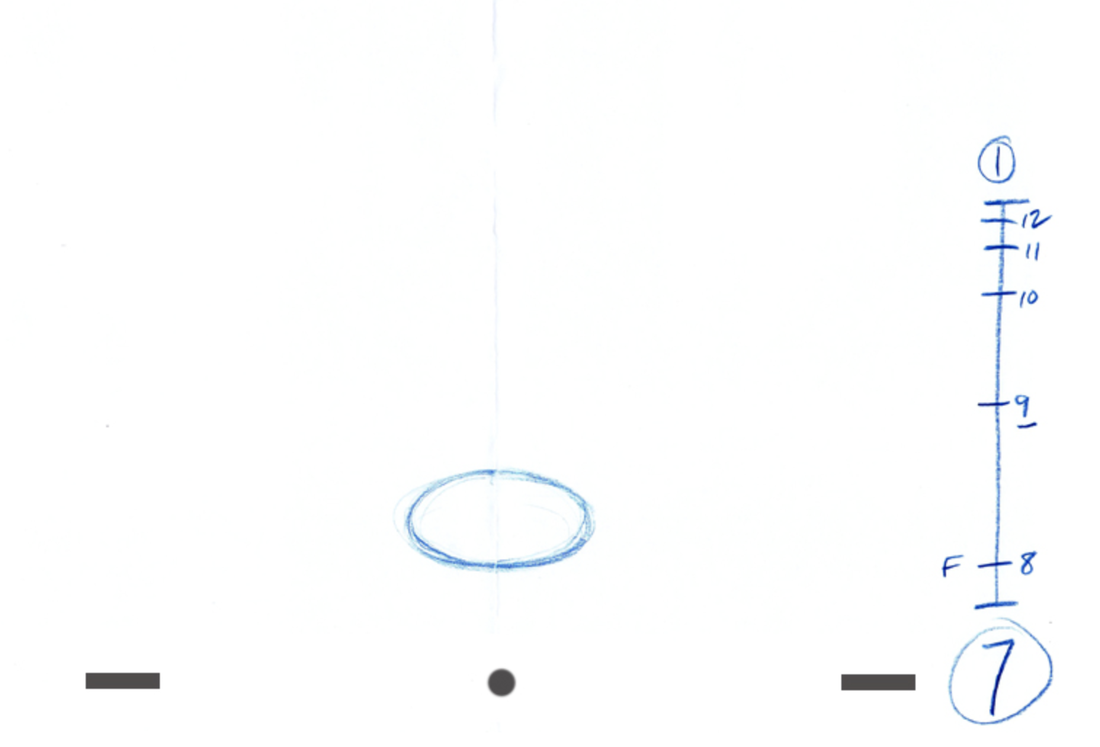
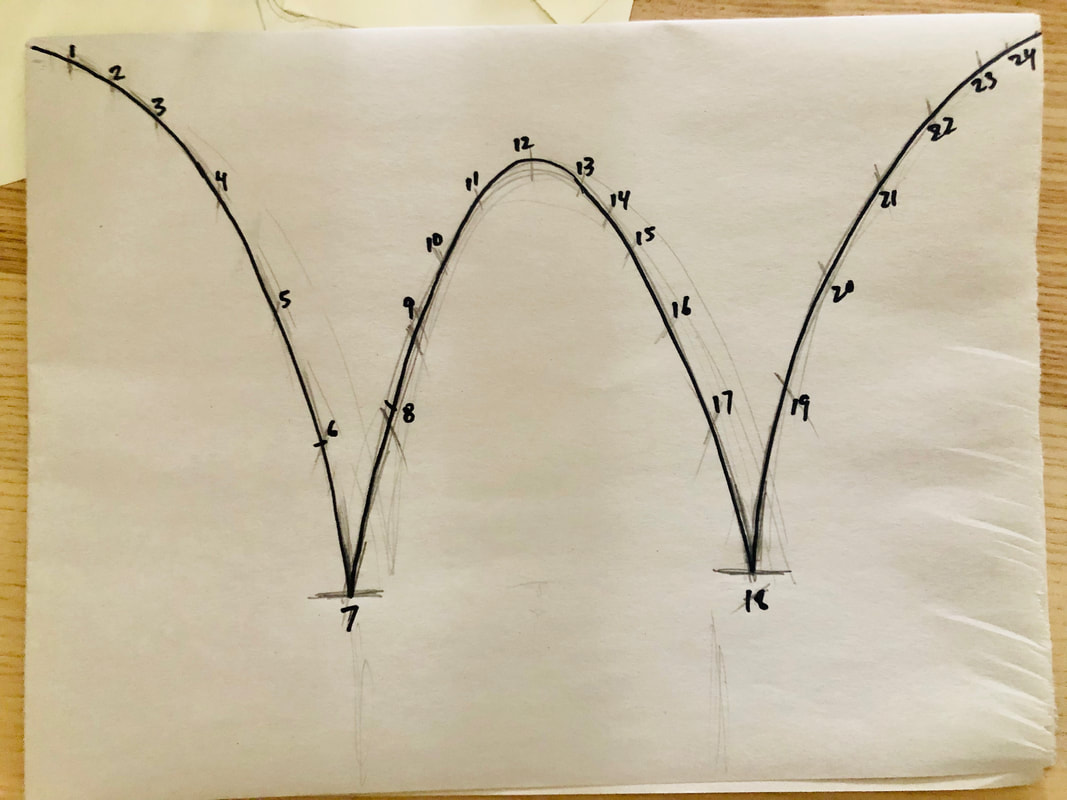
Frame 1 Begin by doing drawing #1. This will be our first key pose. Draw the ball as a circle with it's center at the top of the vertical line you drew for the path of action. Label the drawing 1 in the lower right corner and put a circle around it to indicate that it's a key drawing. |

|
|
Frame 7
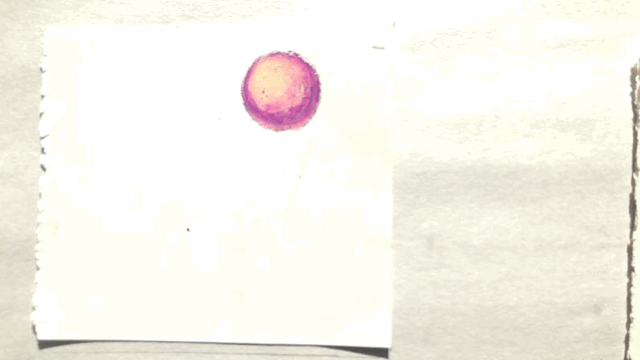
Next we'll do the ball at it's lowest, impact point where it hits the ground. This drawing should show the ball in a squashed position. Not squashed flat but about 50 - 60%. Label this drawing 7 for a 12 drawing cycle. Put a circle around it to indicate that it's a key drawing. |
|
The gif below rates are different, but look at how the ball slows down at the top and picks up acceleration as it falls.
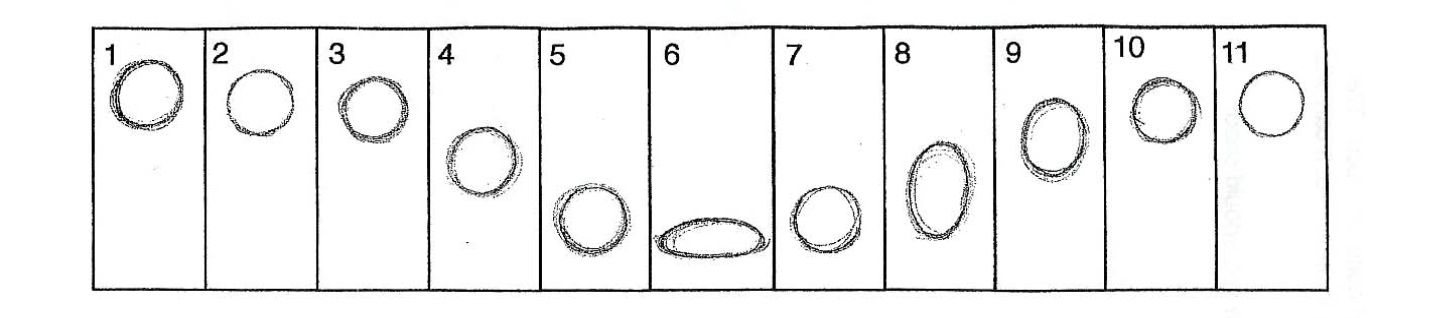
Above are all our frames.
Frames 1, 6, 11 are most important.
Frames 1, 6, 11 are most important.
Using Stop Motion to turn it into a Gif
|
On your phones, download the APP called StopMotion Studio
-12 FPS (frames per second) -play on a loop -export as a GIF |

|
Aimee's first attempt:
Aimee's second attempt:
|
Things to fix:
-make sure I have my phone on a stack of books to keep my phone camera in the SAME SPOT when taking my photos. -add shading to the balls |
|
Things I fixed:
-camera didn't move when I took photos of the frames -I shaded the ball with oil pastel to give it color -added marker lines to make sure I was placing the frames in the same spot. -deleted frame #12 as there was too much of a pause. Things to fix: -overexposed! -center my paper -crop my GIF (https://ezgif.com/crop) |
Add your 1st attempt and 2nd attempt gifs into this shared folder-LINK.
Make sure your files are named like so: "NAME_1st attempt.gif"
Exercise 2: Horizontal ball bounce
In this next exercise, we will create a COLLABORATIVE BALL BOUNCE.
Here's a link to what my old class created with Marty Cooper. We connected our ball bounces into one looping animation.
BALL BOUNCE LOOP-COLLABORATIVE ANIMATION-LINK
BALL BOUNCE LOOP-COLLABORATIVE ANIMATION-LINK
|
Your task:
-Create some type of CHANGE when the ball touches the ground (change in color? change in size? you can be creative with this choice) -You will use stop motion animation to create this. -You will include 1 OR 2 bounces-you choose! If you are a beginner, choose 1 bounce -You will draw your balls, cut them out and use them as your ball objects repeatedly (so you don't have to draw 12-24 frames) -start from the top left corner and end at the top right corner (this is how we will put them all together) at the end! -you must utilize the squash and stretch in your bouncing ball, and use correct timing (spacing) with your ball in motion |

|
1. Brainstorm with your classmates: What will be your change when the ball touches the ground?
SHARED GOOLGE DOC LINK to brainstorm possibilities of transformations with the bounce!
2. You will decide on 1 bounce or 2 bounces and draw your ball motion path map. Draw this on a piece of paper that is the SAME SIZE as your background for your ball bounce.
SHARED GOOLGE DOC LINK to brainstorm possibilities of transformations with the bounce!
2. You will decide on 1 bounce or 2 bounces and draw your ball motion path map. Draw this on a piece of paper that is the SAME SIZE as your background for your ball bounce.
|
|
3. You will mark on your ball motion path map where the balls will be positioned. Use numbers to mark the Frame and positioning of the ball. You need to keep in mind the speed of the ball and spacing of the ball.
4. Next, you will draw your balls, shade them and cut them out. Think about how you will show your transformation and the size of the balls in relation to your chosen background paper.
4. Next, you will draw your balls, shade them and cut them out. Think about how you will show your transformation and the size of the balls in relation to your chosen background paper.
|
|
