Exploring the Fundamentals of observational Drawing:
Project routes:
1. The Body exploring fears/phobias
2. Triptych of landscapes/cityscapes exploring Home
3. Linear Perspective and Text/pop culture
|
Studio Project Outcome:
Students will have the choice to select 1 of 3 project routes. |
Skill Practice:
|
- Exploring line, mark making and pattern through automatic drawings and revisiting values and tone through the use of varied marks
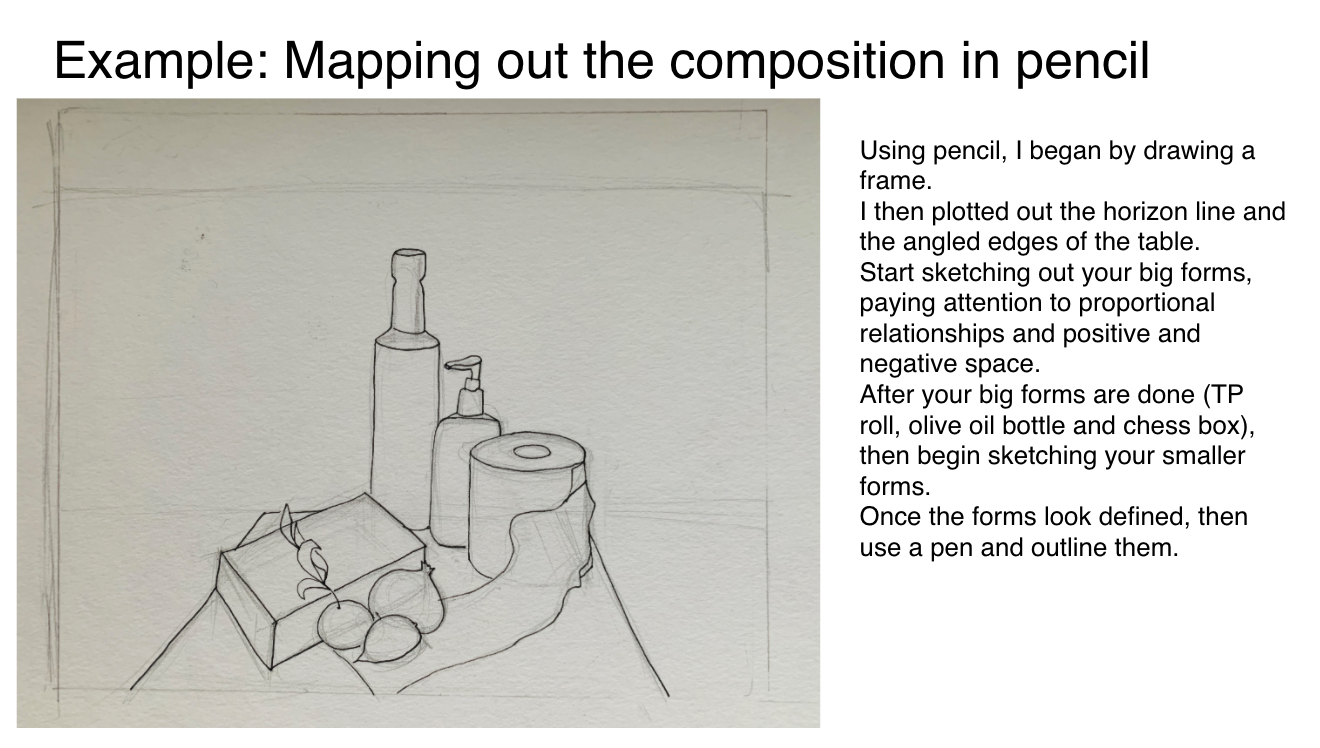
- Creating the illusion of space by understanding foreground, middle ground, background and the use of overlapping
- Creating the illusion of space by understanding atmospheric perspective
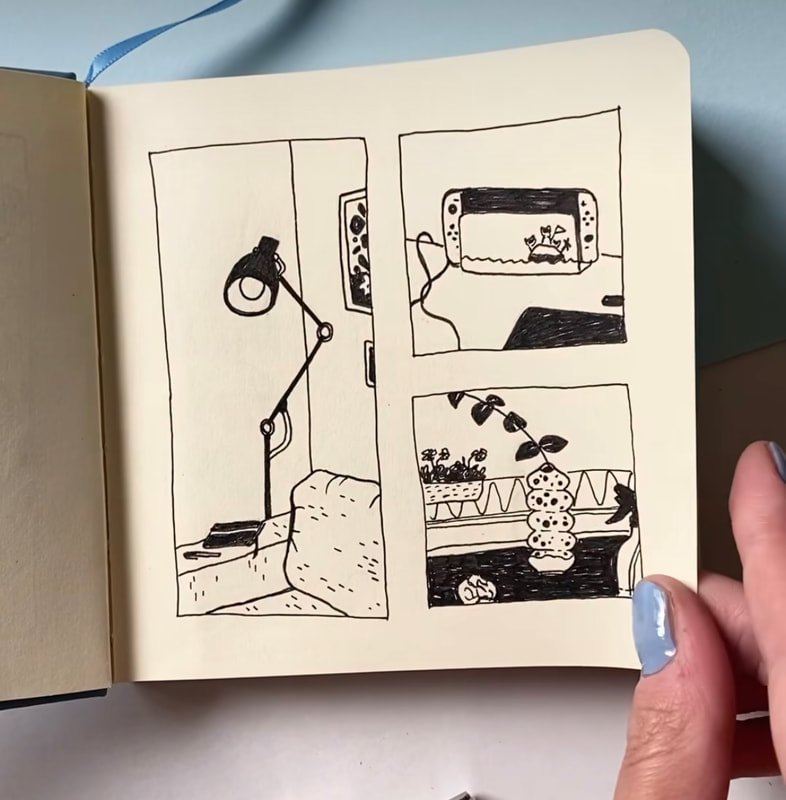
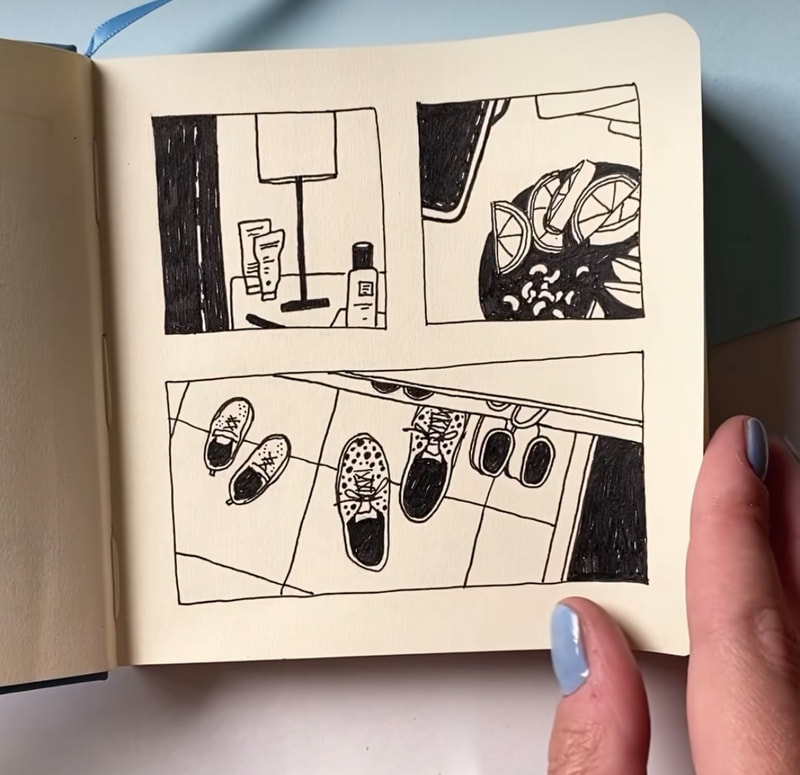
In Class Assignment: Compositional Frames
Using a viewfinder for framing and composition
Step 1: Make a paper viewfinder with an index card or any firm paper. We chose a 3.5 inch x 3.5 inch square
Cheat tip: I use my phone camera as a viewfinder and will create simple compositions by zooming in. I use this image to help me sketch the main shapes and then use my observation to finish the drawing from life.
Step 2: Using a ruler and a pencil, map out 4 composition frames (like in the images below) on a piece of paper or in your sketchbook. Draw your frames before you attempt any drawing. Frames first!
Step 3: Go outside and choose your location. Hold up your viewfinder so you can see some simple compositions, or use your camera phone to zoom into interesting compositions. The viewfinder helps us just focus on the shapes and lines present in the chosen compositional frame.
Step 4: Draw in pen if you have a pen OR draw in pencil and make the commitment not to erase. Draw slowly and if you make a mistake, embrace it and keep going.
Step 5: Add in some shaded areas so there's more of a balance of dark and light in each of your composition sketches. If you are using a pen for these drawings, make sure to use a sharpie to color in, as using the pen to fill in areas will dry it out really fast.
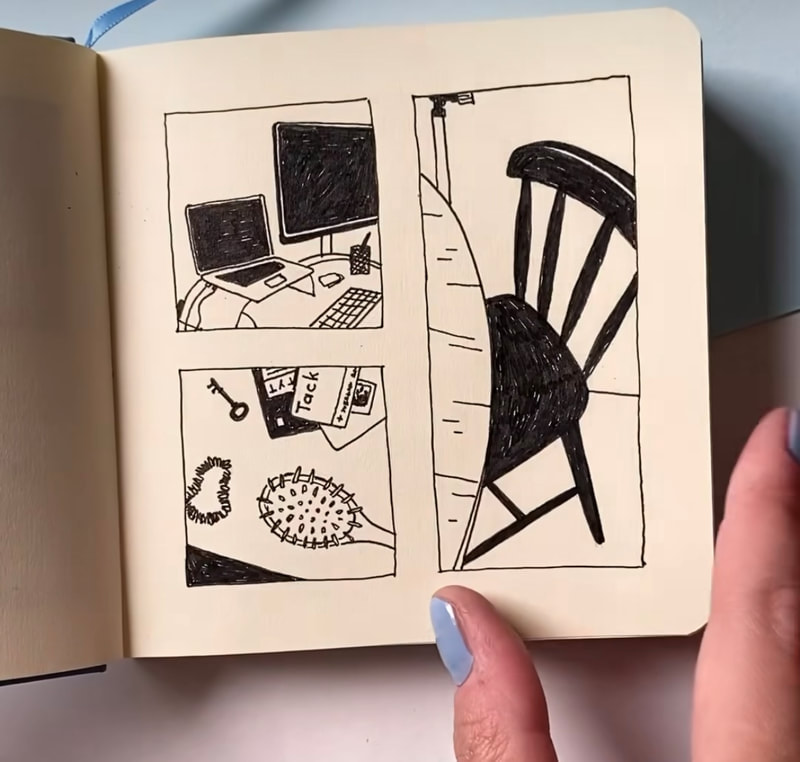

IN CLASS ASSIGNMENT: Background, Middle Ground, Foreground
Foreground/Middle ground/Background exercise
Materials needed:
-3 different colored markers except yellow (1 color for foreground, 1 for middle ground, 1 for background)
-sketchbook
Step 1: Watch the tutorial below demonstrating this drawing exercise
Step 2: Choose 3 different colored markers, one of each plane of space (1 color for foreground, 1 color for middleground, 1 for background)
Step 3: Use your viewfinder to help you with your compositions. Remember, you need to find a composition that has all 3 planes of space visible.
Step 4: On 1 sheet of sketchbook paper, draw out your frame outline. Portrait orientation or landscape orientation.
Step 5: Begin with drawing your foreground, then move to your middleground, and lastly, add in your background.
Step 6: Aim to do this type of drawing at least 2 x, 1 drawing per page. Different scene and view.
TIP: Make sure you have an object or subject very close to you as the foreground. Sometimes it can be visually confusing if your foreground and middle ground are too close together. Also, if you don't understand linear perspective yet, try to stay away from architectural forms as these can be very complicated.
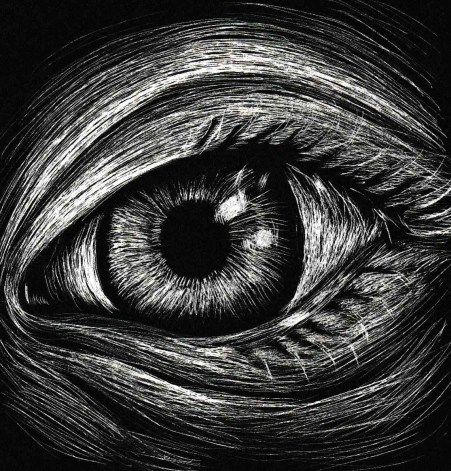
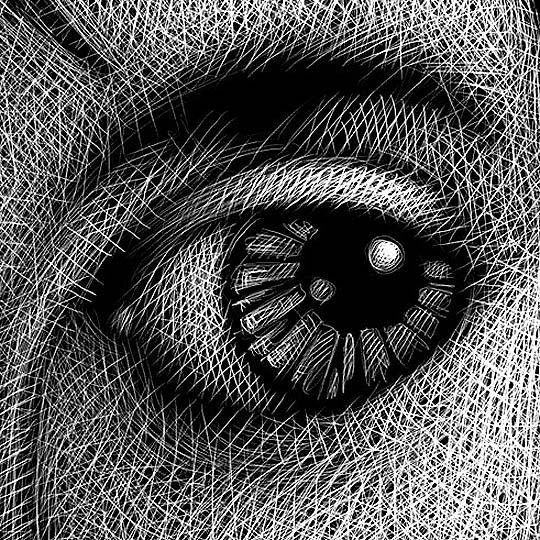
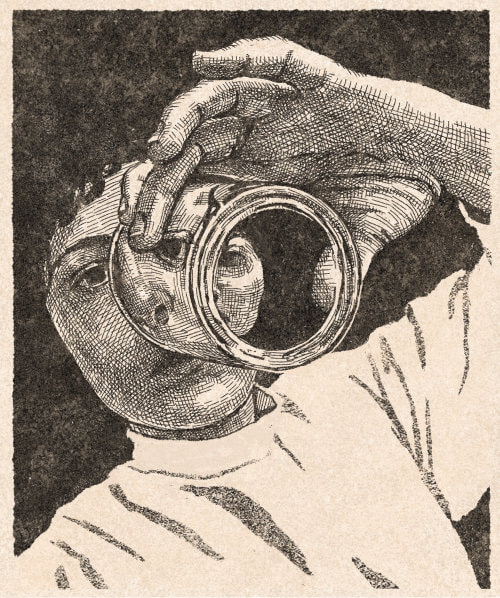
in Class Assignment: Drawing your Eye in Graphite/Pencil
|
|

|
|
|
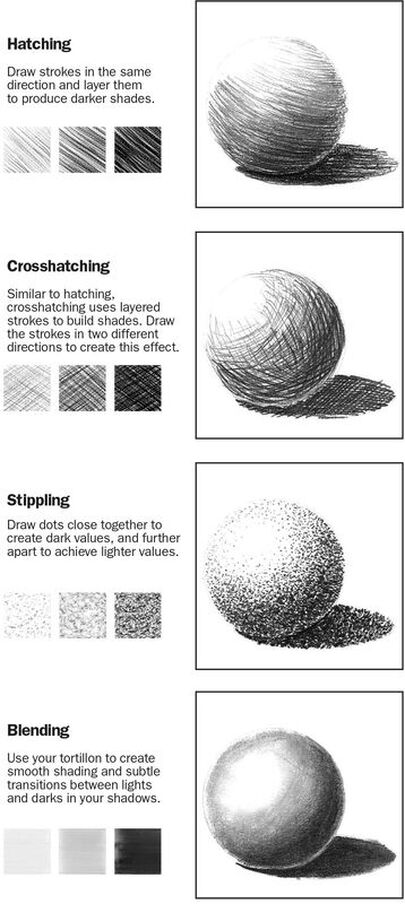
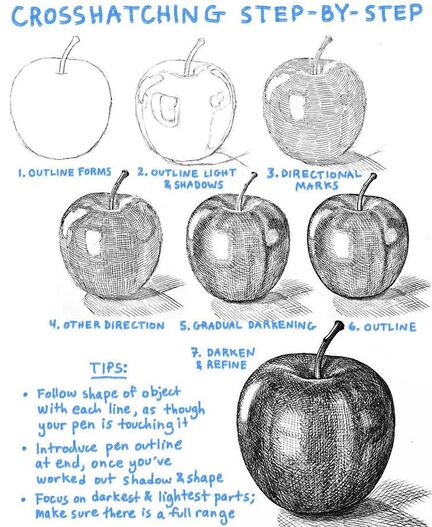
In Class Assignment: Scratchboard Apple Drawing
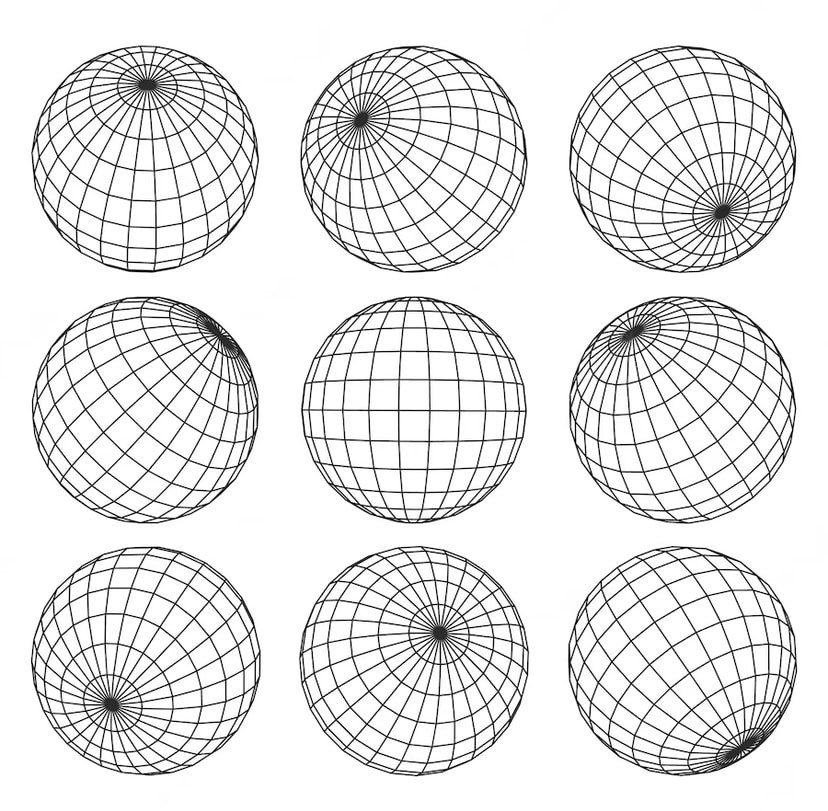
Step 1: Practice drawing a cross contour sphere in your sketchbook from 3 angles using a pencil, so draw 3 spheres. Use the image below with 9 images of cross contour spheres to choose from.
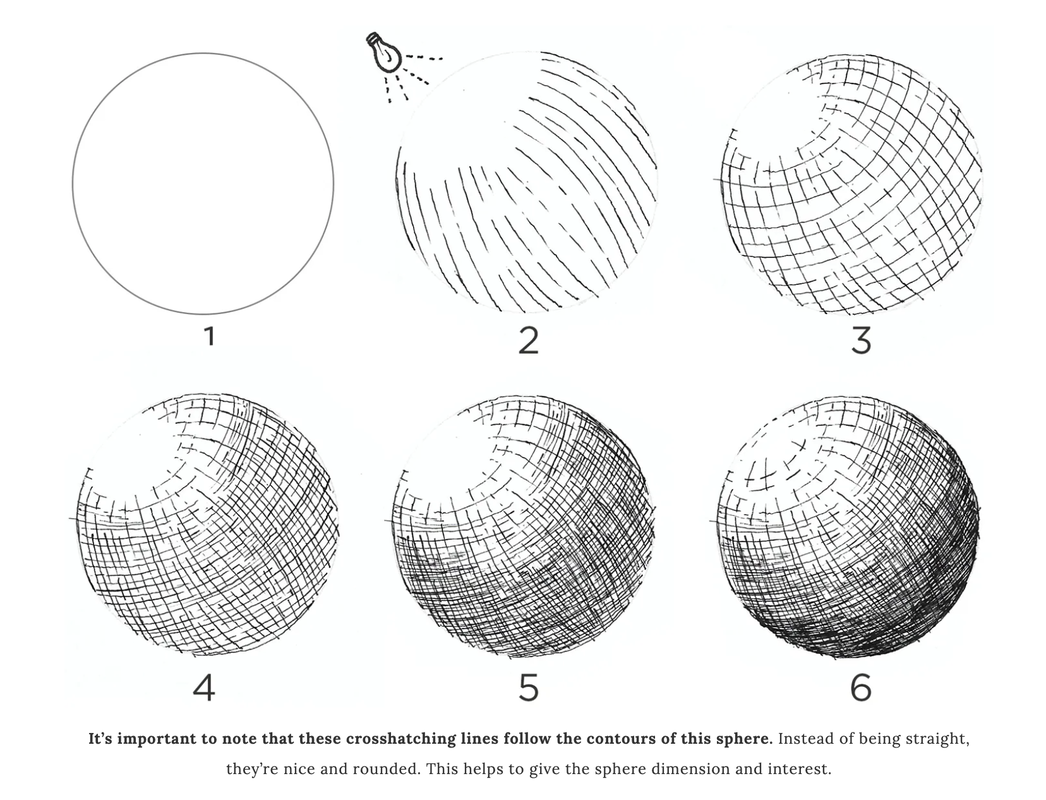
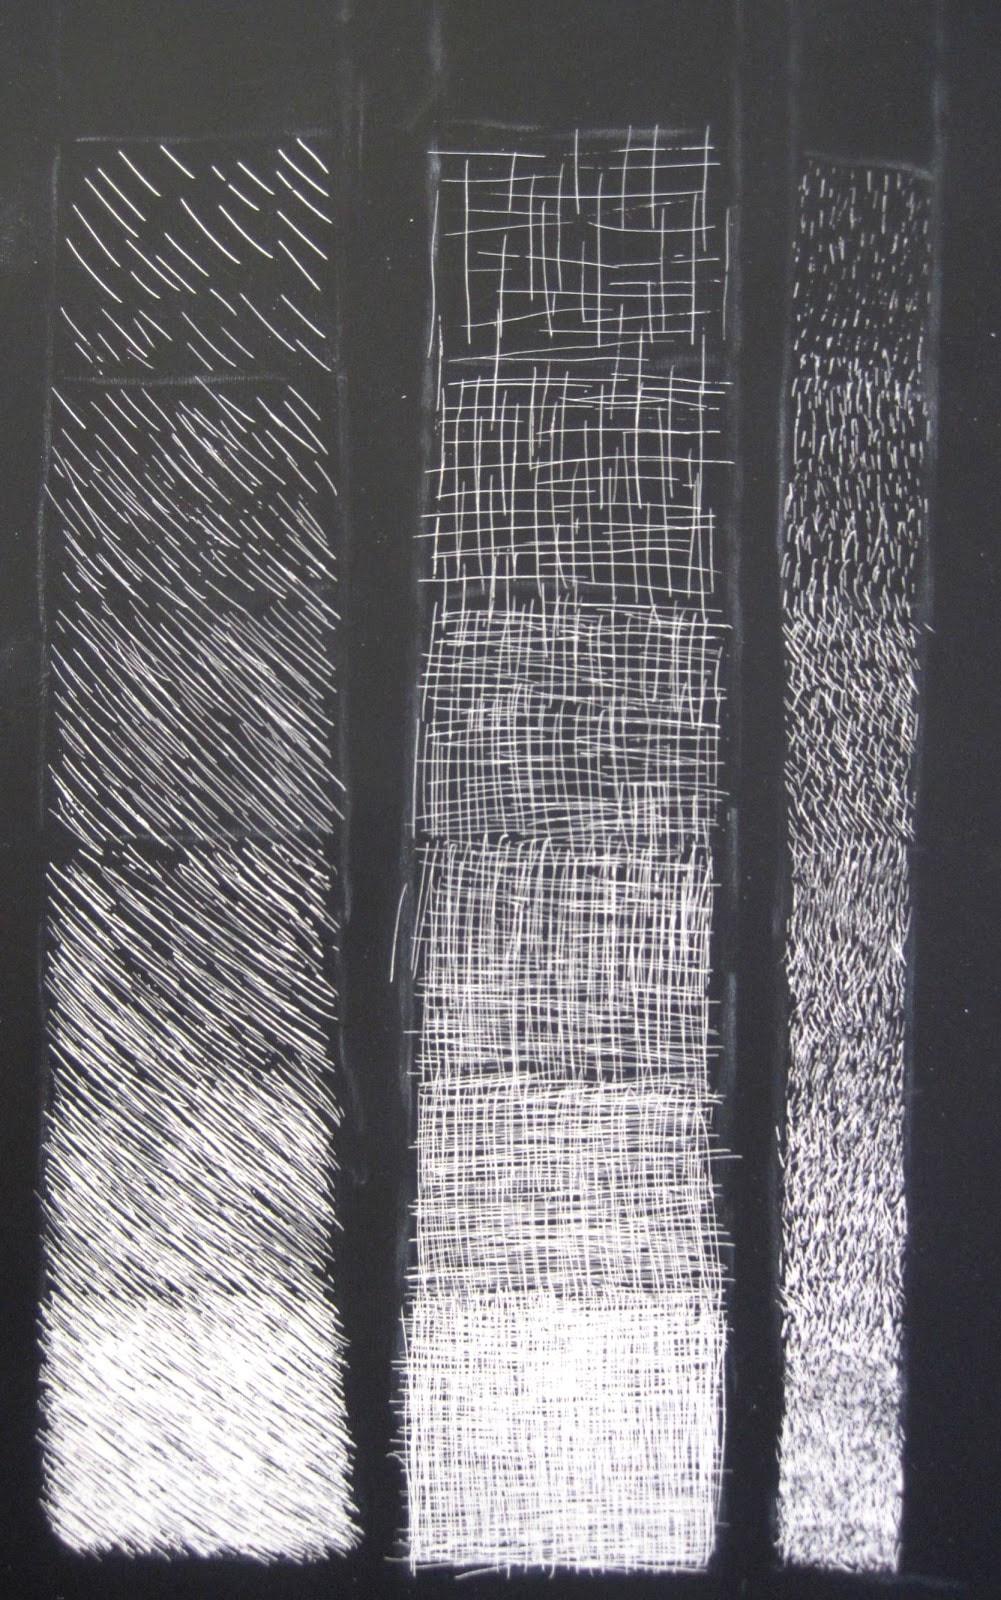
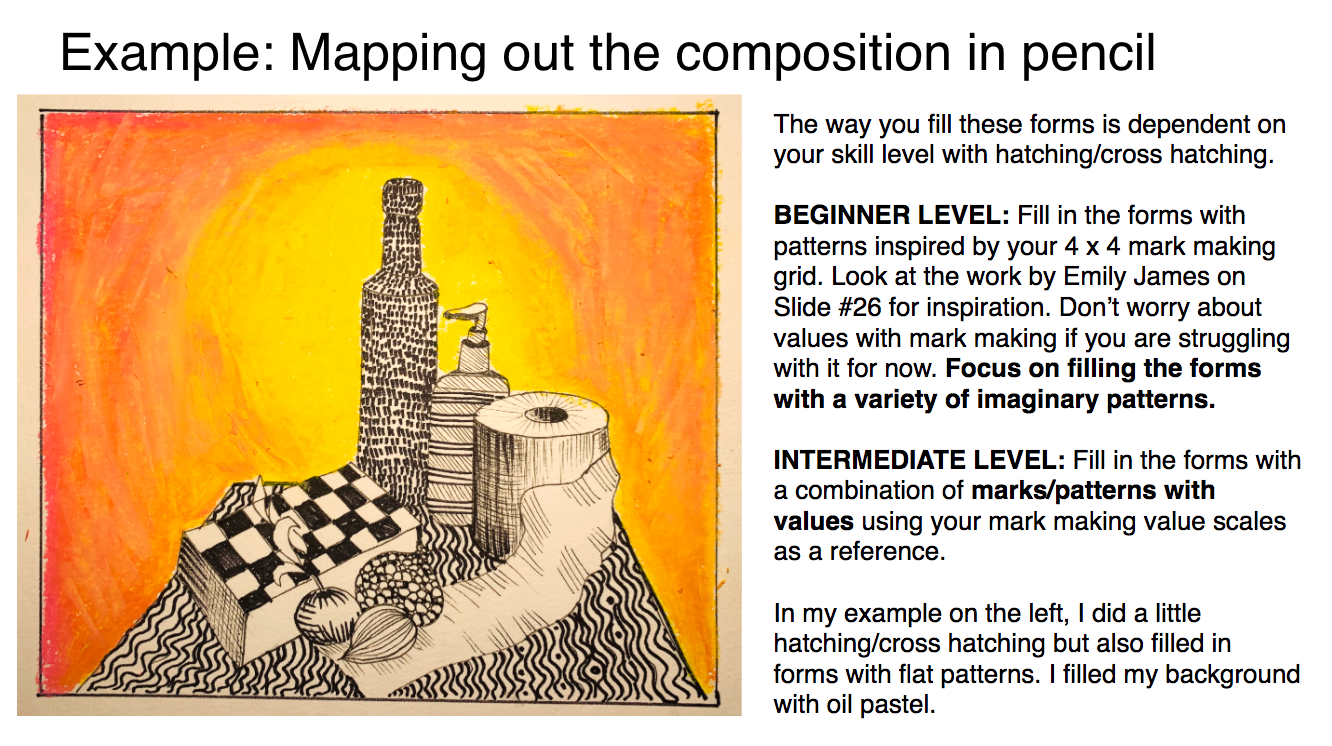
Step 2: After your 3 cross contour pencil sketches in your sketchbook, move on to scratchboard and create 2 value scales . 1 value scale showing hatching, and the 2nd one showing cross-hatching. See example image below. Each value scale should be 7 steps.
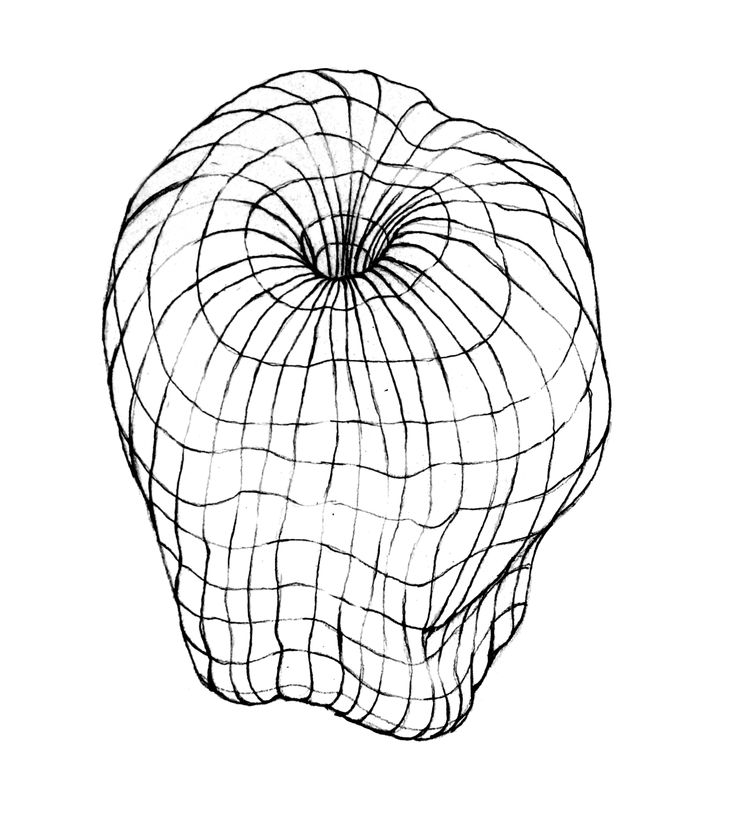
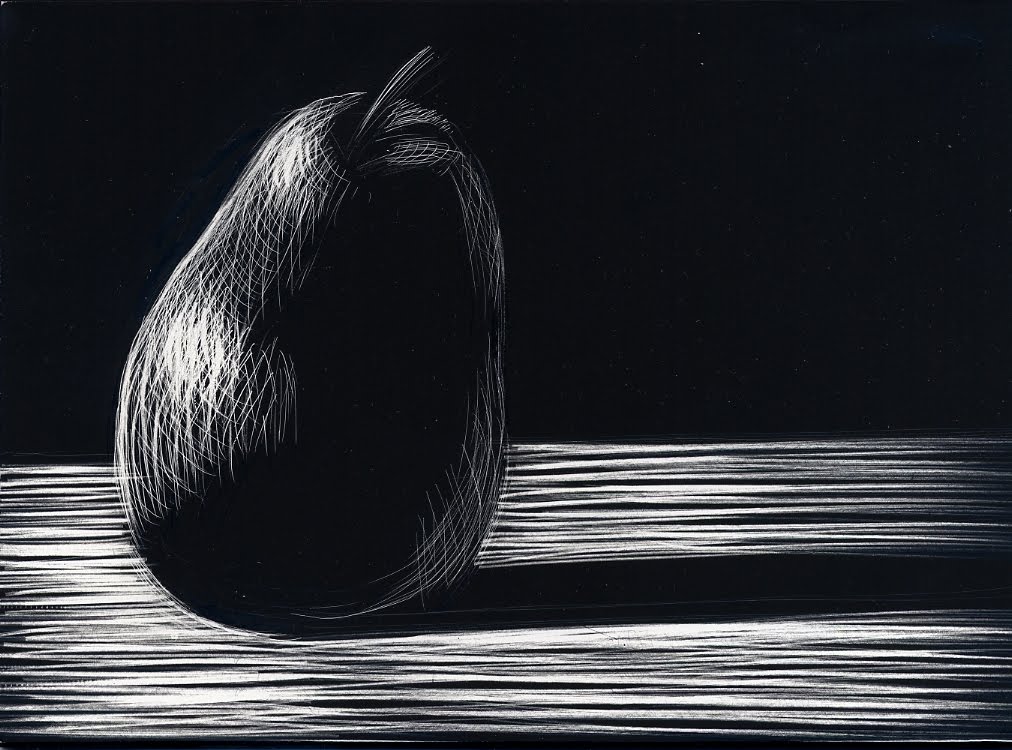
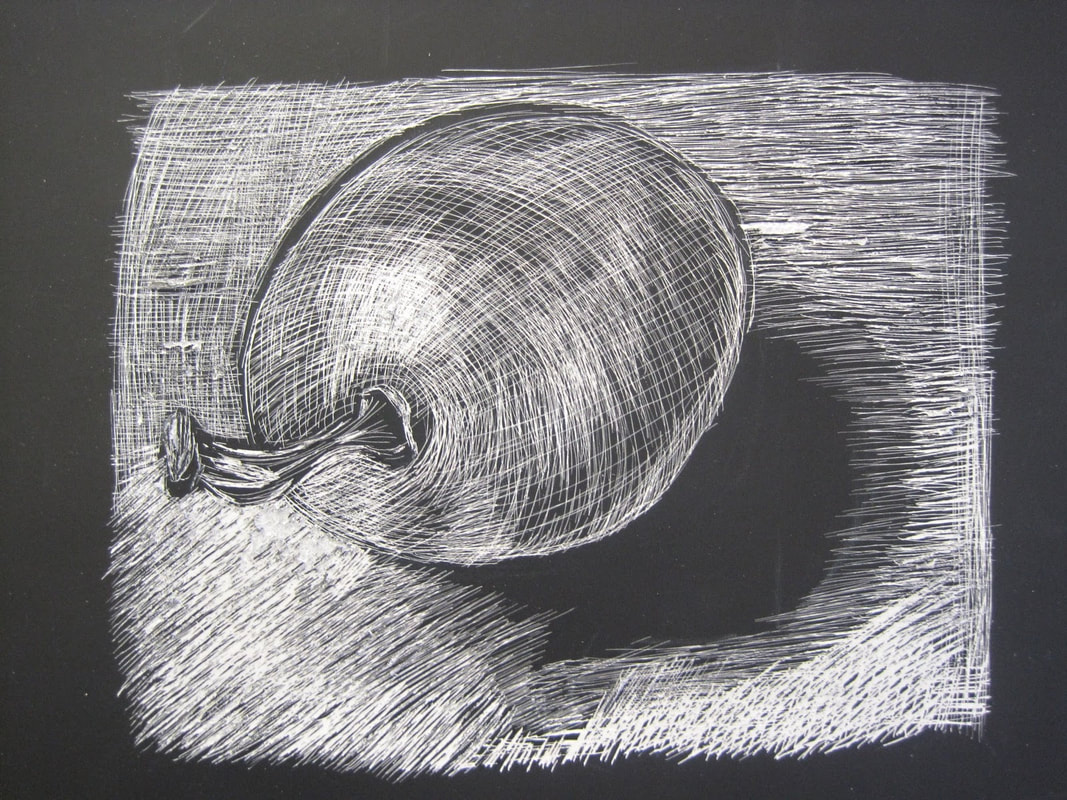
Step 3: Choose an apple photo as your photo reference to draw an apple using cross contour/cross hatching lines on scratchboard.
Step 2: After your 3 cross contour pencil sketches in your sketchbook, move on to scratchboard and create 2 value scales . 1 value scale showing hatching, and the 2nd one showing cross-hatching. See example image below. Each value scale should be 7 steps.
Step 3: Choose an apple photo as your photo reference to draw an apple using cross contour/cross hatching lines on scratchboard.
|
|
|
|
|
Cross Hatching A Grapefruit OR Lemon
|
|
|
|
|
|
|

|
|
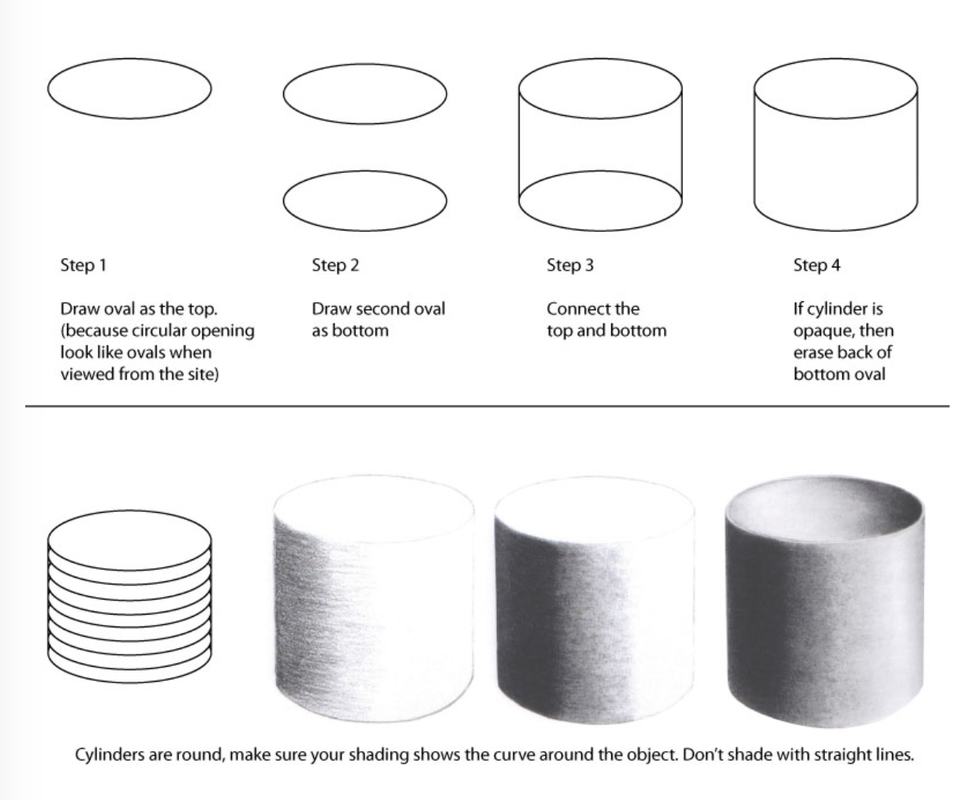
Drawing Cylinders

|
|
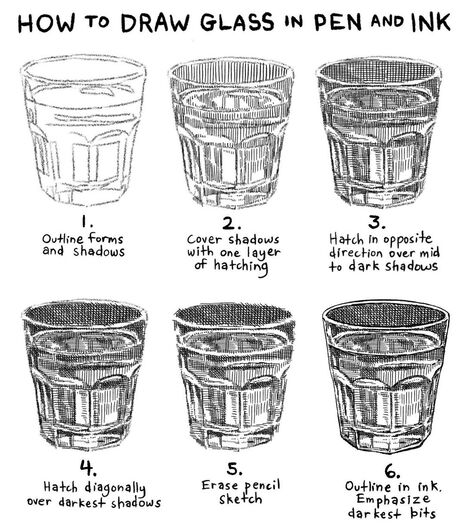
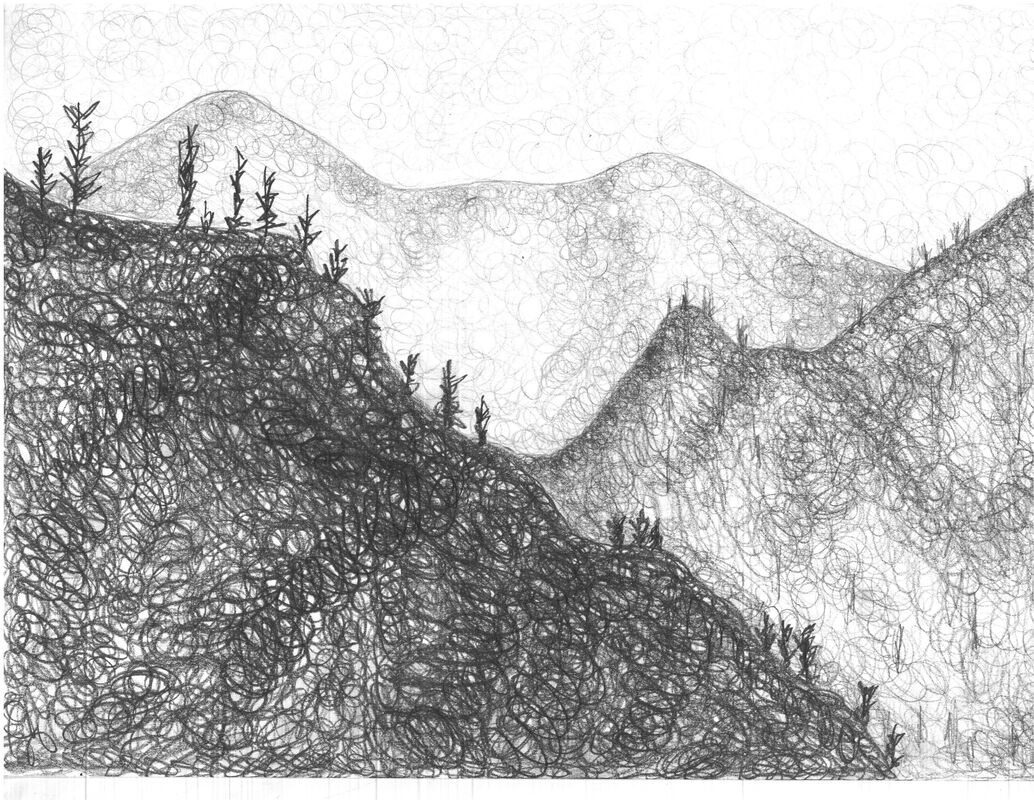
Hatching/cross hatching inspiration


|
|
|
|
|
|
|
Drawing with Artist Song Kang
|
|
|
CHIAROSCURO
Artists investigating the Body
|
|
|
|
|
|
| 5x7grid.psd |

|

|
Atmospheric perspective
Reference images for atmospheric perspective


|
|
Linear Perspective - resource Page Link
|
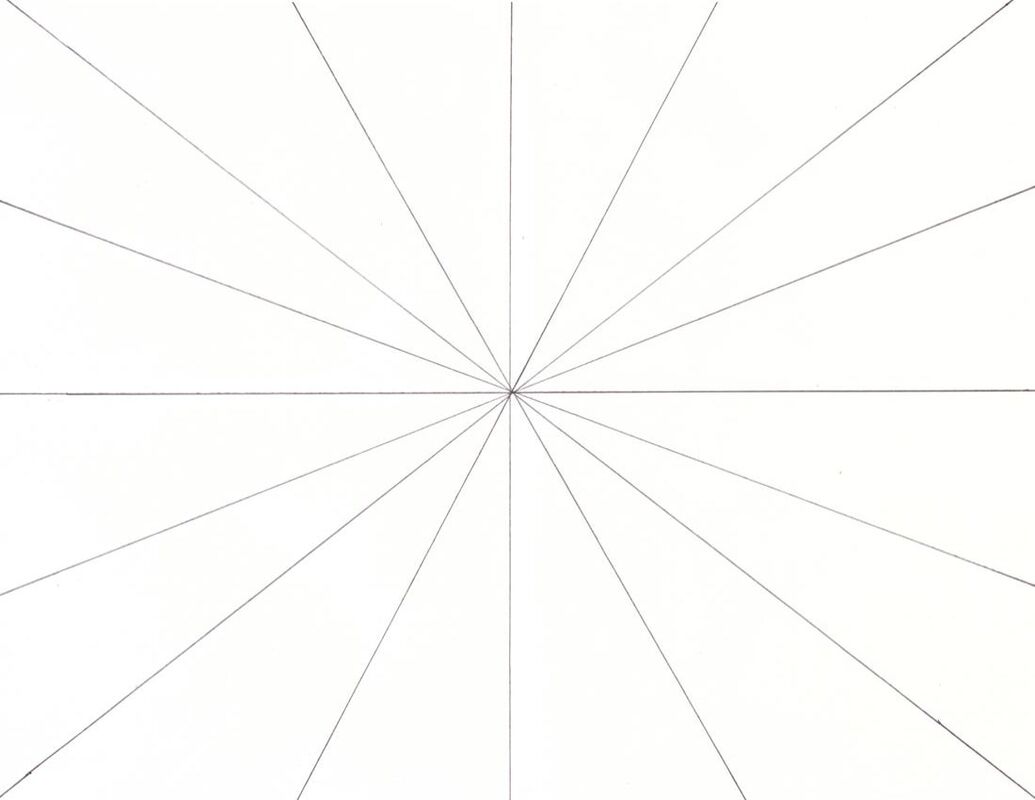
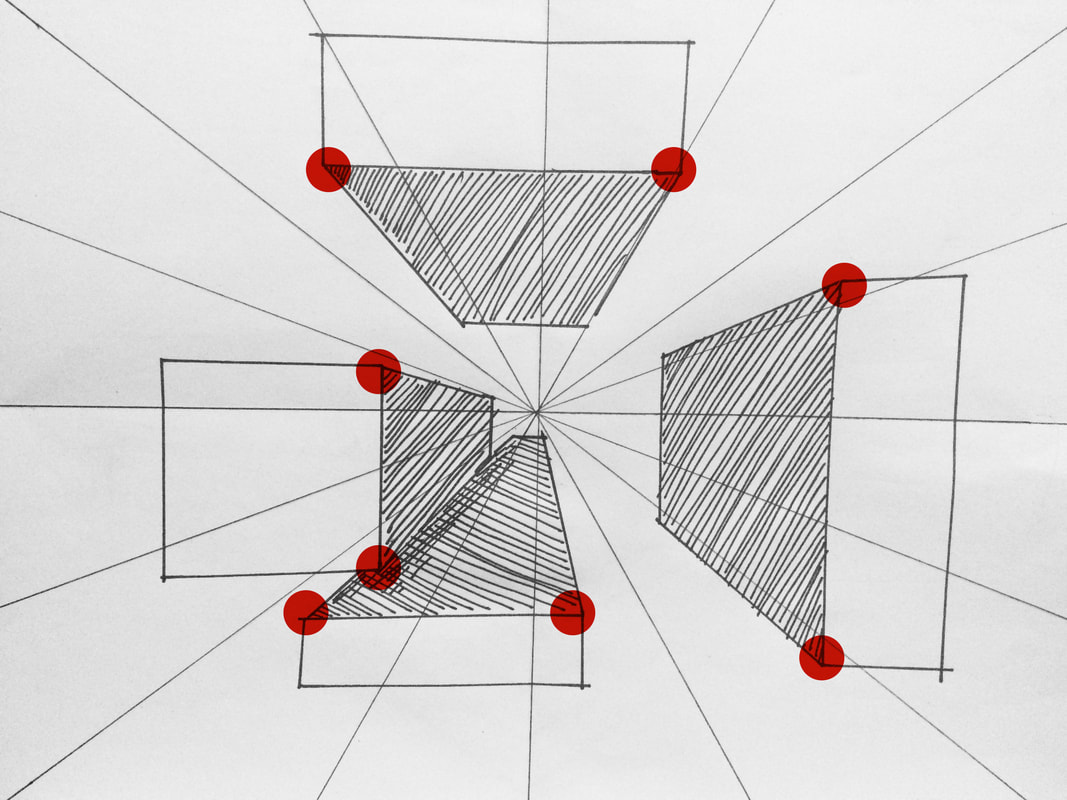
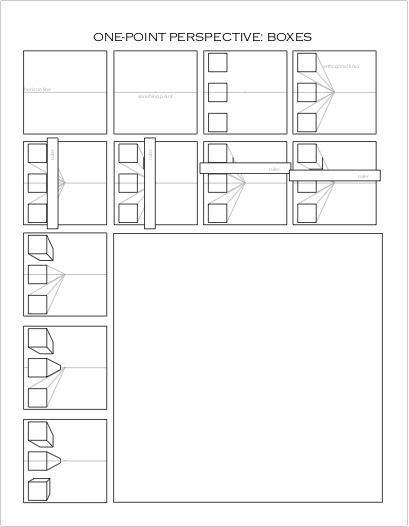
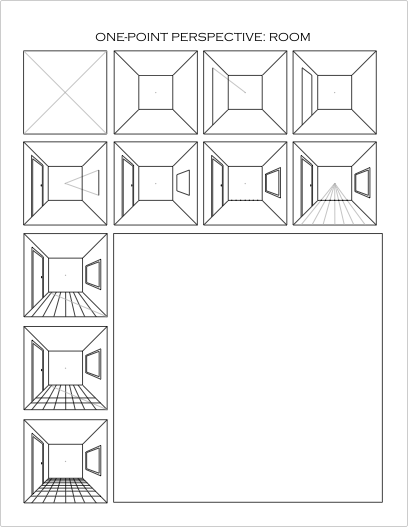
1 pt perspective practice
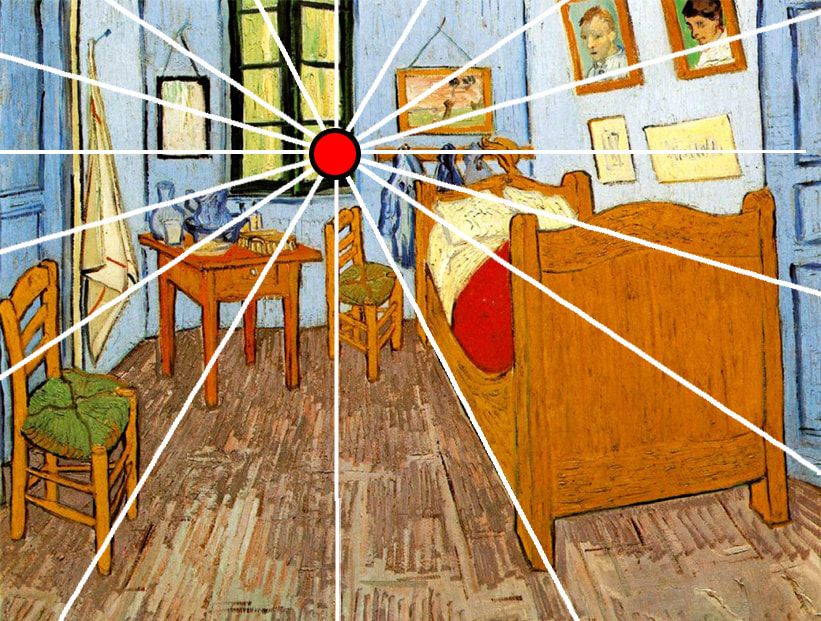
1 point perspective has 1 vanishing point. This means all edges will disappear and recede into that point. On the right, you see this demonstrated in a painting by Vincent Van Gogh in 1888 of his bedroom. Notice how all the edges recede to the same single vanishing point. How to do this exercise: 1. Prepare your One-Point Perspective grid (you can download the PDF below to print it or draw it for yourself). 2. Draw a few flat (two dimensional) rectangles or squares anywhere on your grid. 3. Pinpoint the corners/angles of your shapes that are closest to the Vanishing Point (see red highlights in the image). 4. Using your ruler, draw straight lines from the corners of your shapes down to the Vanishing Point. Take into account here that there may be two to three lines, depending on where you placed your shape. 5. Finally, close your shapes with vertical or horizontal lines. Remember to make these lines parallel to the lines you used in your initial two dimensional shape. |

|
|
|
| 1_point_grid.pdf |
|
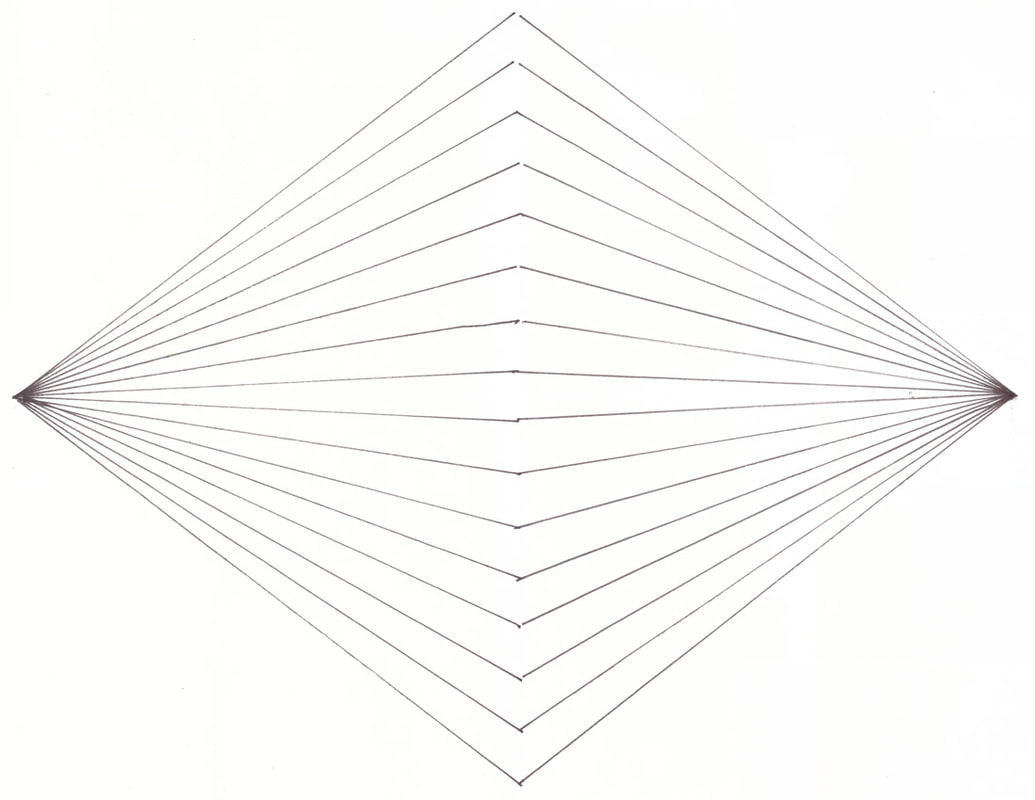
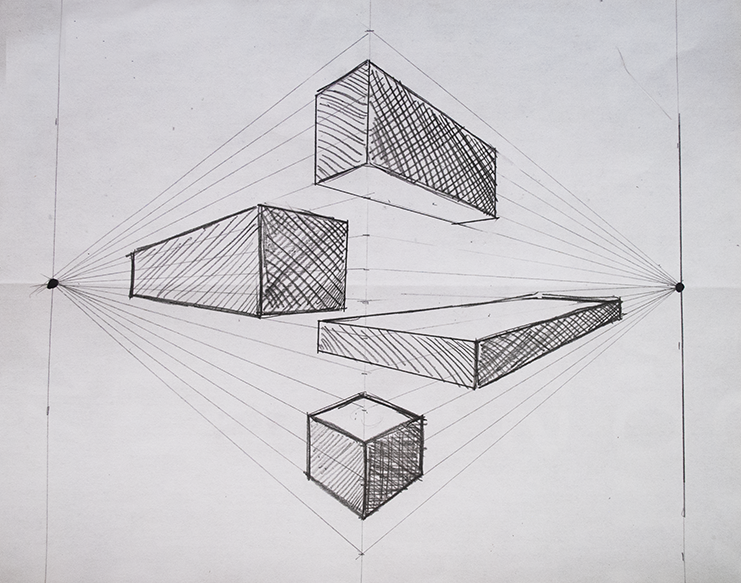
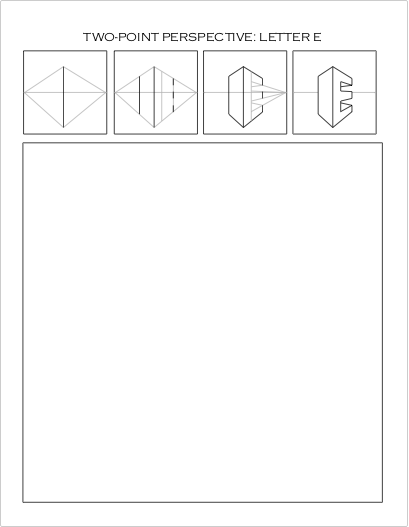
2 pt perspective practice
2 point perspective has 2 vanishing points.
|
| ||
|
|
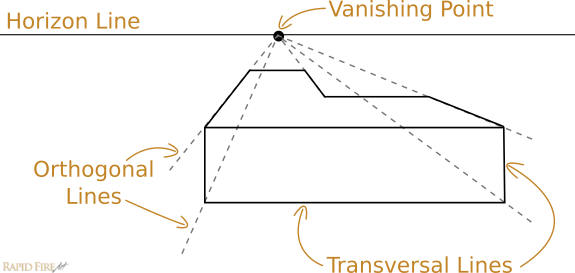
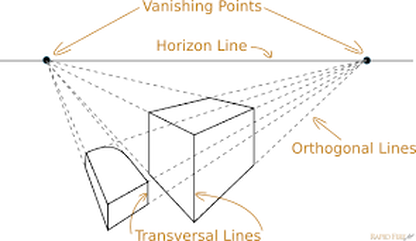
Linear Perspective: a system of creating an illusion of depth on a flat surface.
Linear perspective is thought to have been devised about 1415 by Italian Renaissance architect Filippo Brunelleschi and later documented by architect and writer Leon Battista Alberti in 1435 (Della Pittura). Linear perspective was likely evident to artists and architects in the ancient Greek and Roman periods, but no records exist from that time, and the practice was thus lost until the 15th century.
The three components essential to the linear perspective system are orthogonals (parallel lines), the horizon line, and a vanishing point(s). So as to appear farther from the viewer, objects in the compositions are rendered increasingly smaller as they near the vanishing point. Early examples of Brunelleschi’s system can be seen in Donatello’s relief St. George Killing the Dragon (c. 1416–17) and Masaccio’s painting The Holy Trinity (1425–27), a dramatic illusionistic crucifixion. Andrea Mantegna (who also mastered the technique of foreshortening), Leonardo da Vinci, and German artist Albrecht Dürer are considered some of the early masters of linear perspective. As the limitations of linear perspective became apparent, artists invented additional devices (e.g., foreshortening and anamorphosis) to achieve the most-convincing illusion of space and distance.
Resources:
My Modern Met-Perspective Drawing-LINK
My Modern Met-Perspective Drawing-LINK
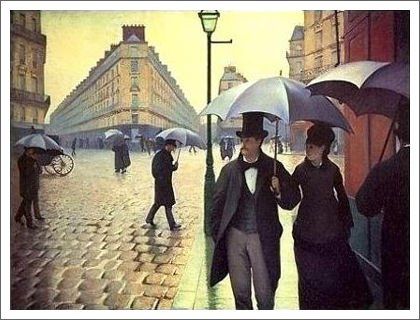
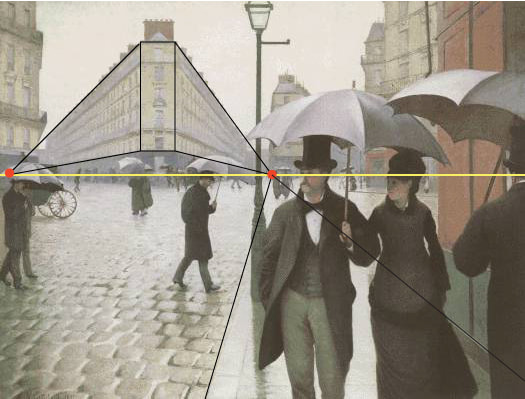
Look at the 2 paintings below. What do you notice about the illusion of space in each one?

|

|
|
The Annunciation by Duccio, 1311
|
The Annunciation by Botticelli, 1485
|
|
|
|
PRACTICE: Linear Perspective
|
|
|
Vocabulary:
-horizon line -orthogonal lines -vanishing point(s) -transversal lines |
PRACTICE: You will complete 4 linear perspective practice drawings in your sketchbook. Each practice drawing should take up 1 page. Aim to do 2 in 1-point perspective, and 2 in 2-point perspective.
Use the sheets below as references to help you. I will model this for you in class. |


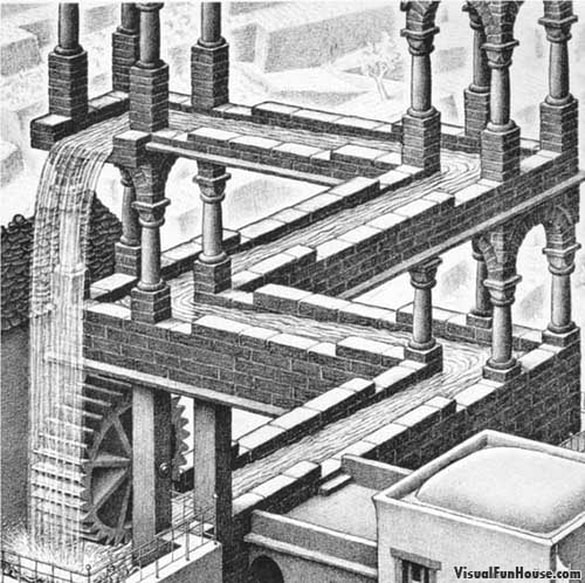
MC Escher
Read more about MC Escher at the link here
|
|
|
Artist Wayne White-LINK to this Website
Article About Wayne White-LINK

|
|
|