MANUAL 101
Shutter Speed
|
|
|
Shutter Speed Photo Assignments:
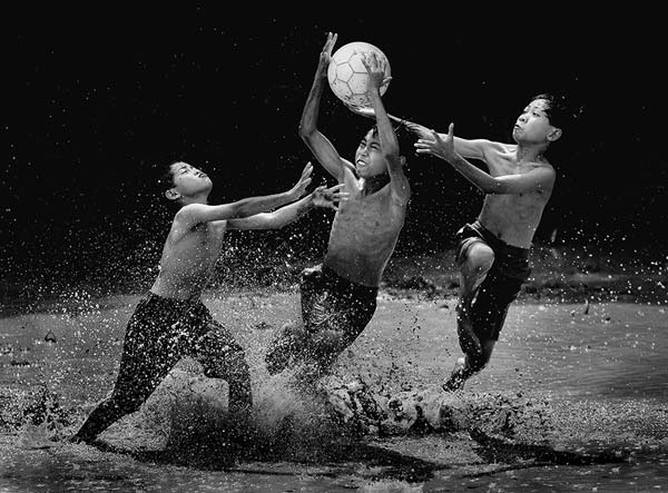
Fast shutter speed-FREEZING ACTION-tripod optional
-20 SUCCESSFUL/EDITED photos of something/someone in action
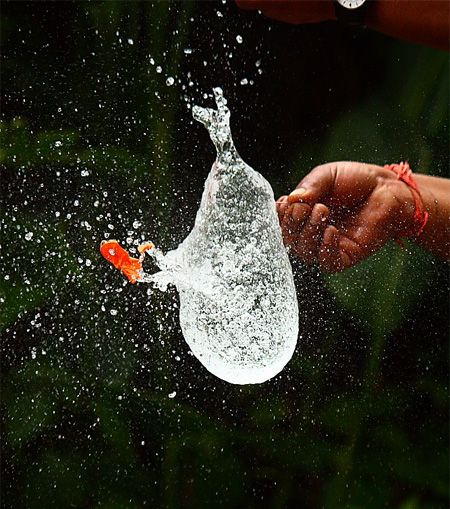
Aim to show at least 3 different subjects in motion (including water balloons at school).
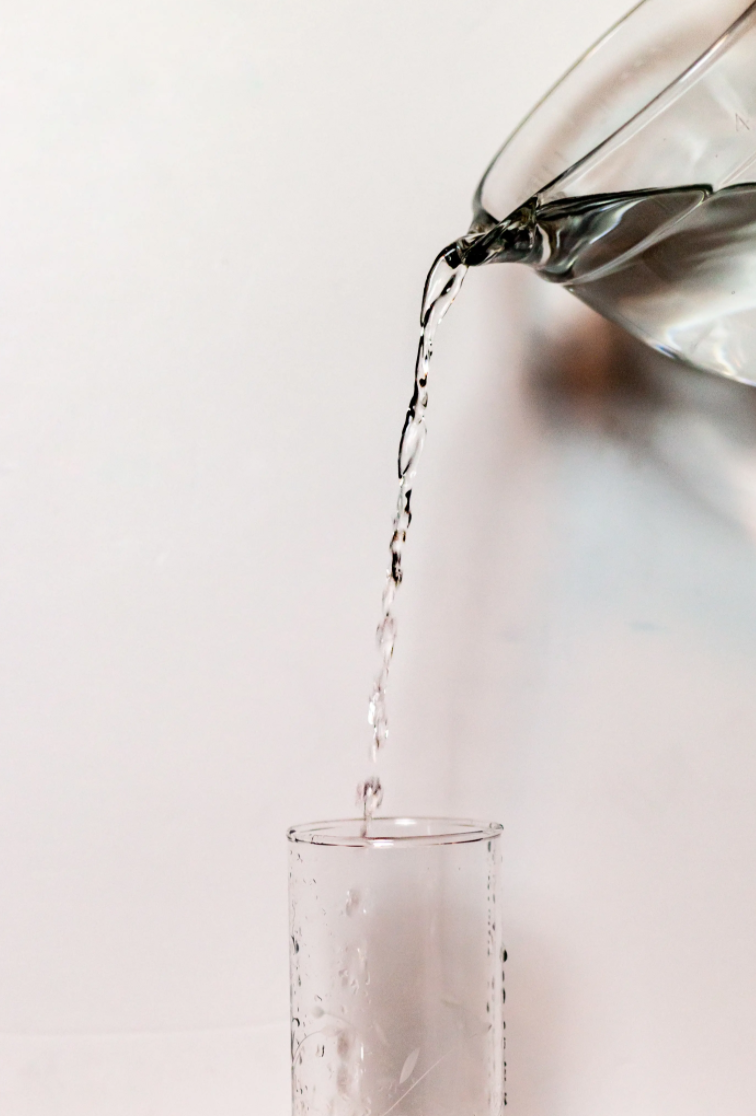
Inspiration/Ideas: Birds in flight, skateboarding, playground action, anything involving water in motion, pets playing, hair flips, any type of sport involving quick movement
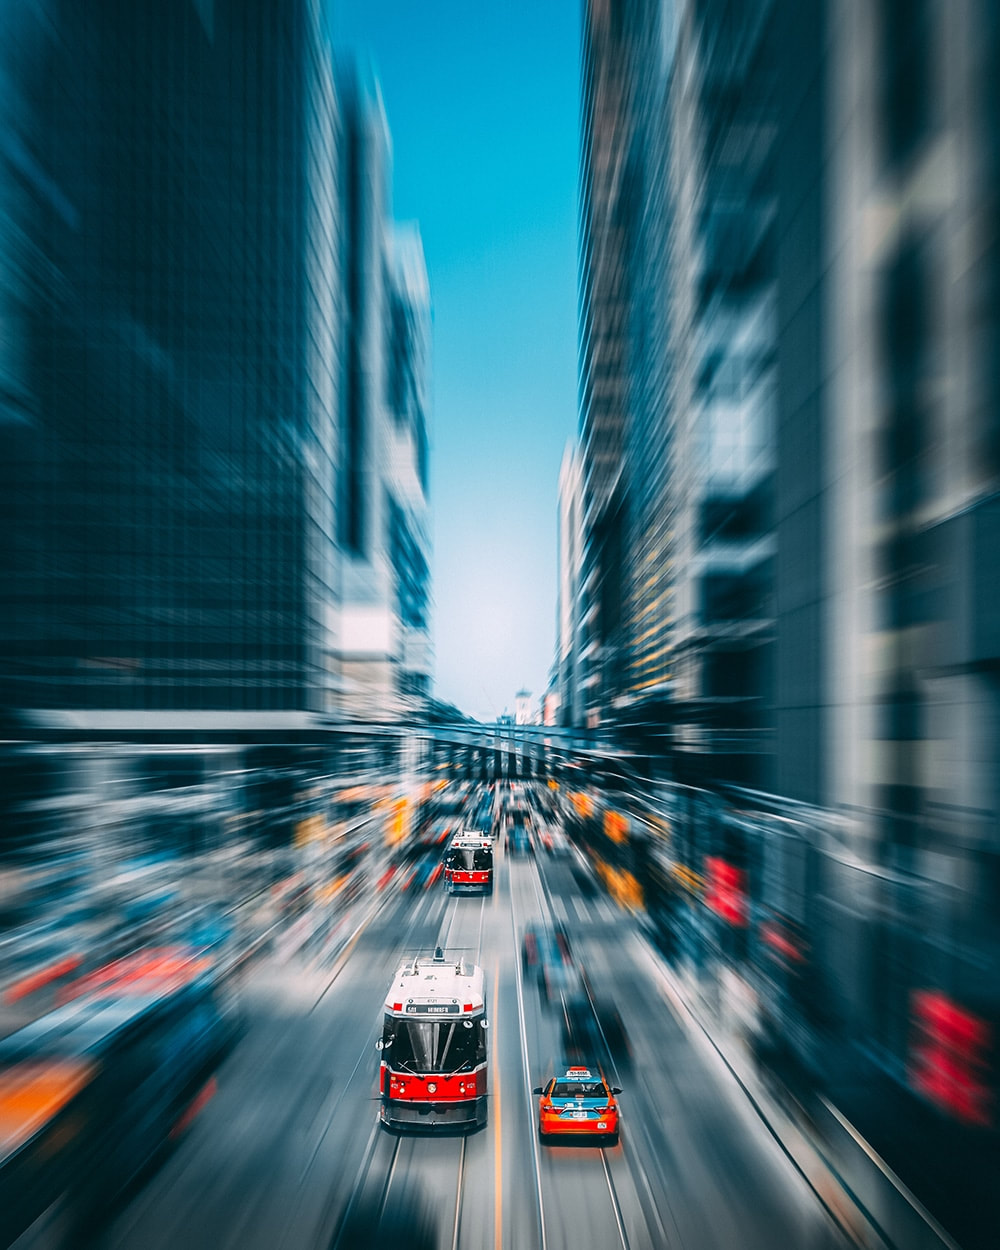
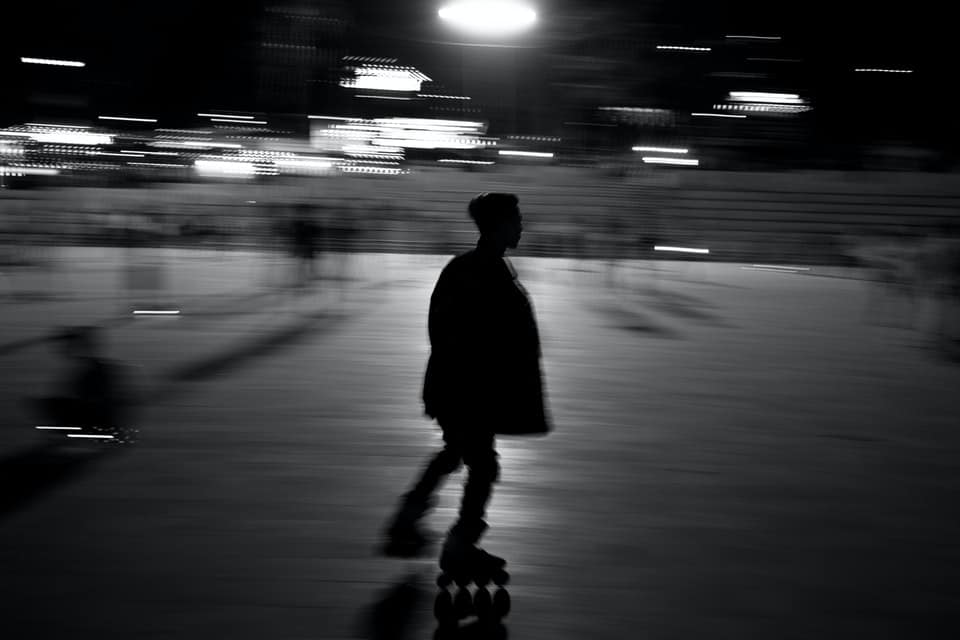
Slow shutter speed-MOTION BLUR without a tripod
-15-20 SUCCESSFUL/EDITED photos of zoom lens motion blur and abstract painting
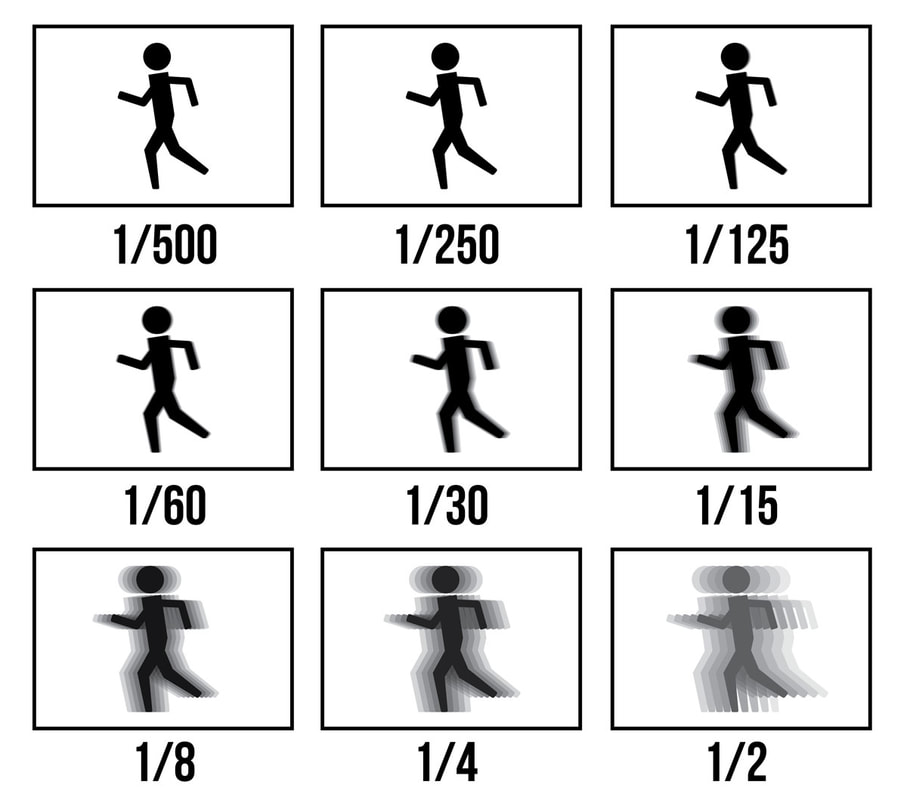
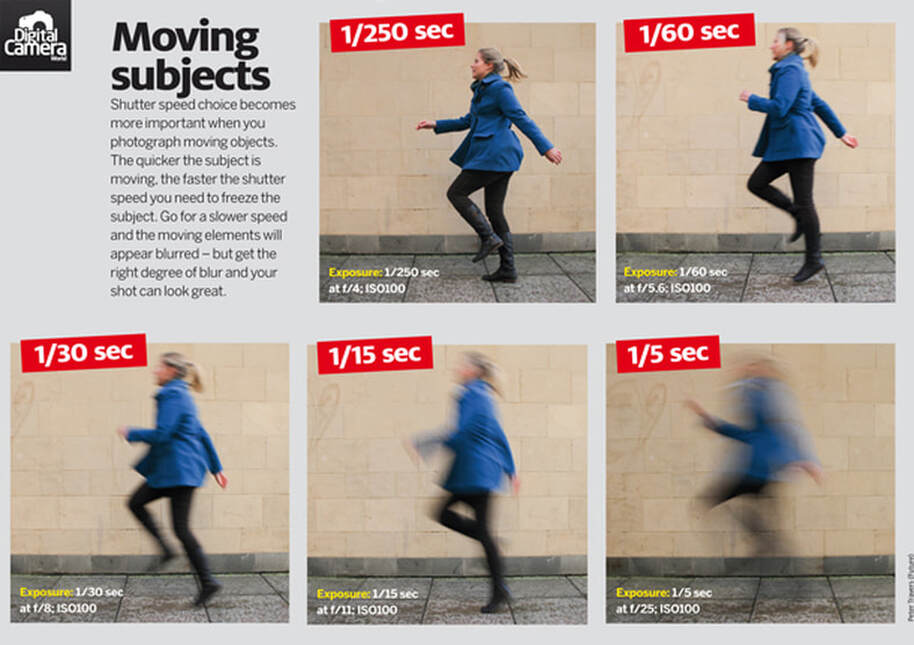
A slower shutter speed allows the subject to move while the camera is still recording the image, causing a blurred effect. The slower your subject is moving, the slower your shutter speed will need to be to produce a blur.
If you want to keep any part of your image in focus, you should use a TRIPOD if you are using a shutter speed slower than 1/60. This is because during that long of an exposure, camera shake will occur from hand-holding your camera. This will produce an image that is blurry all over (not what we want!) instead of just the moving subject.
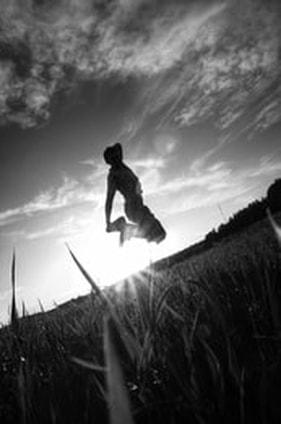
Inspiration/Ideas: silhouette of someone in motion, forest/tree landscape-side to side, view from a moving car, color background blur-diagonal movement, botanical blur
-20 SUCCESSFUL/EDITED photos of something/someone in action
Aim to show at least 3 different subjects in motion (including water balloons at school).
Inspiration/Ideas: Birds in flight, skateboarding, playground action, anything involving water in motion, pets playing, hair flips, any type of sport involving quick movement
Slow shutter speed-MOTION BLUR without a tripod
-15-20 SUCCESSFUL/EDITED photos of zoom lens motion blur and abstract painting
A slower shutter speed allows the subject to move while the camera is still recording the image, causing a blurred effect. The slower your subject is moving, the slower your shutter speed will need to be to produce a blur.
If you want to keep any part of your image in focus, you should use a TRIPOD if you are using a shutter speed slower than 1/60. This is because during that long of an exposure, camera shake will occur from hand-holding your camera. This will produce an image that is blurry all over (not what we want!) instead of just the moving subject.
Inspiration/Ideas: silhouette of someone in motion, forest/tree landscape-side to side, view from a moving car, color background blur-diagonal movement, botanical blur
Slow shutter speed-PANNING
-Panning shots with 2 different moving subjects- 6-8 successful photos
Use shutter priority mode, set your shooting mode to continuous or burst mode and choose 2 subjects you will use to try panning. Aim to take about 20 photos per subject, or until you get some really sharp images of your subject with a beautiful blur in the background.
In the end, you should have a several successful images of each of your 2 different subjects.
Slow shutter speed-LONG EXPOSURE with a tripod
-Light Trails (4-5 successful long exposure light trail shots)
Scroll below for more info...
'Capturing Movement' Guidebook
| masteringicm.pdf |
Types of motion blur:
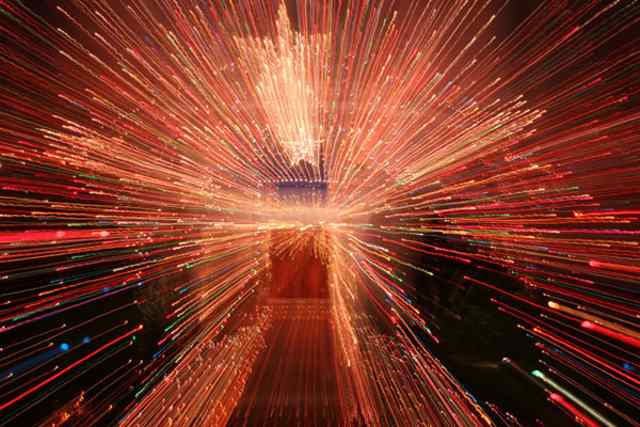
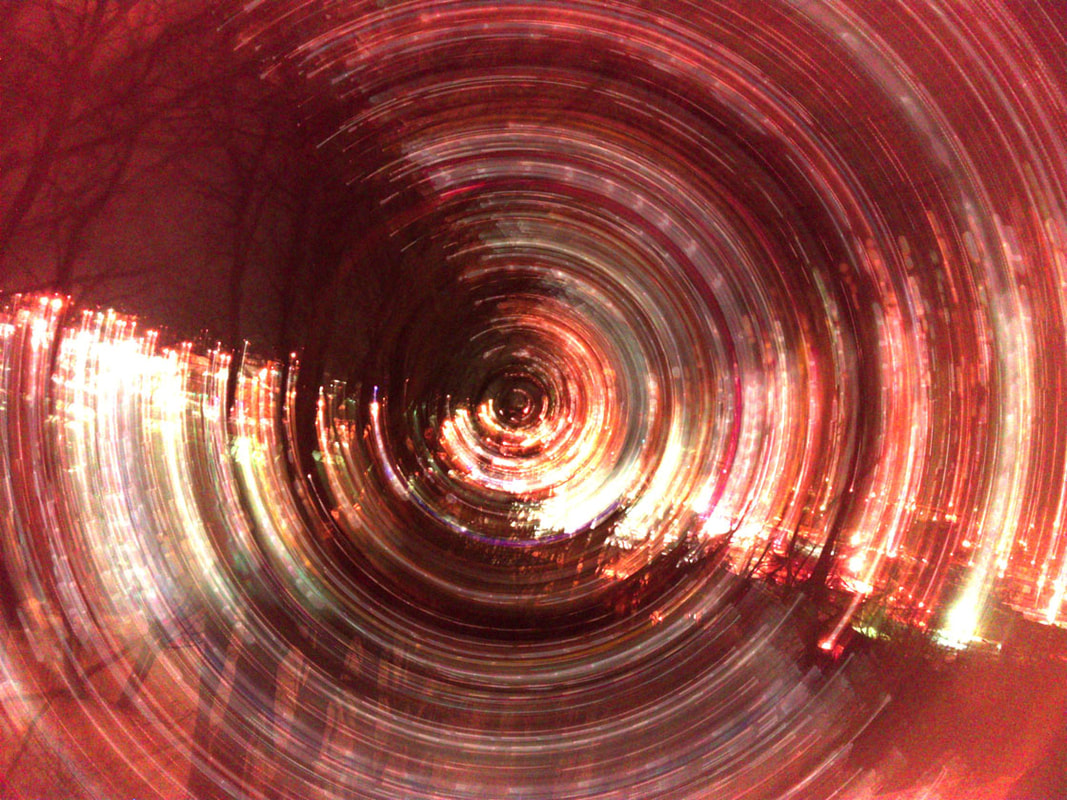
MOTION BLUR: ZOOM LENS/ZOOM BLUR TECHNIQUE
|
Zoom lenses are very versatile because they enable us to make a subject larger or smaller in an image. And with a simple push or pull of the zoom lens during a timed exposure, you can bring life and movement to a stationary subject. Tripod use is up to you, but recommended as it results in a cleaner image. The most common result of zooming (or racking) the lens during a long exposure is the appearance of lines radiating out from the center of your subject.
You can use the zooming technique with any number of subjects. However, bright lights against a dark background often yield the most dramatic images. To create a zoomed image, you’ll need to use a slow shutter speed of at least 1/30 second or preferably longer. Zoom through the full range of the lens’s focal lengths for intriguing results, or even just partway. Experiment by zooming from the wide end to the longest end, and vice versa. Depending on the lighting conditions, you should use a small aperture setting and a low ISO. |
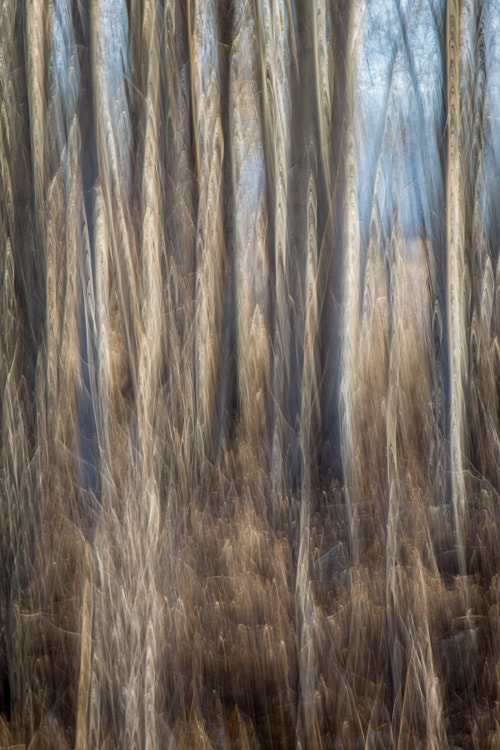
MOTION BLUR: Abstract "painting' With a Slow Shutter Speed (no tripod)
spinning the camera
Up and down movement
|
Instead of moving only the lens during a long exposure, experiment by setting the entire camera in motion. You can capture some dynamic images of stationary objects this way. Some of the best subjects are neon signs or buildings at night, but you can also capture some great impressionistic images of flowers or foliage in daylight.
The amount of movement that occurs when you simply hand-hold a camera during a long exposure is often enough to produce a pleasing amount of blur. You can also move the camera up and down, side to side, or in a circular motion for artistic effects. Just remember that even slight camera movement during an exposure time of ¼ to ½ second can produce an abstract rendering of your subject. The results of camera movement are often unpredictable. And because of the long shutter speeds involved, it’s a good idea to experiment with different exposure settings. Again, it’s a good idea to use low ISO settings and small apertures (high F stop number). 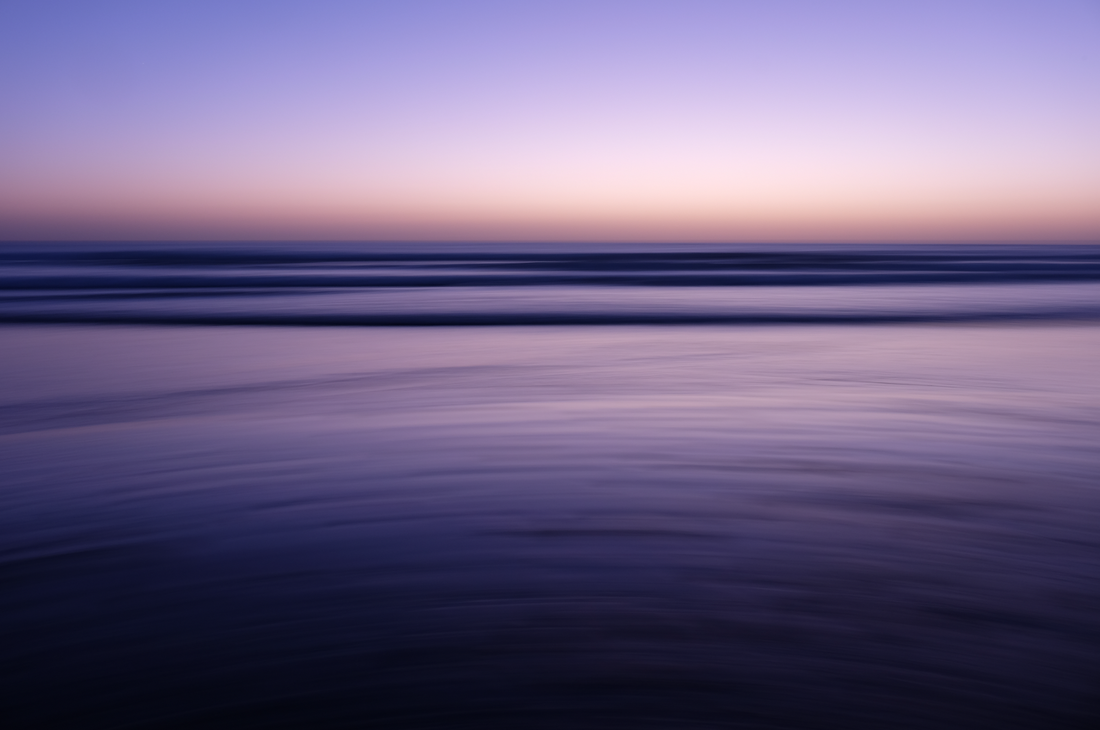
side to side movement
|
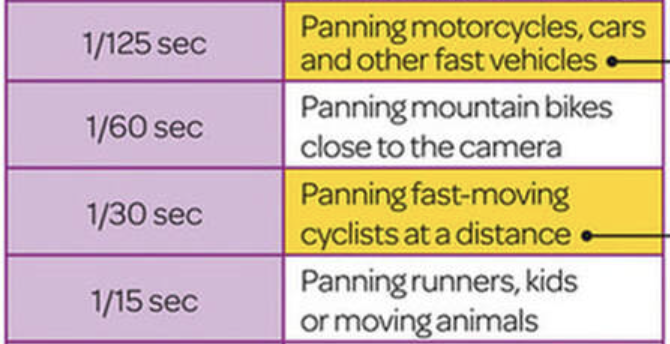
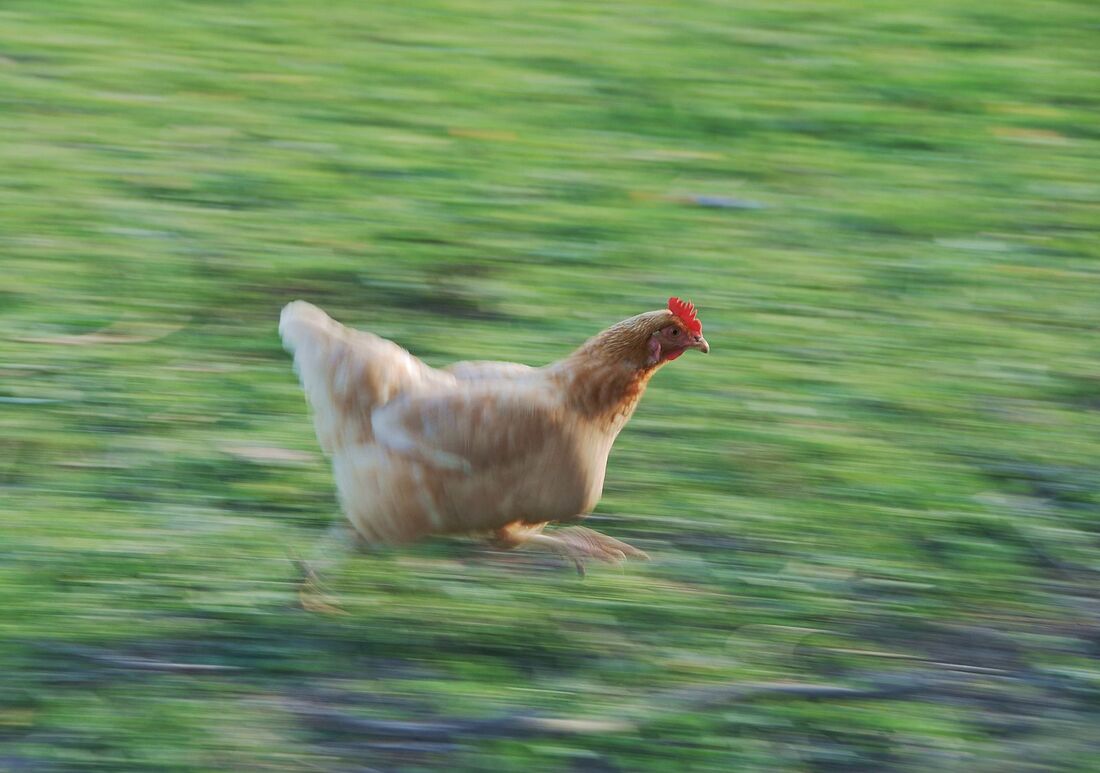
Motion Blur: Panning with a slow shutter speed (No Tripod Necessary)
|
Recommended Camera Settings:
ISO: 100 -Go low, especially in a daytime light setting Aperture: F9-F16 (experiment with this. Push your aperture number higher if your shot is overexposed) Shutter Speed: See right Focus settings: Auto focus Shooting Mode: Continuous Shooting/Burst Mode |
|
|
Panning is a great way to imply motion in your photography. This technique can be used to create a sense of motion in your photography thanks to the combination of a sharp subject and a motion-blurred background. Panning is a technique where you pan your camera while tracking a moving subject. By doing so, you end up with the subject that is in focus, but a motion-blurred background. This gives the image a feeling of movement and speed. Panning is quite different from motion blur photography because the main subject you are tracking has minimal motion blur. Instead, the subject is relatively frozen in motion while the background is moving. To get this effect, you need to pan your camera with the moving subject while taking the shot. You will have to experiment to get the right speed setting to achieve the effect you want. A few tips include: Subject Example Shutter Speed (s) Slow-moving cyclists or runners-1/4 to 1/15 Moderate Cars or bikes on a city street-1/15 to 1/30 Fast-moving car-1/60 to 1/125 |
|
|
|
|
|
|
|
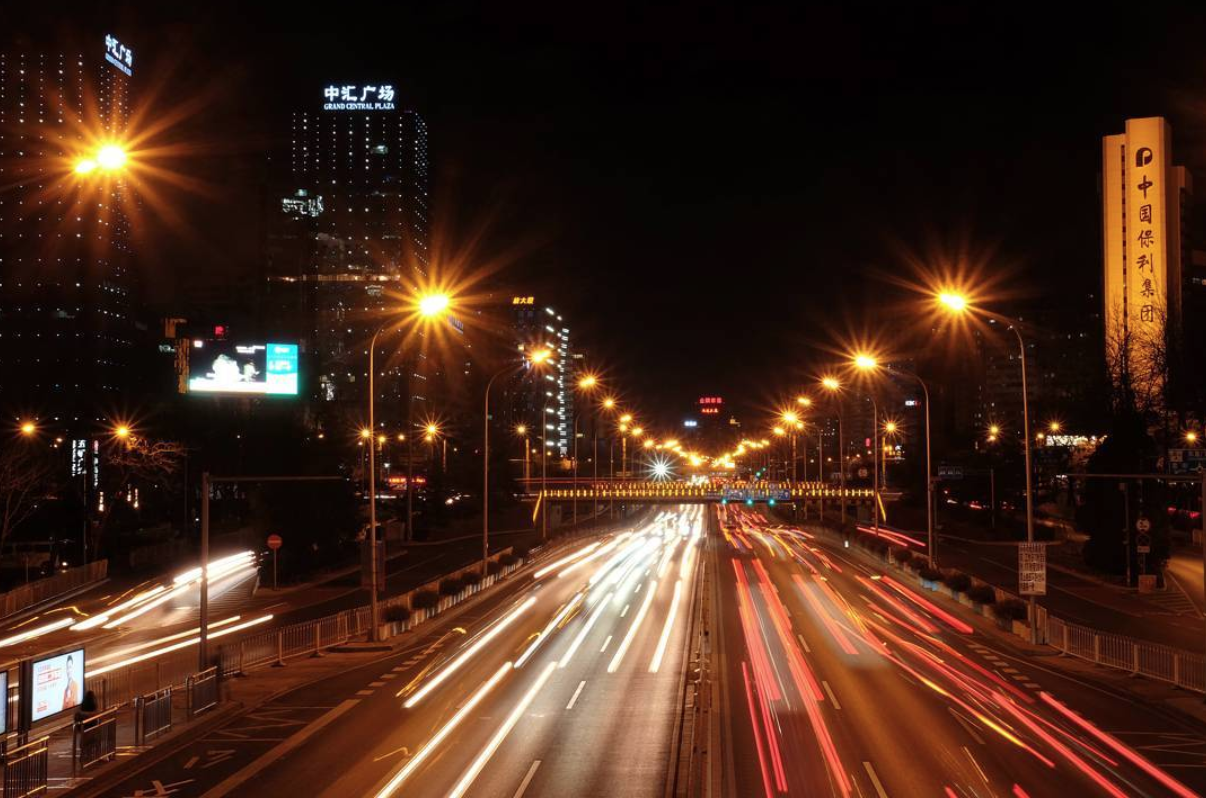
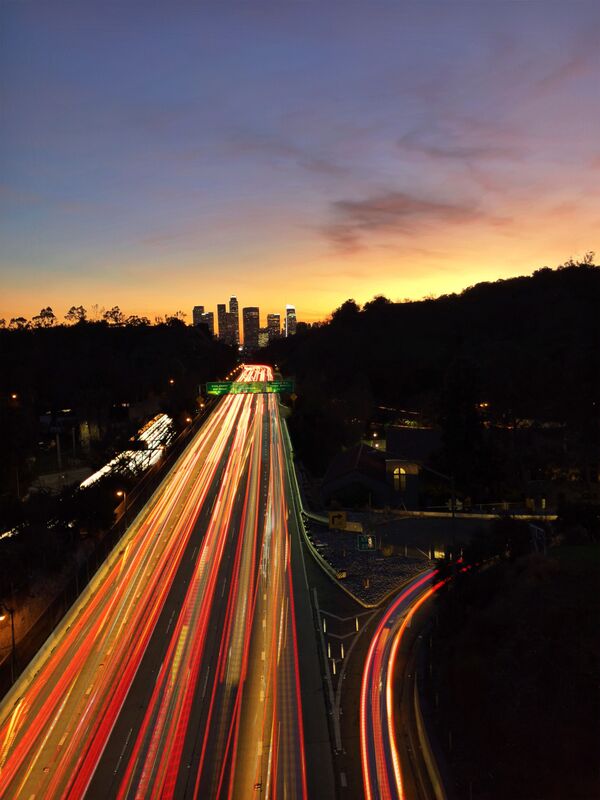
Long EXPOSURE: Light Trail Photography- tripod required
|
You’re going to practice creating light trails by photographing passing vehicles. You’ll need a tripod for this technique (or some other way to stabilize your camera) as you will be opening up your shutter for a few seconds or more at a time, and you need your camera to stay perfectly still. Otherwise, you’ll get camera shake, and your photos will be blurry. You will also need a camera that lets you control the shutter speed. And, you will need to be doing this technique during or after twilight, on a night that has little or no wind (to avoid camera shake).
RECOMMENDED DSLR CAMERA SETTINGS Here are a few settings to get you started–you will need to experiment, as not every situation is the same. The lighting, the time of night, and the speed of traffic will all influence the shutter speed you need to use. To start off, I’d advise that you use the recommended settings and experiment from there:
Once your camera is set up at your ideal vantage point, remember you will have to play around with your shutter speed a bit until you’re happy with the results. Start with 3 seconds and try changing your shutter speed in increments up to 30 seconds. |

|
Light Trail VIDEO Tutorials
|
|
|
FAST SHUTTER-Freezing Action
|
PHLEARN-Resource on Shutter Speed-LINK
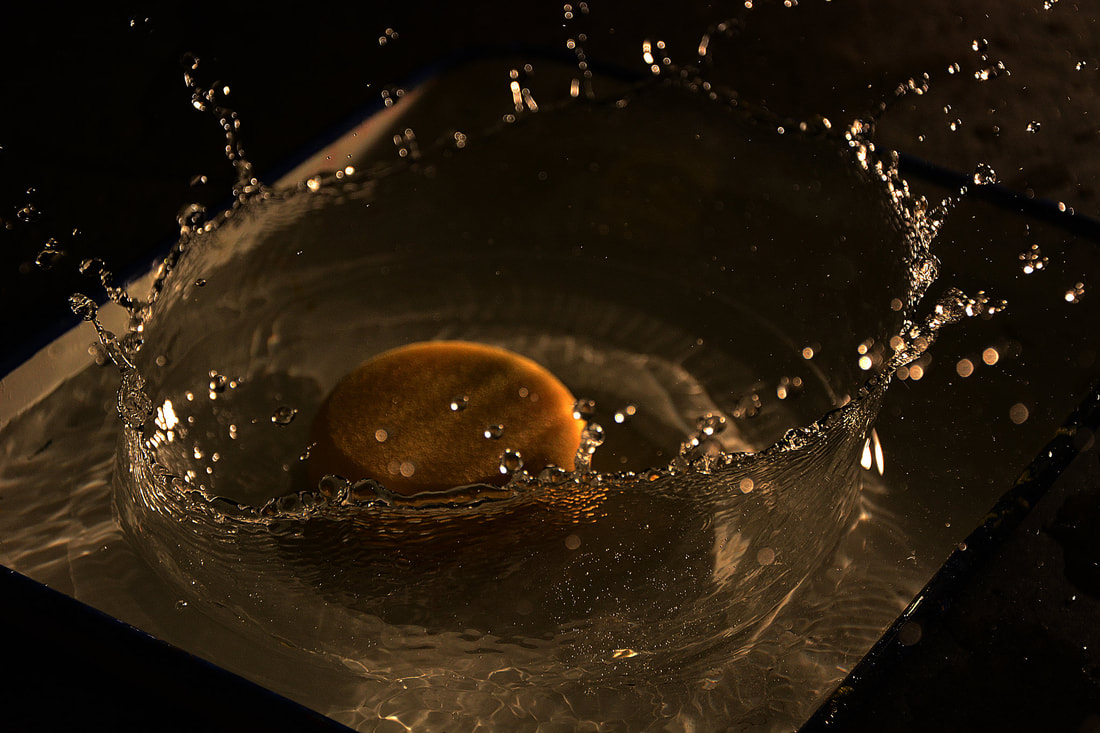
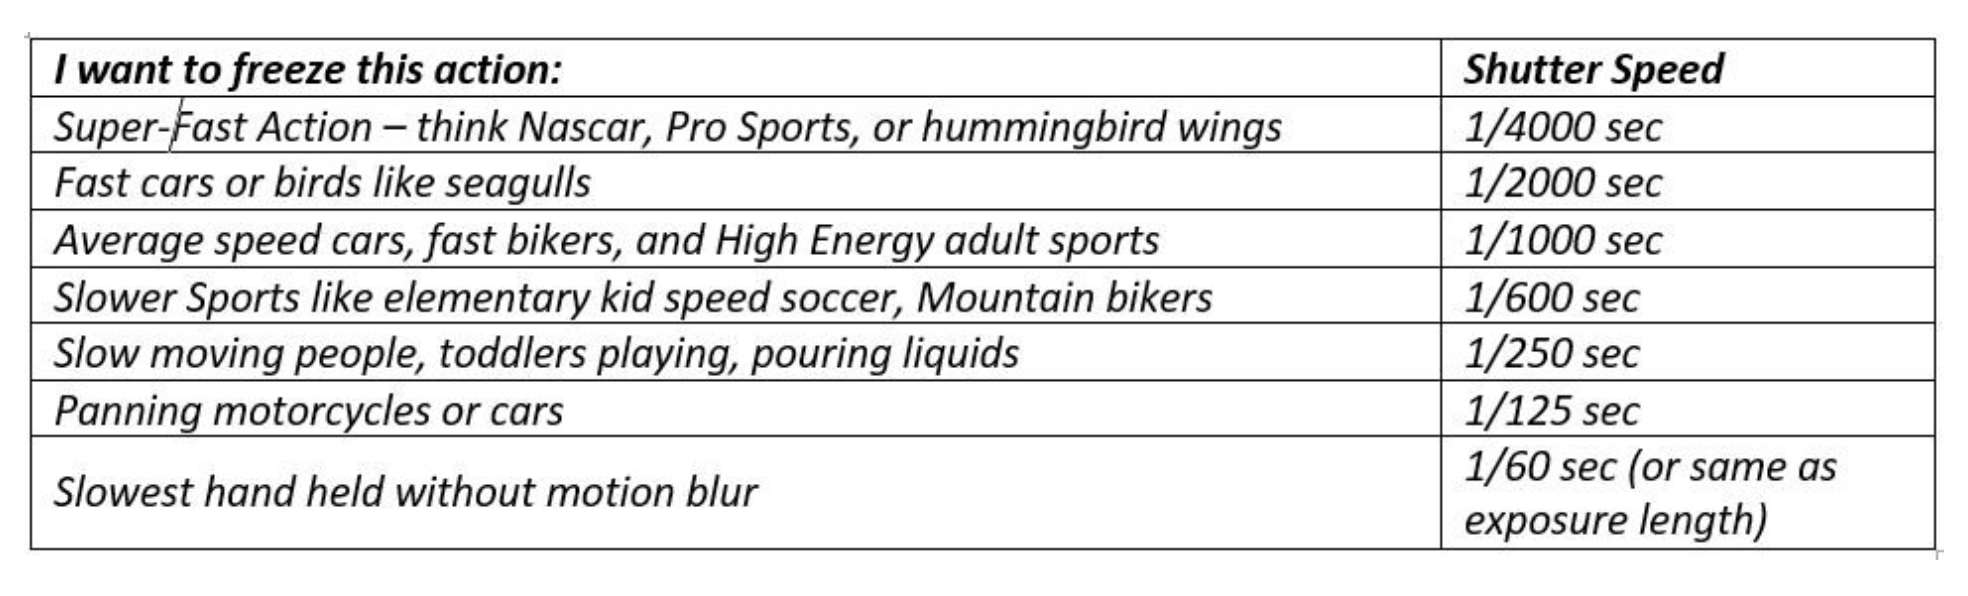
To freeze action and keep your moving subject(s) sharp you will need a fast shutter speed. The faster your subject is moving, the faster your shutter speed will need to be. A super fast shutter speed means LESS LIGHT is coming into your shutter so you may need to increase your Aperture and boost your ISO to a higher setting. |
|
|
|

|
|
SHUTTER SPEED
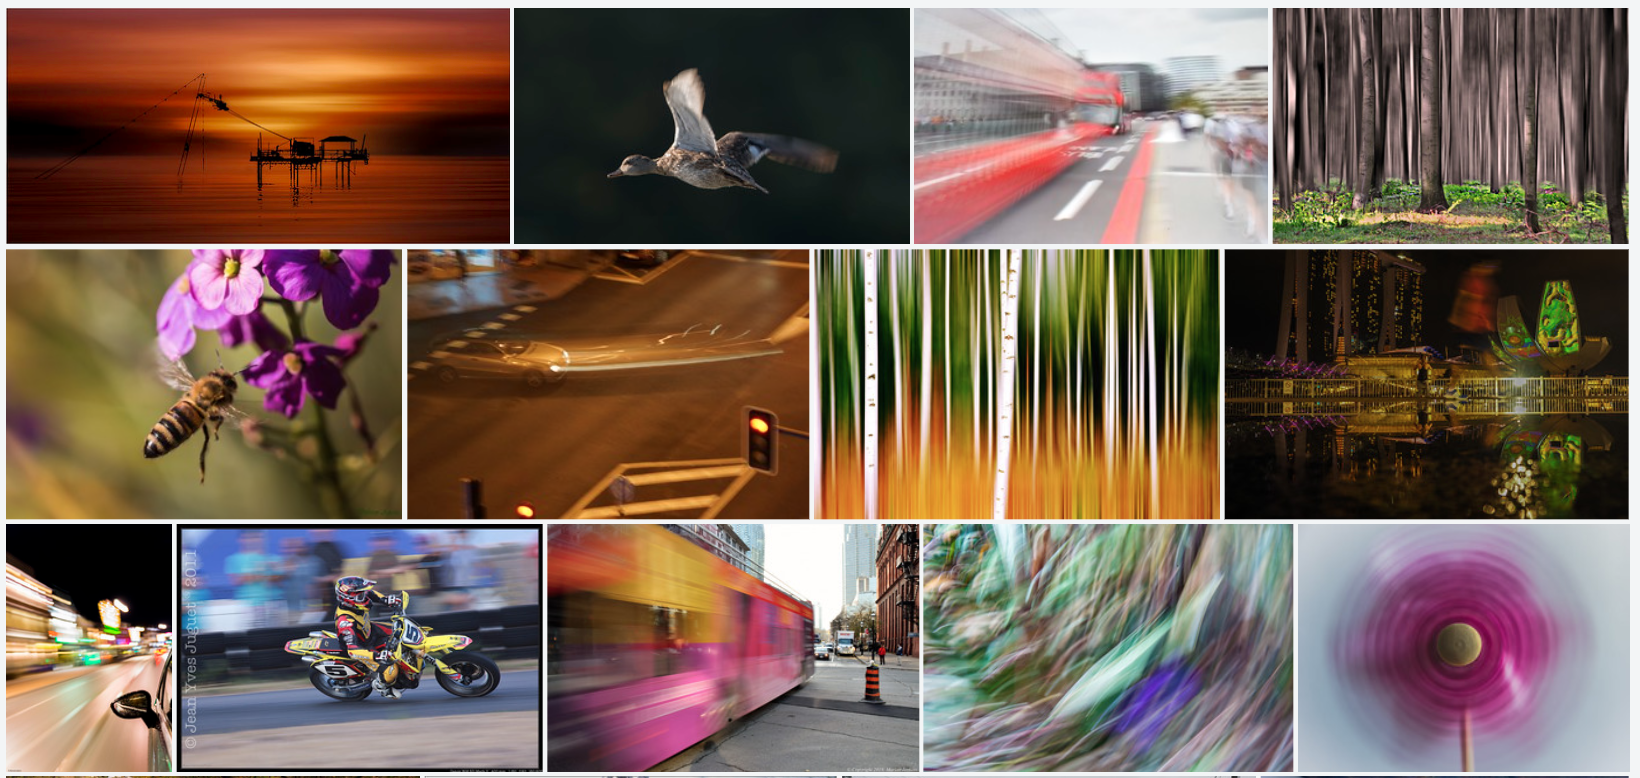
Photographers have two primary options when capturing motion or movement. They may wish to "freeze" the action exactly at a specific moment, or they may choose to purposely "blur" the motion to emphasize the movement or speed of their subject.
Both options require the photographer to manipulate the shutter speed to achieve the desired effect.
Both options require the photographer to manipulate the shutter speed to achieve the desired effect.
Important reminder about Exposure and Shutter Speed:
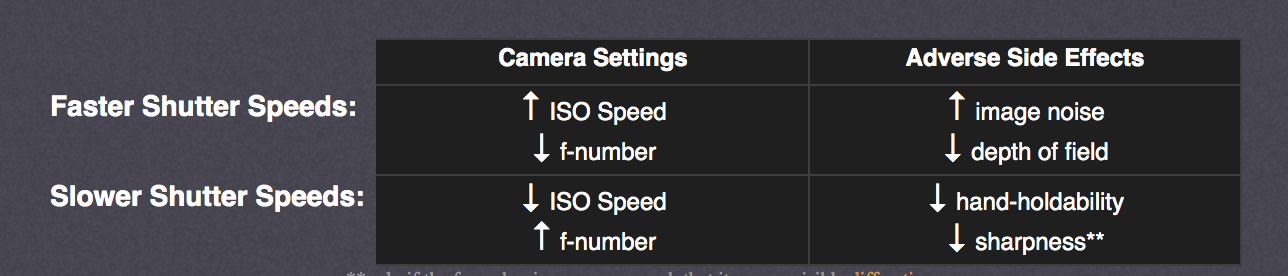
Keep in mind that shutter speed not only affects motion, but exposure as well.
The faster your shutter speed, the less light can enter your camera. (HIGH ISO SETTING, LOW/MEDIUM APERTURE SETTING)
The slower your shutter speed, the more light will enter your camera. (LOW ISO SETTING, HIGH APERTURE SETTING)
This is important to consider, especially if you plan to use a very fast shutter speed when there is not much light, or a very slow shutter speed in bright daylight.
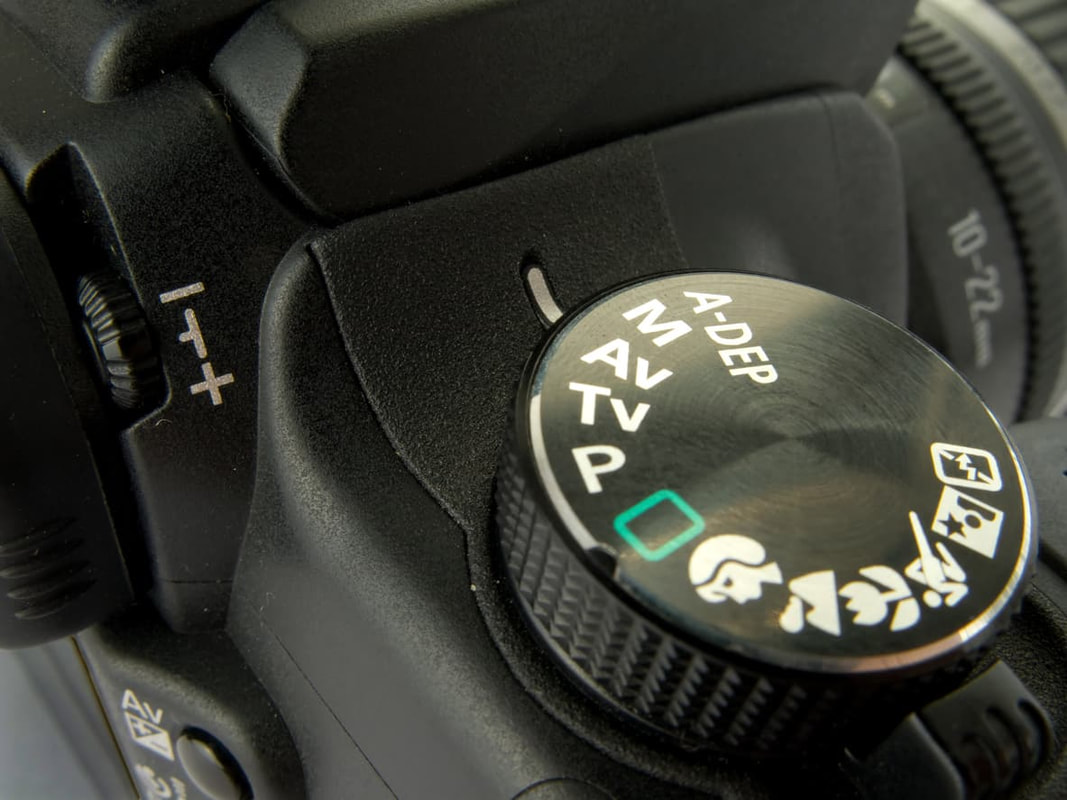
Using 'Shutter Priority' Mode on your DSLR-LINK
|
Shutter priority mode is indicated as TV or S on your camera's dial.
When shooting in shutter priority mode, you get to determine the shutter speed and the ISO the camera uses to capture an image. Meanwhile, the camera determines an aperture that works with the settings you've identified in order to get a good exposure. That means that shutter priority mode is a semi-automatic mode - you and the camera work together to get the right exposure. Think of this as a go-between from full automatic mode, in which the camera has all the control, and full manual mode, in which you have to determine all of these settings. |
|
Motion Blur examples-Flickr Link