Exploring the theme of place/space through:

|
|
Intro to STILL LIFE |
Intro to the FAUVISM Movement
|
|
|
|
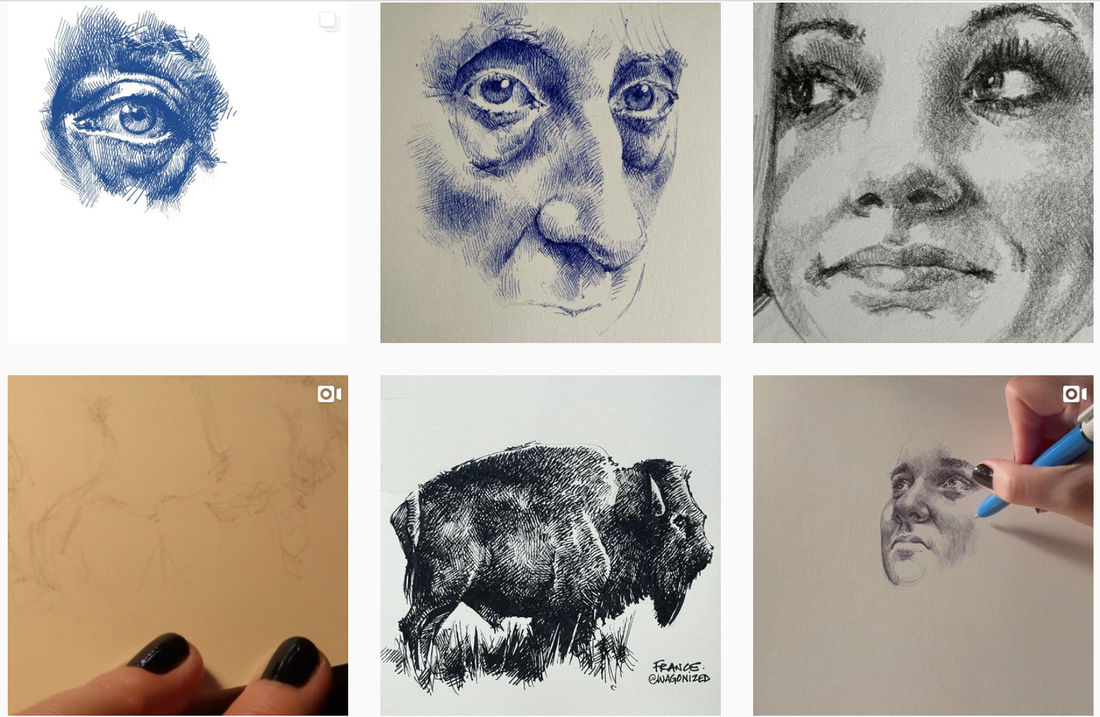
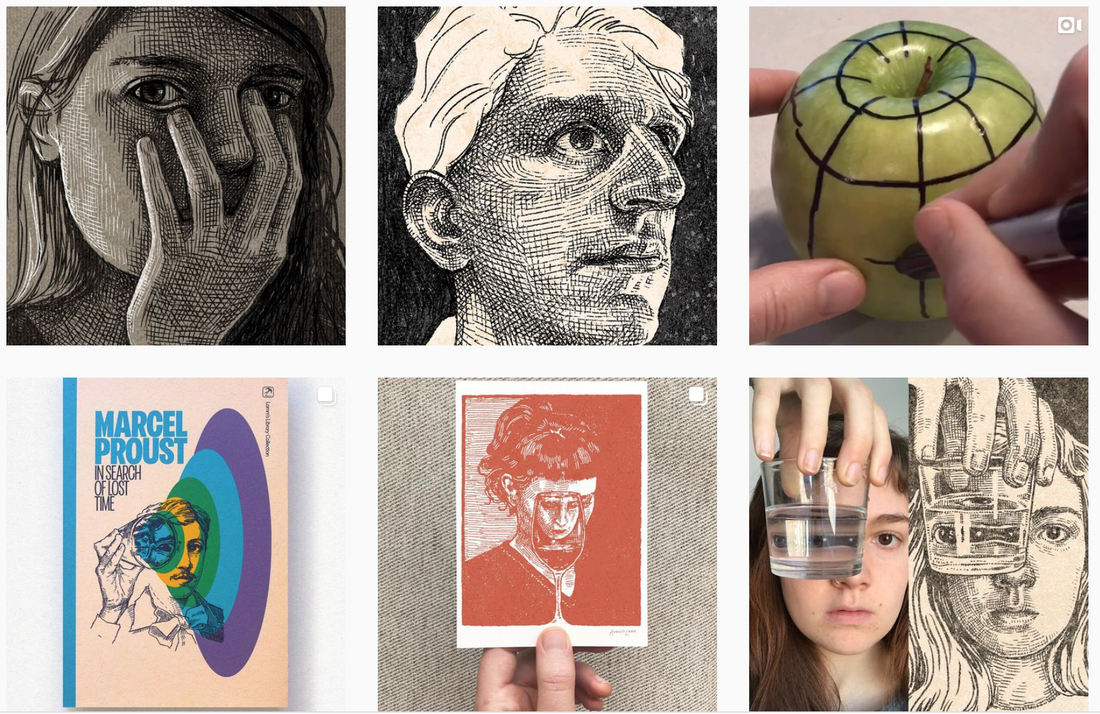
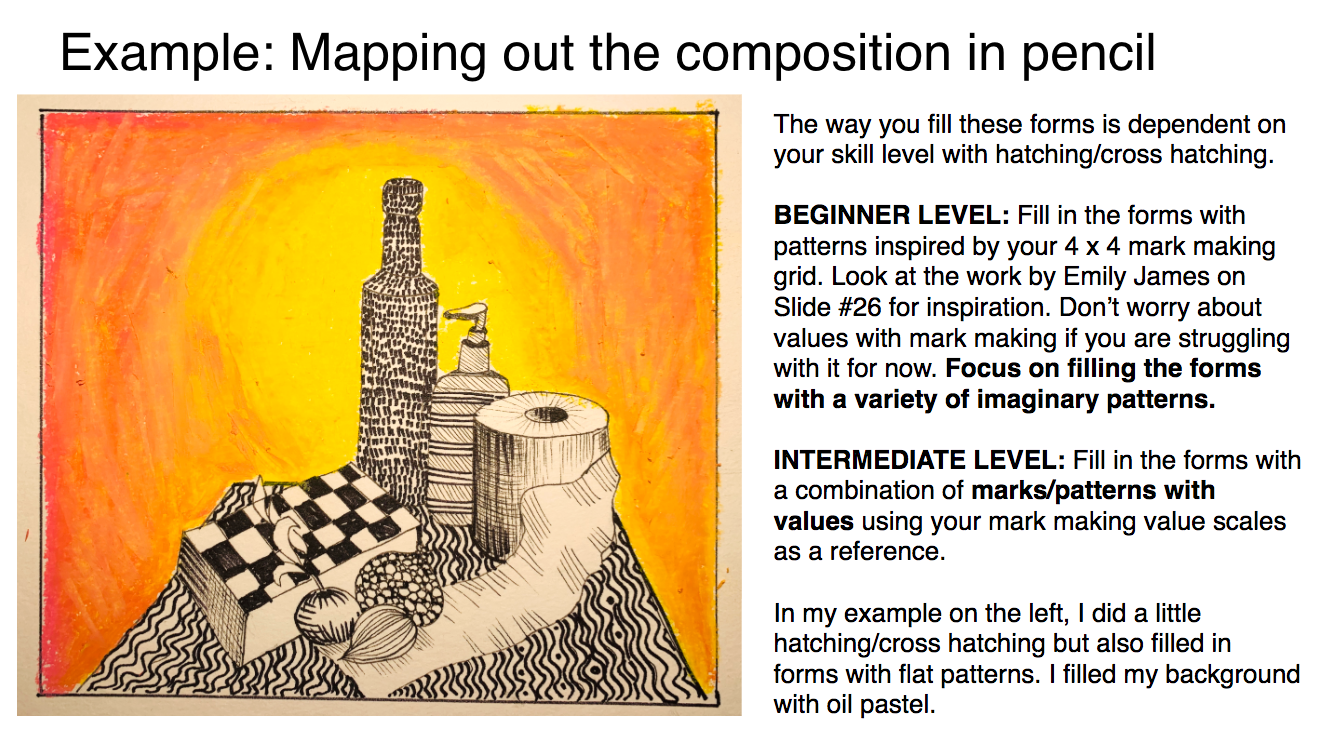
Hatching/ Cross Hatching Artist INspiration
|
|
|
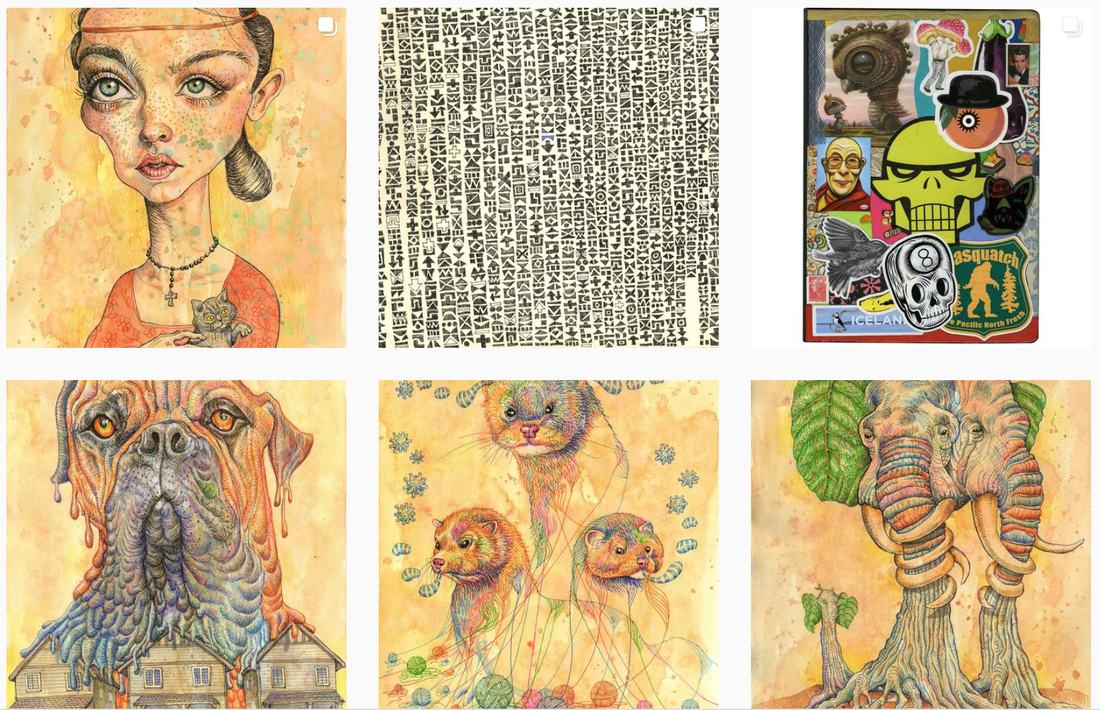
Artwork below by Beya rebai (oil pastel) and Angela McKay (Watercolor/Gouache)
Look at how they work with LIMITED COLOR SCHEMES, EXAGGERATING COLOR and MARK MAKING with LAYERS OF MEDIA
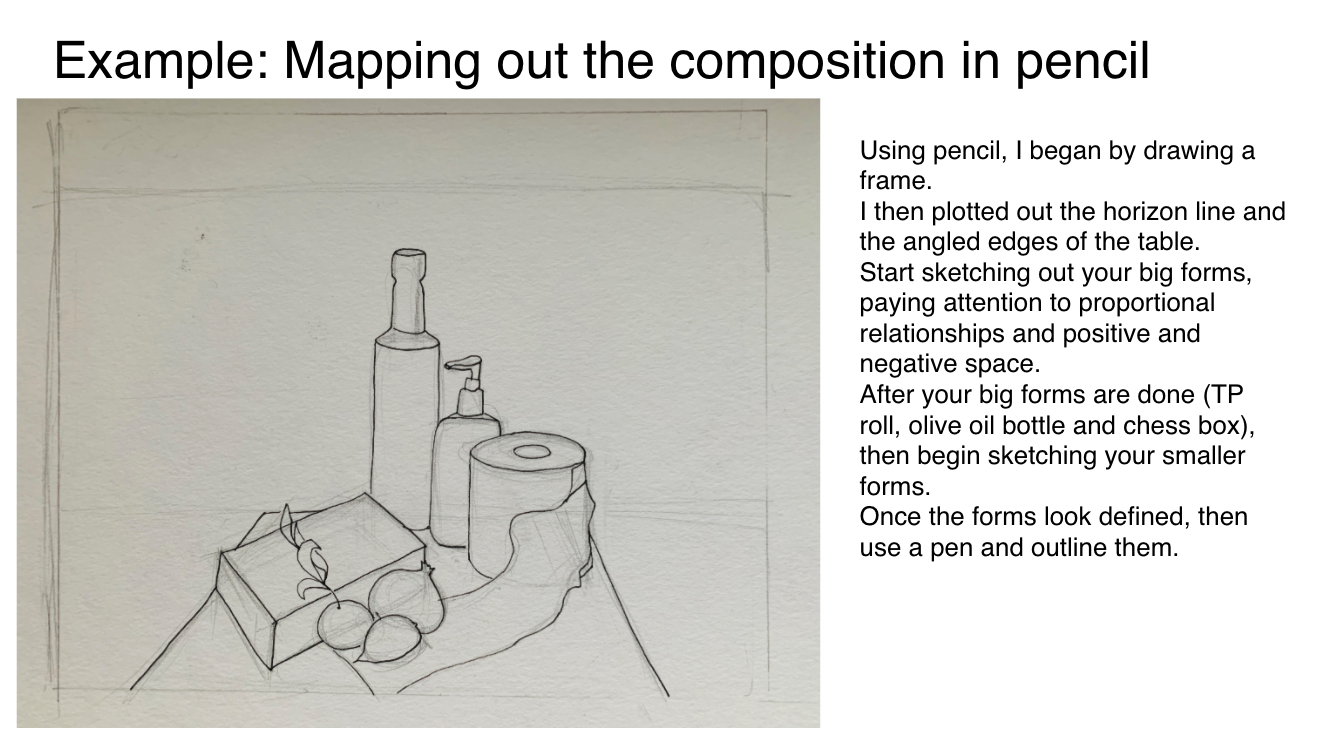
Skill Practice: |
Studio outcome: |
|
All students must demonstrate these skill practice assignments:
1. Mark Making Value Scales (3 scales: hatching, cross-hatching and free choice) 2. Cylindrical Form Drawing-Mug (using hatching and cross hatching with pen or pencil to add values) 3. Still Life Composition Study Drawing (drawing from the same composition and students having free choice on how to shade and color the objects and background) 6. Atmospheric Perspective Practice (small study with pencil, larger study with watercolor) OPTIONAL: 1 pt perspective practice OPTIONAL: 2 pt perspective practice |
Choice-based studio project:
Option 1: a room/landscape/cityscape/seascape of a location/place significant to you (demonstrating atmospheric perspective) Pre-study: analysis of an inspiration artist working to depict a specific space/landscape. Media testing with media to use. Option 2: a still life of 3-5 objects significant/symbolic to you or the context of our times. This can be B&W, monochromatic or in color. Pre-study: Media experimentation employing mark making/pattern and an analysis of a still life artist and their work. |
Final Plan
For your final plan, you should decide:
-What project listed above will you do?
-What project listed above will you do?
|
Landscape -watch video 'how color became free (Fauvism)'-posted above -Choose your 'place' or 'places'. It should be a place you have physically spent time in that means something to you. Perhaps it is where your parents met each other, or where your grandparent was born. Or perhaps it's a place that represented a special time or holiday you experienced. Or maybe it represents what "home" means to you... -Create 4 mini studies of the landscape you'd like to work with. If you are doing 1 landscape, Select a reference photo of a place you have been for these mini studies. This can be a reference photo taken by you, someone you know or borrowed from google images. -Artist influence: Each mini study should be influenced by an artist (look through the still life artist inspiration slideshow below). Mini-studies should be in color and explore media. You should exaggerate your colors as the Fauvists did. Think about the emotive quality related to the place you are depicting. Experiment with mark-making and line quality and direction. 1 of your 4 mini-studies will be your final plan to take larger scale. |
Still life -watch video 'still in the game'-posted above -look over the 'still life inspiration' slideshow below Select 3-5 objects demonstrating size variation and form variation. Be mindful about the meaning and symbolism of each object. Think about including both manmade forms and natural forms. Usually still lifes have a bit of both. Questions to consider as your select and layout your objects for a photo shoot:
Aim to take at least 5 photos of your still life arrangement, moving some of the objects around, changing your point of view, or adjusting the light source direction. You will create 4 mini studies using a variety of media and styles with your 1-2 favorite photos. Each mini study should be influenced by a still life artist (use the slideshow below). 1 of your 4 mini-studies will be your final plan to take larger scale. |
20 Artists on the Work They Made in 2020-article link
Still Life


|
|
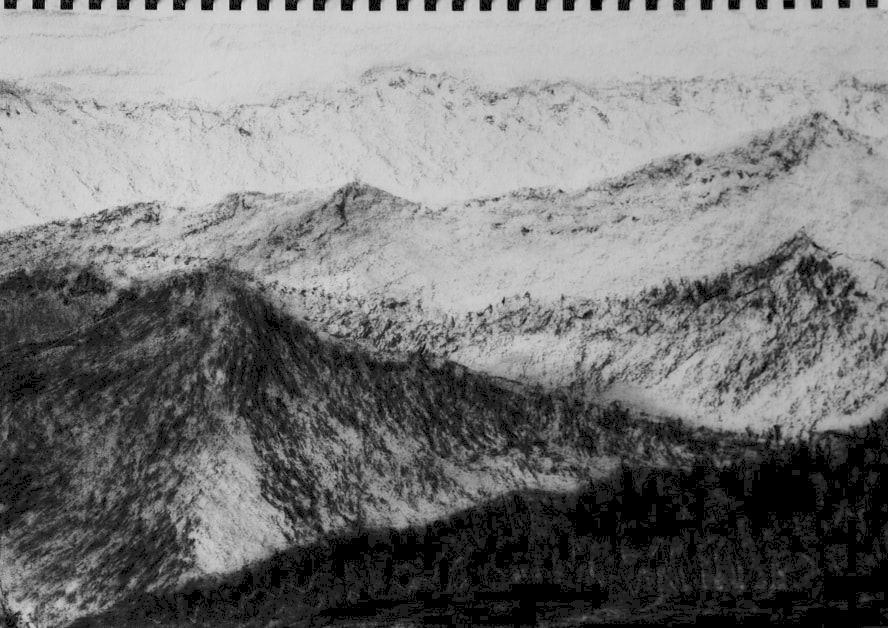
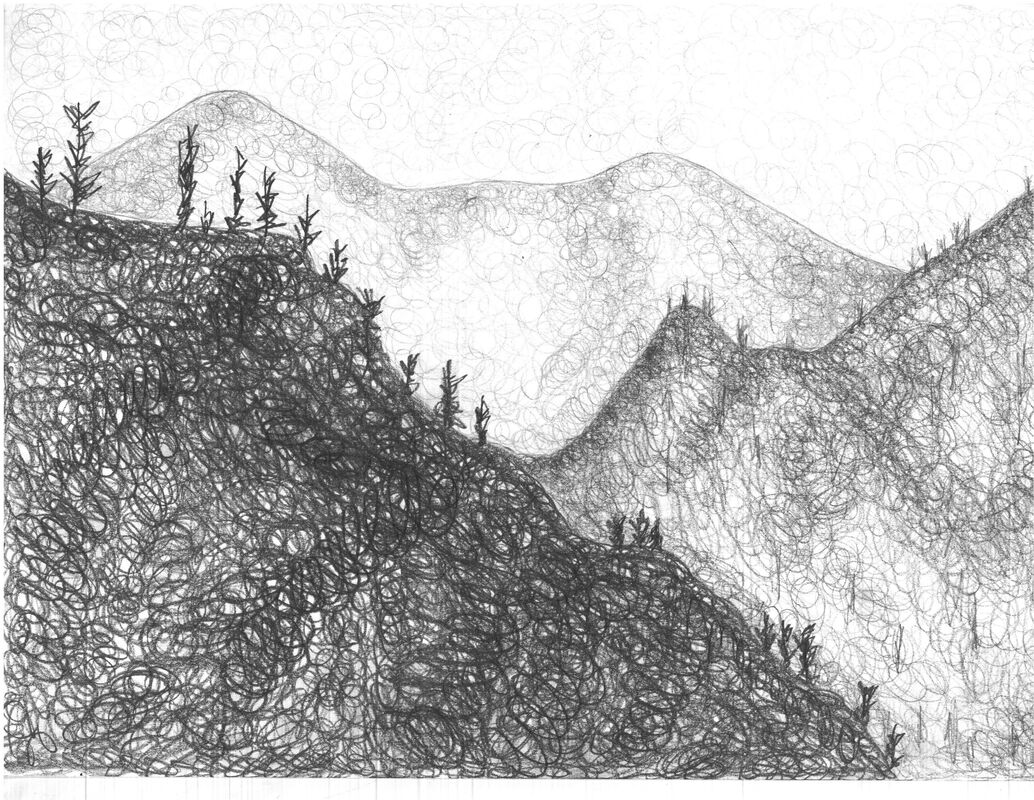
Atmospheric perspective
Reference images for atmospheric perspective


|
|
Linear Perspective - resource Page Link
|
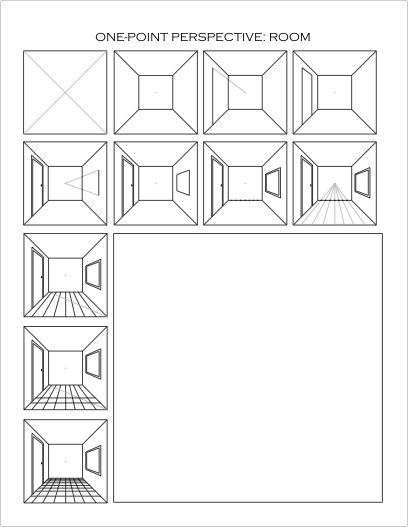
1 pt perspective practice
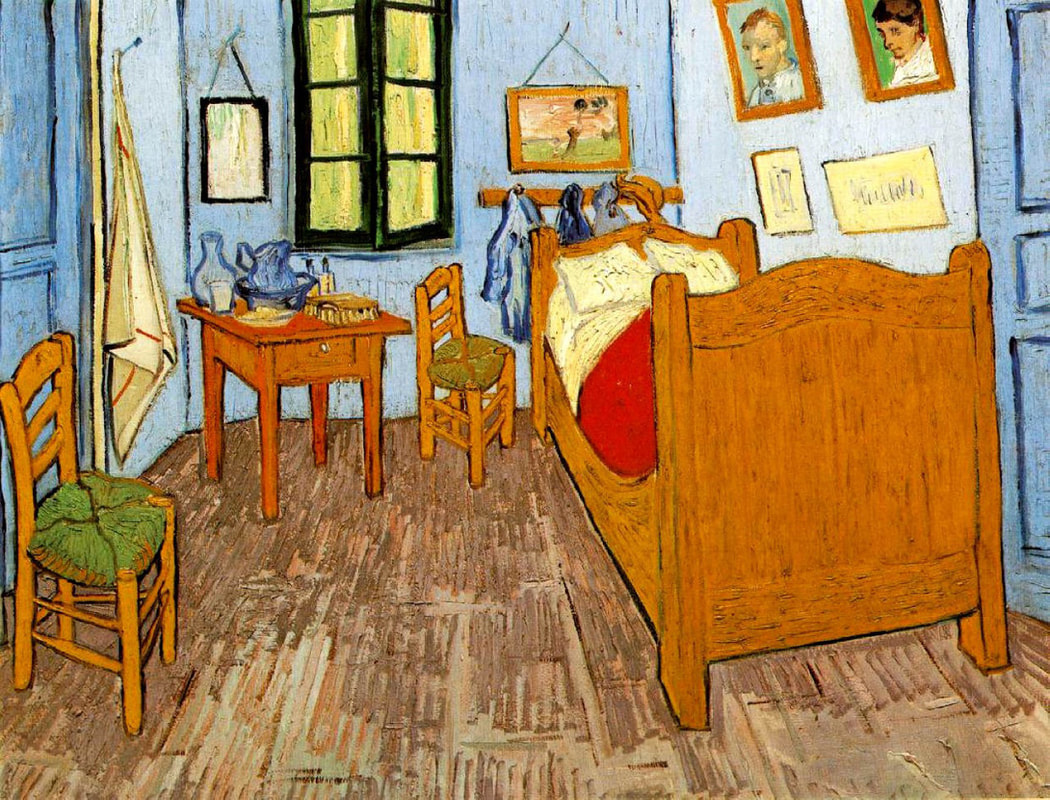
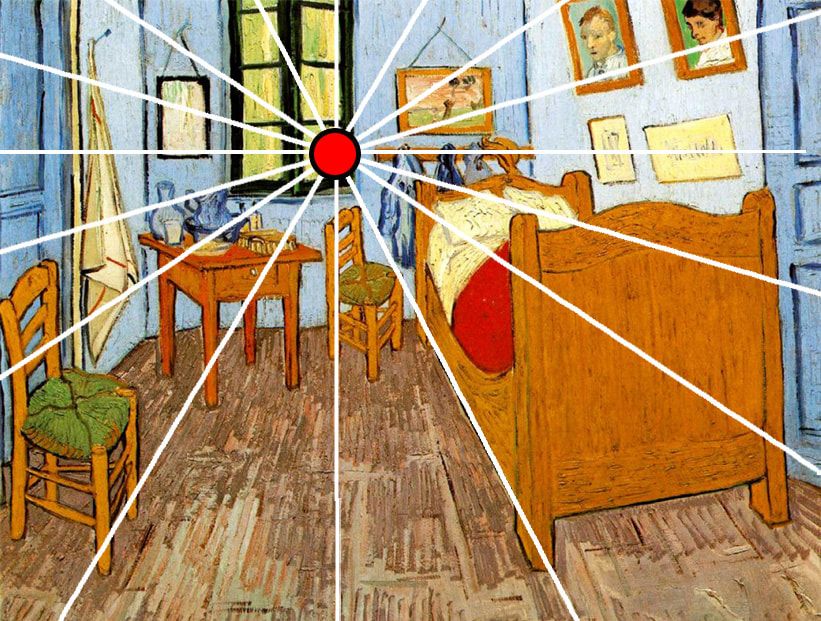
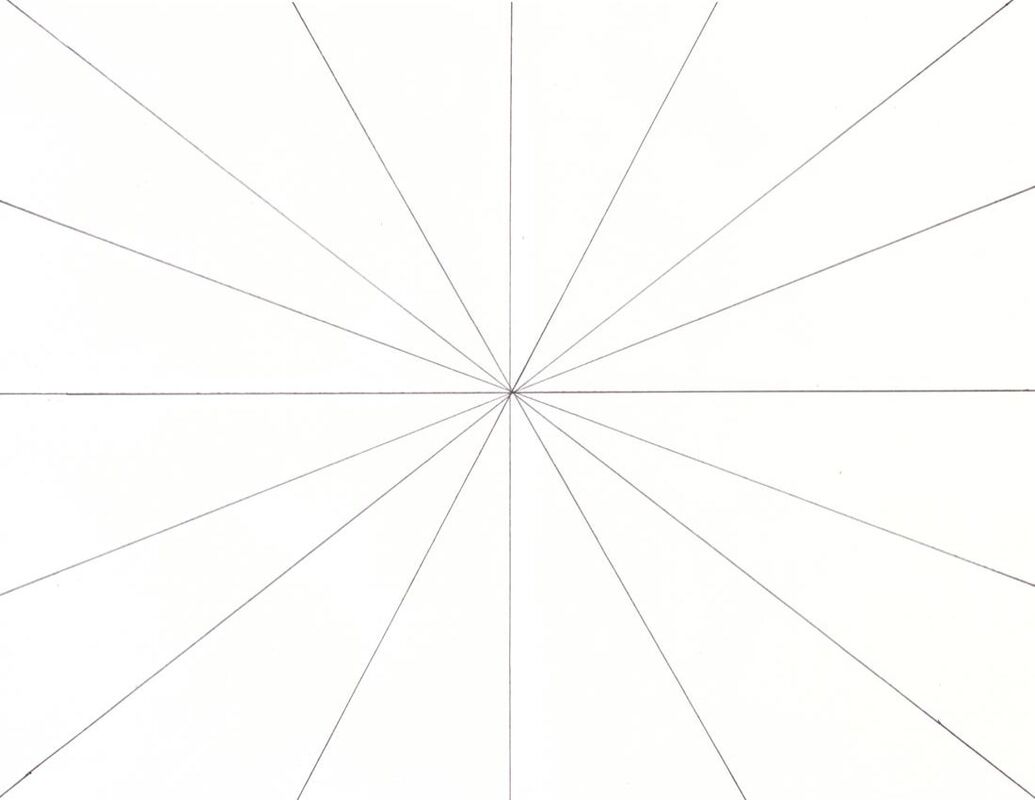
1 point perspective has 1 vanishing point. This means all edges will disappear and recede into that point. On the right, you see this demonstrated in a painting by Vincent Van Gogh in 1888 of his bedroom. Notice how all the edges recede to the same single vanishing point. How to do this exercise: 1. Prepare your One-Point Perspective grid (you can download the PDF below to print it or draw it for yourself). 2. Draw a few flat (two dimensional) rectangles or squares anywhere on your grid. 3. Pinpoint the corners/angles of your shapes that are closest to the Vanishing Point (see red highlights in the image). 4. Using your ruler, draw straight lines from the corners of your shapes down to the Vanishing Point. Take into account here that there may be two to three lines, depending on where you placed your shape. 5. Finally, close your shapes with vertical or horizontal lines. Remember to make these lines parallel to the lines you used in your initial two dimensional shape. |
|
|

|
| 1_point_grid.pdf |
|
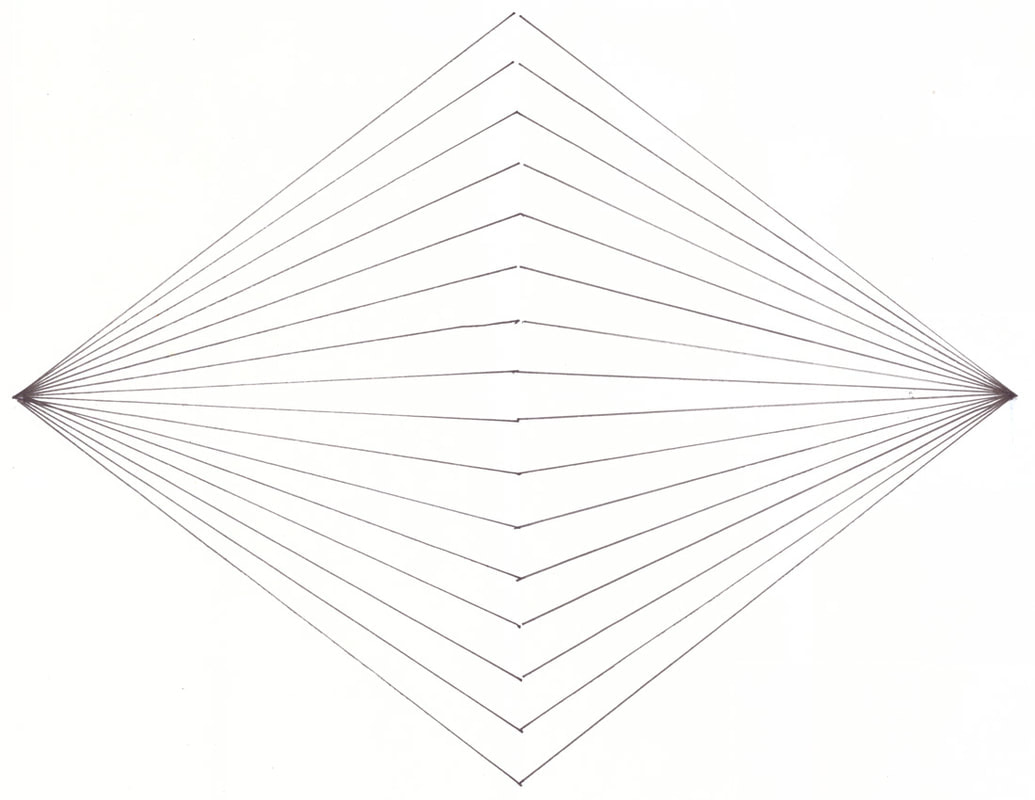
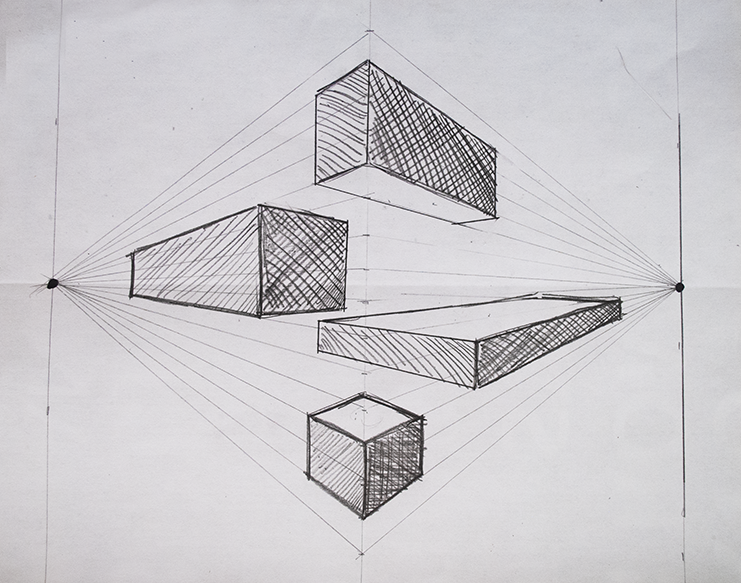
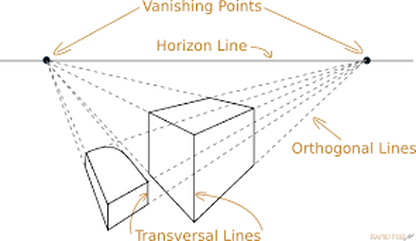
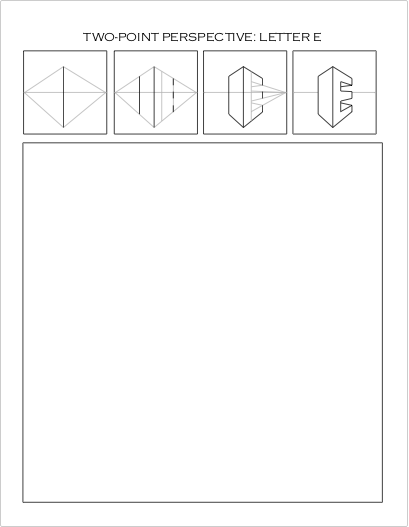
2 pt perspective practice
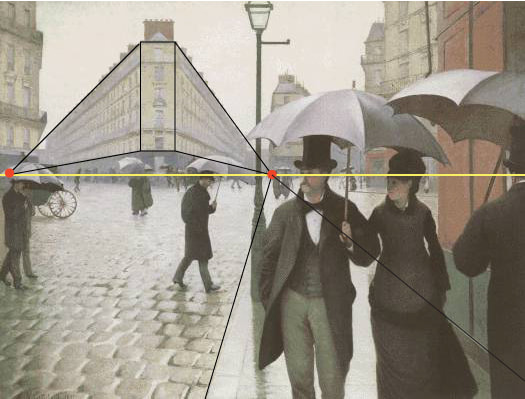
2 point perspective has 2 vanishing points.
|
| ||
|
|
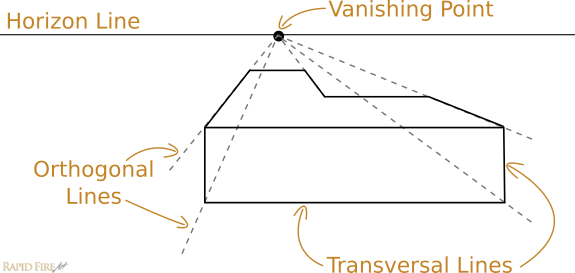
Linear Perspective: a system of creating an illusion of depth on a flat surface.
Linear perspective is thought to have been devised about 1415 by Italian Renaissance architect Filippo Brunelleschi and later documented by architect and writer Leon Battista Alberti in 1435 (Della Pittura). Linear perspective was likely evident to artists and architects in the ancient Greek and Roman periods, but no records exist from that time, and the practice was thus lost until the 15th century.
The three components essential to the linear perspective system are orthogonals (parallel lines), the horizon line, and a vanishing point(s). So as to appear farther from the viewer, objects in the compositions are rendered increasingly smaller as they near the vanishing point. Early examples of Brunelleschi’s system can be seen in Donatello’s relief St. George Killing the Dragon (c. 1416–17) and Masaccio’s painting The Holy Trinity (1425–27), a dramatic illusionistic crucifixion. Andrea Mantegna (who also mastered the technique of foreshortening), Leonardo da Vinci, and German artist Albrecht Dürer are considered some of the early masters of linear perspective. As the limitations of linear perspective became apparent, artists invented additional devices (e.g., foreshortening and anamorphosis) to achieve the most-convincing illusion of space and distance.
Resources:
My Modern Met-Perspective Drawing-LINK
My Modern Met-Perspective Drawing-LINK
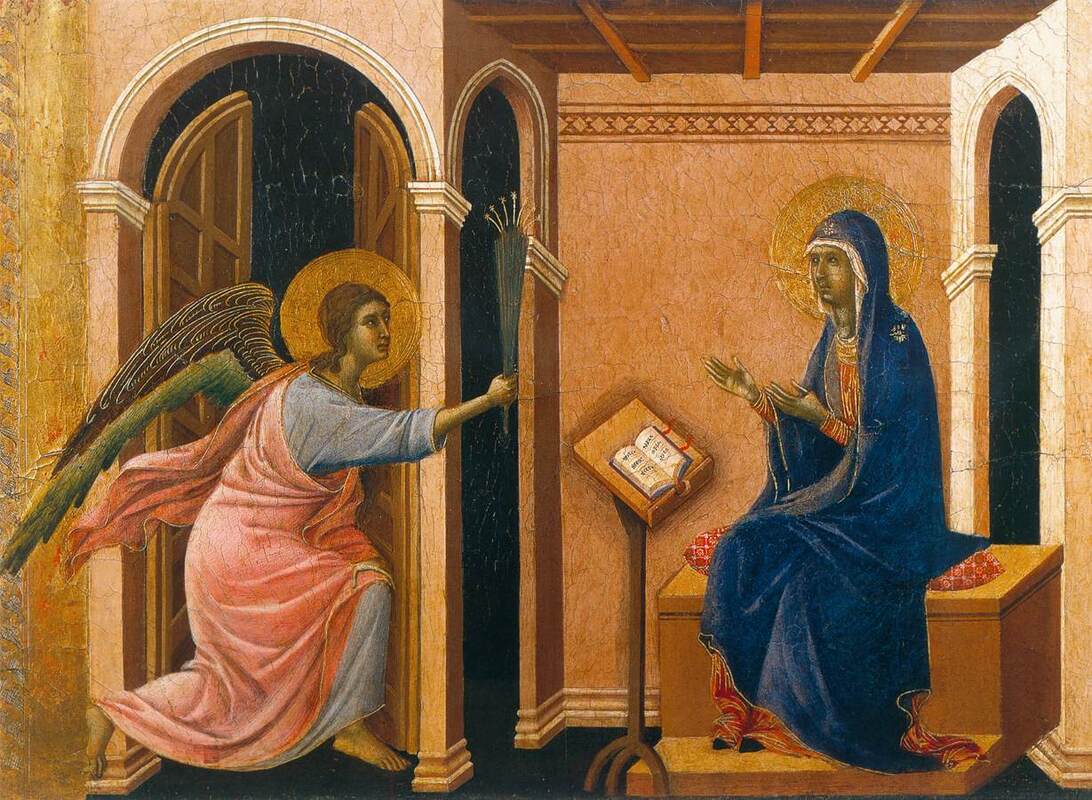
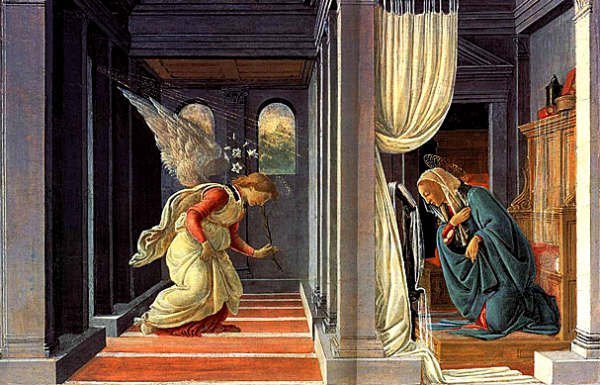
Look at the 2 paintings below. What do you notice about the illusion of space in each one?
|
|
|
The Annunciation by Duccio, 1311
|
The Annunciation by Botticelli, 1485
|
|
|
|
PRACTICE: Linear Perspective
|
|
|
Vocabulary:
-horizon line -orthogonal lines -vanishing point(s) -transversal lines |
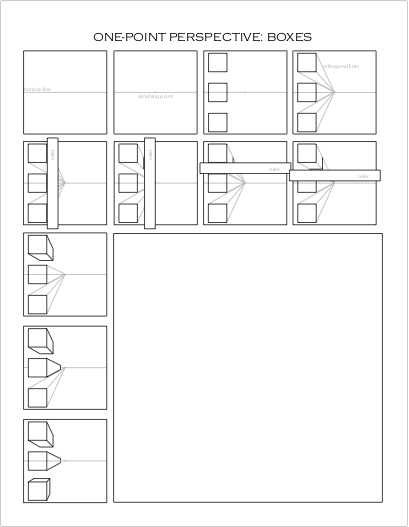
PRACTICE: You will complete 4 linear perspective practice drawings in your sketchbook. Each practice drawing should take up 1 page. Aim to do 2 in 1-point perspective, and 2 in 2-point perspective.
Use the sheets below as references to help you. I will model this for you in class. |


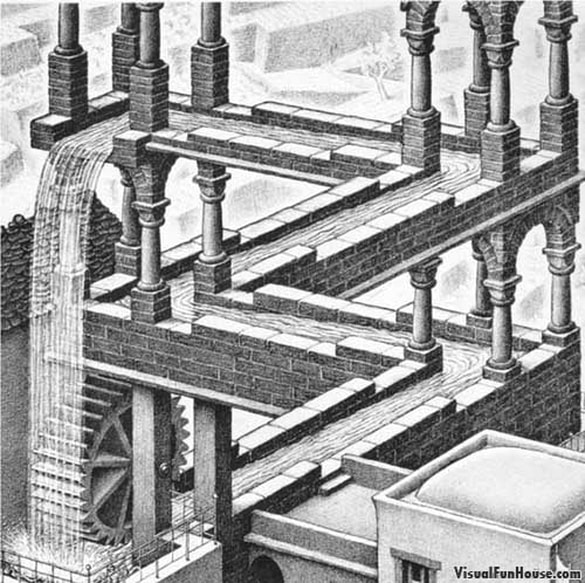
MC Escher
Read more about MC Escher at the link here
|
|
|
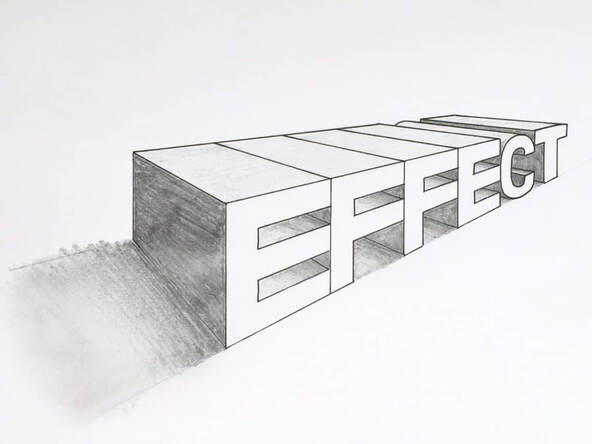
Artist Wayne White-LINK to this Website
Article About Wayne White-LINK

|
|
|
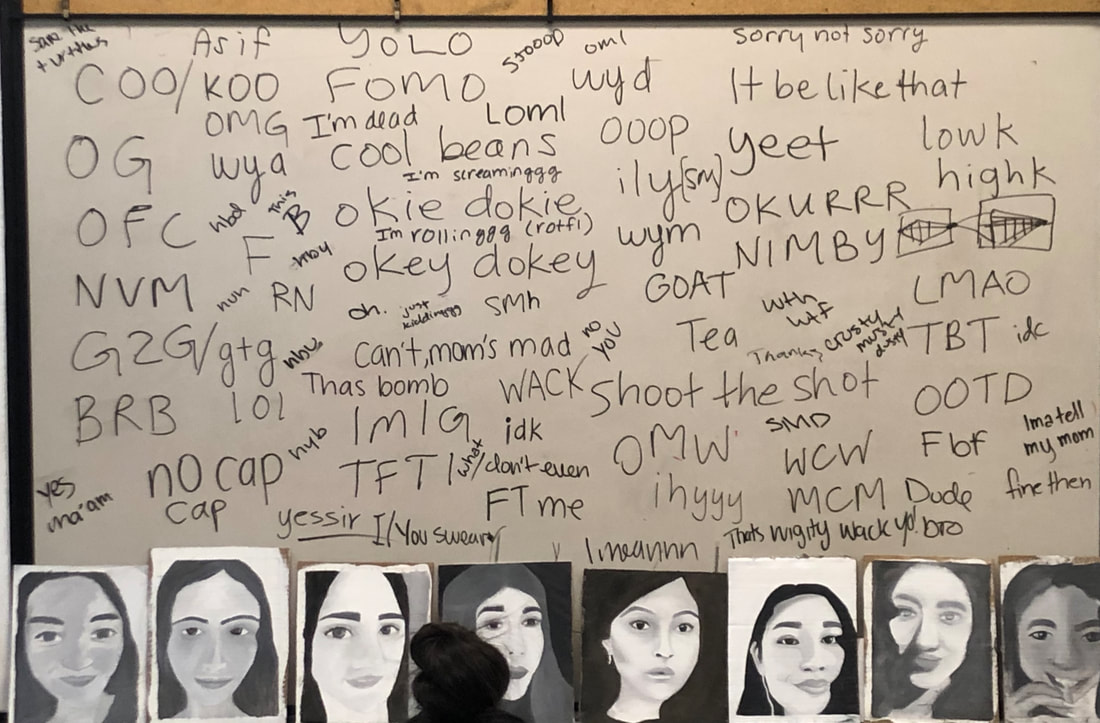
Class List of Phrases